Features
Created by the team that developed Atom, Electron, and Tree-sitter, Zed is crafted from the ground-up for performance, collaboration, and the future.
Breadcrumbs
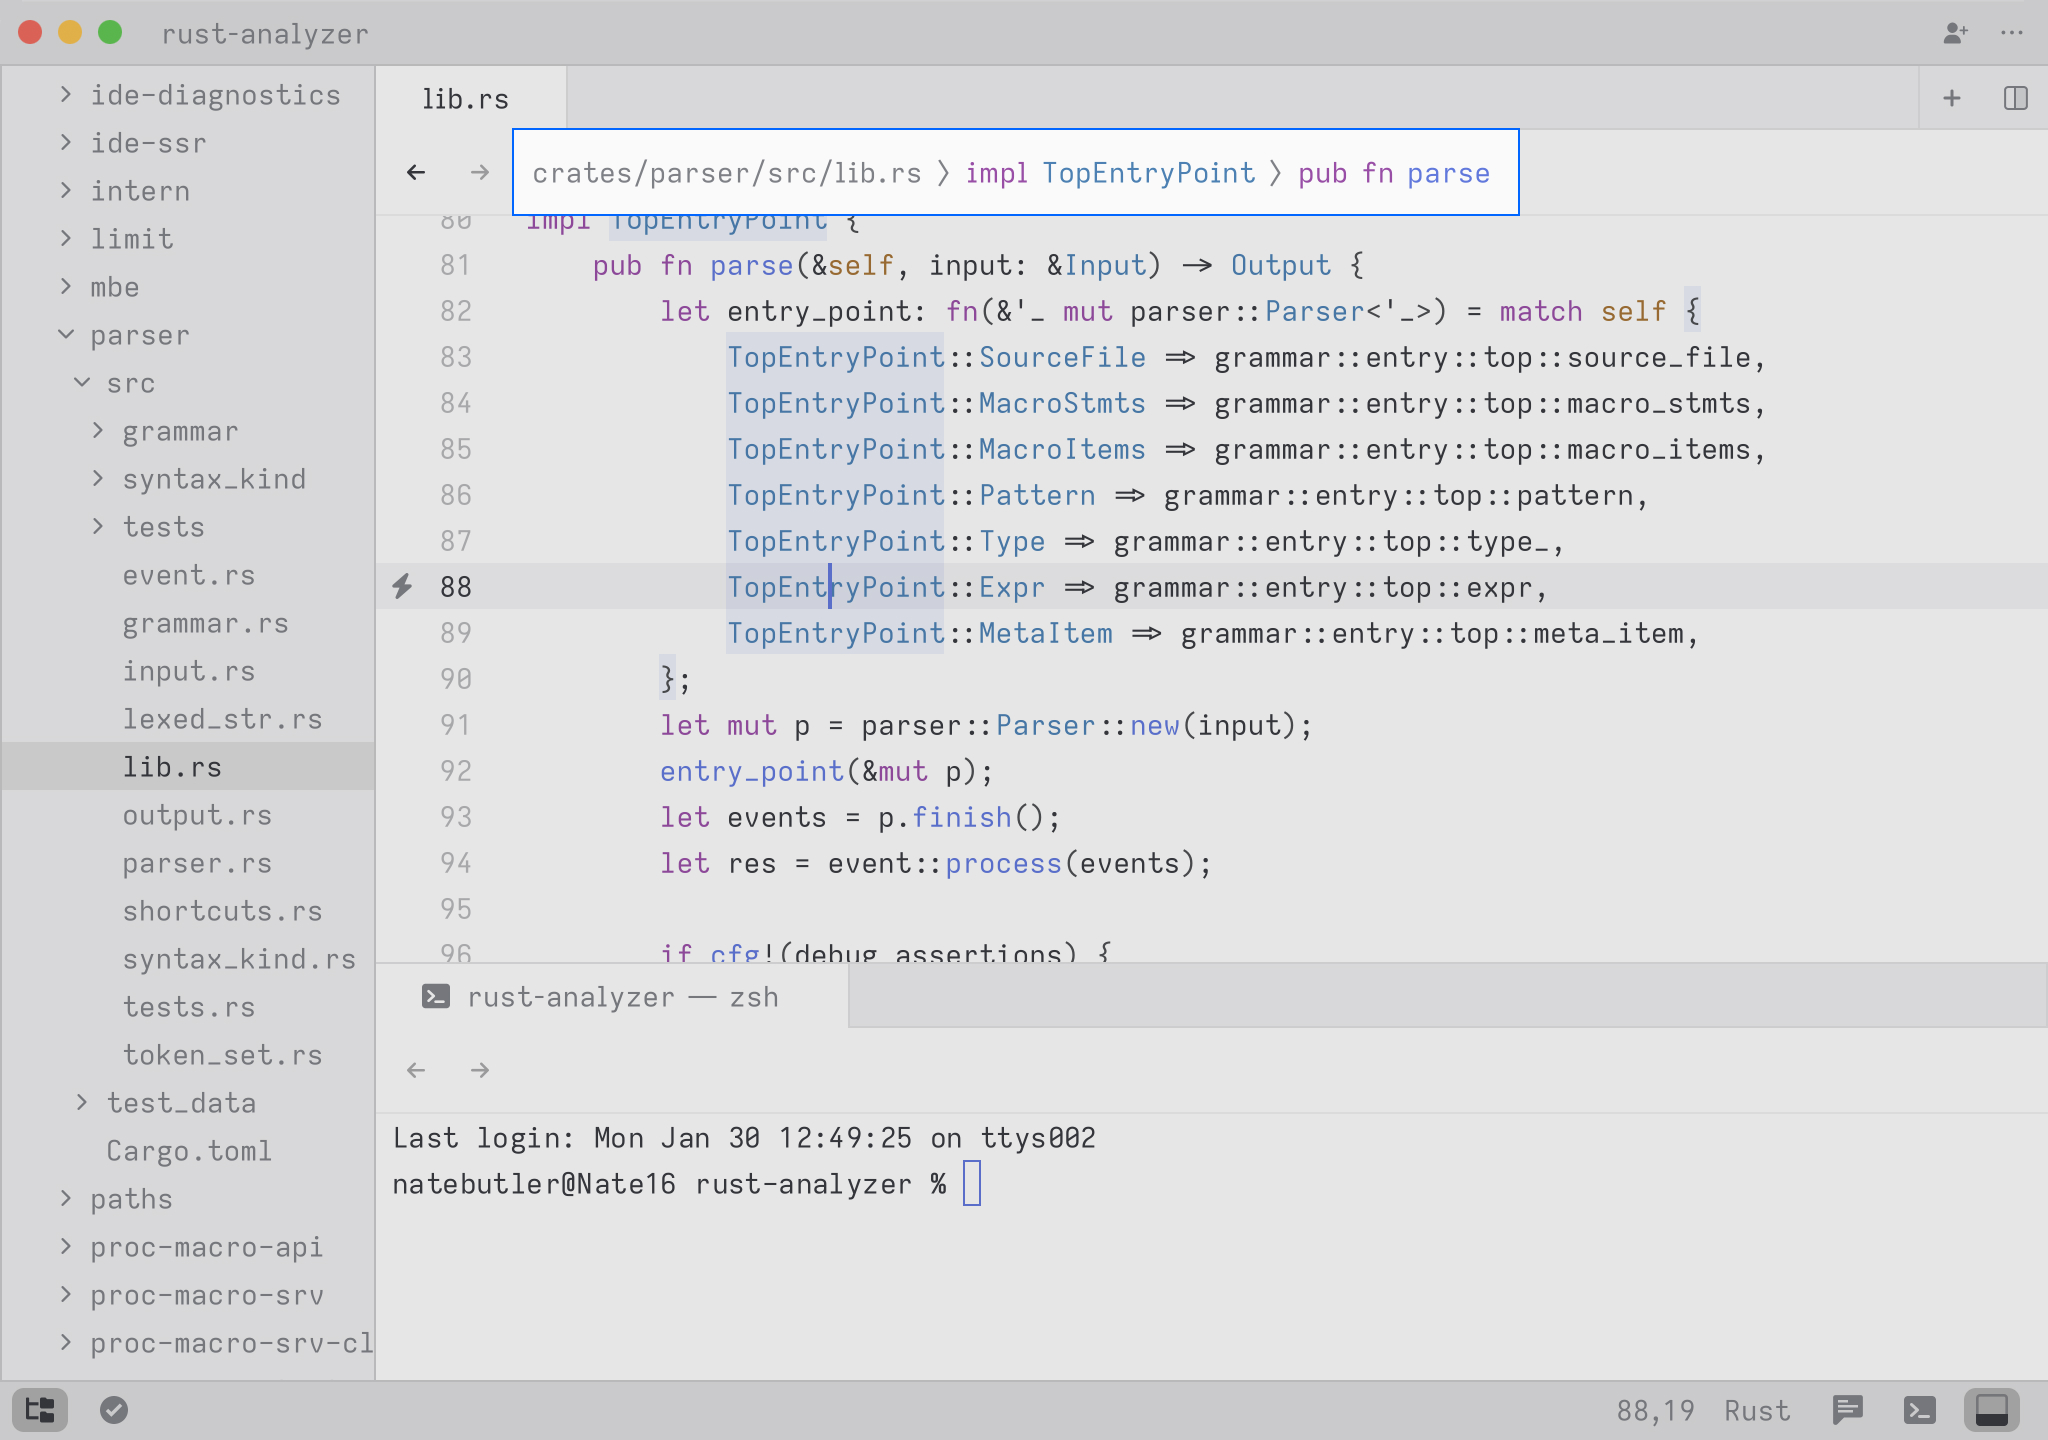
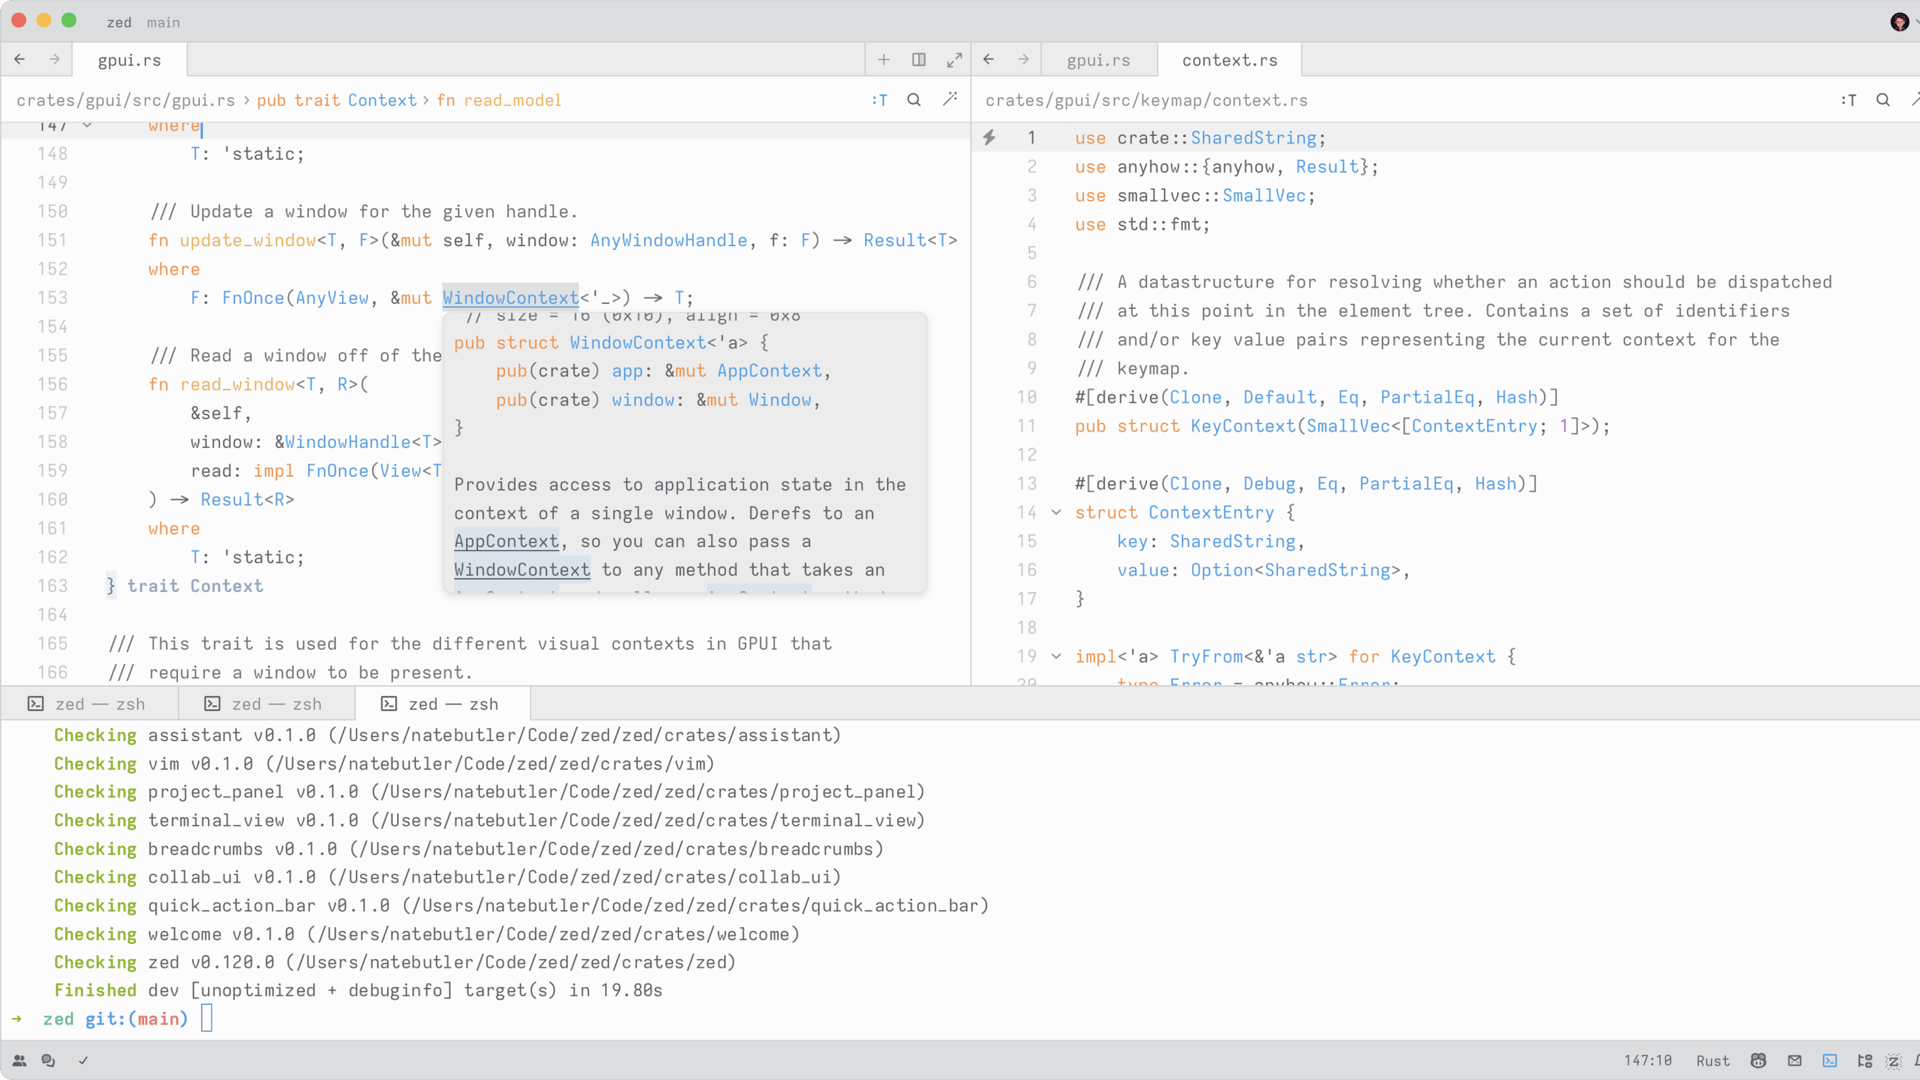
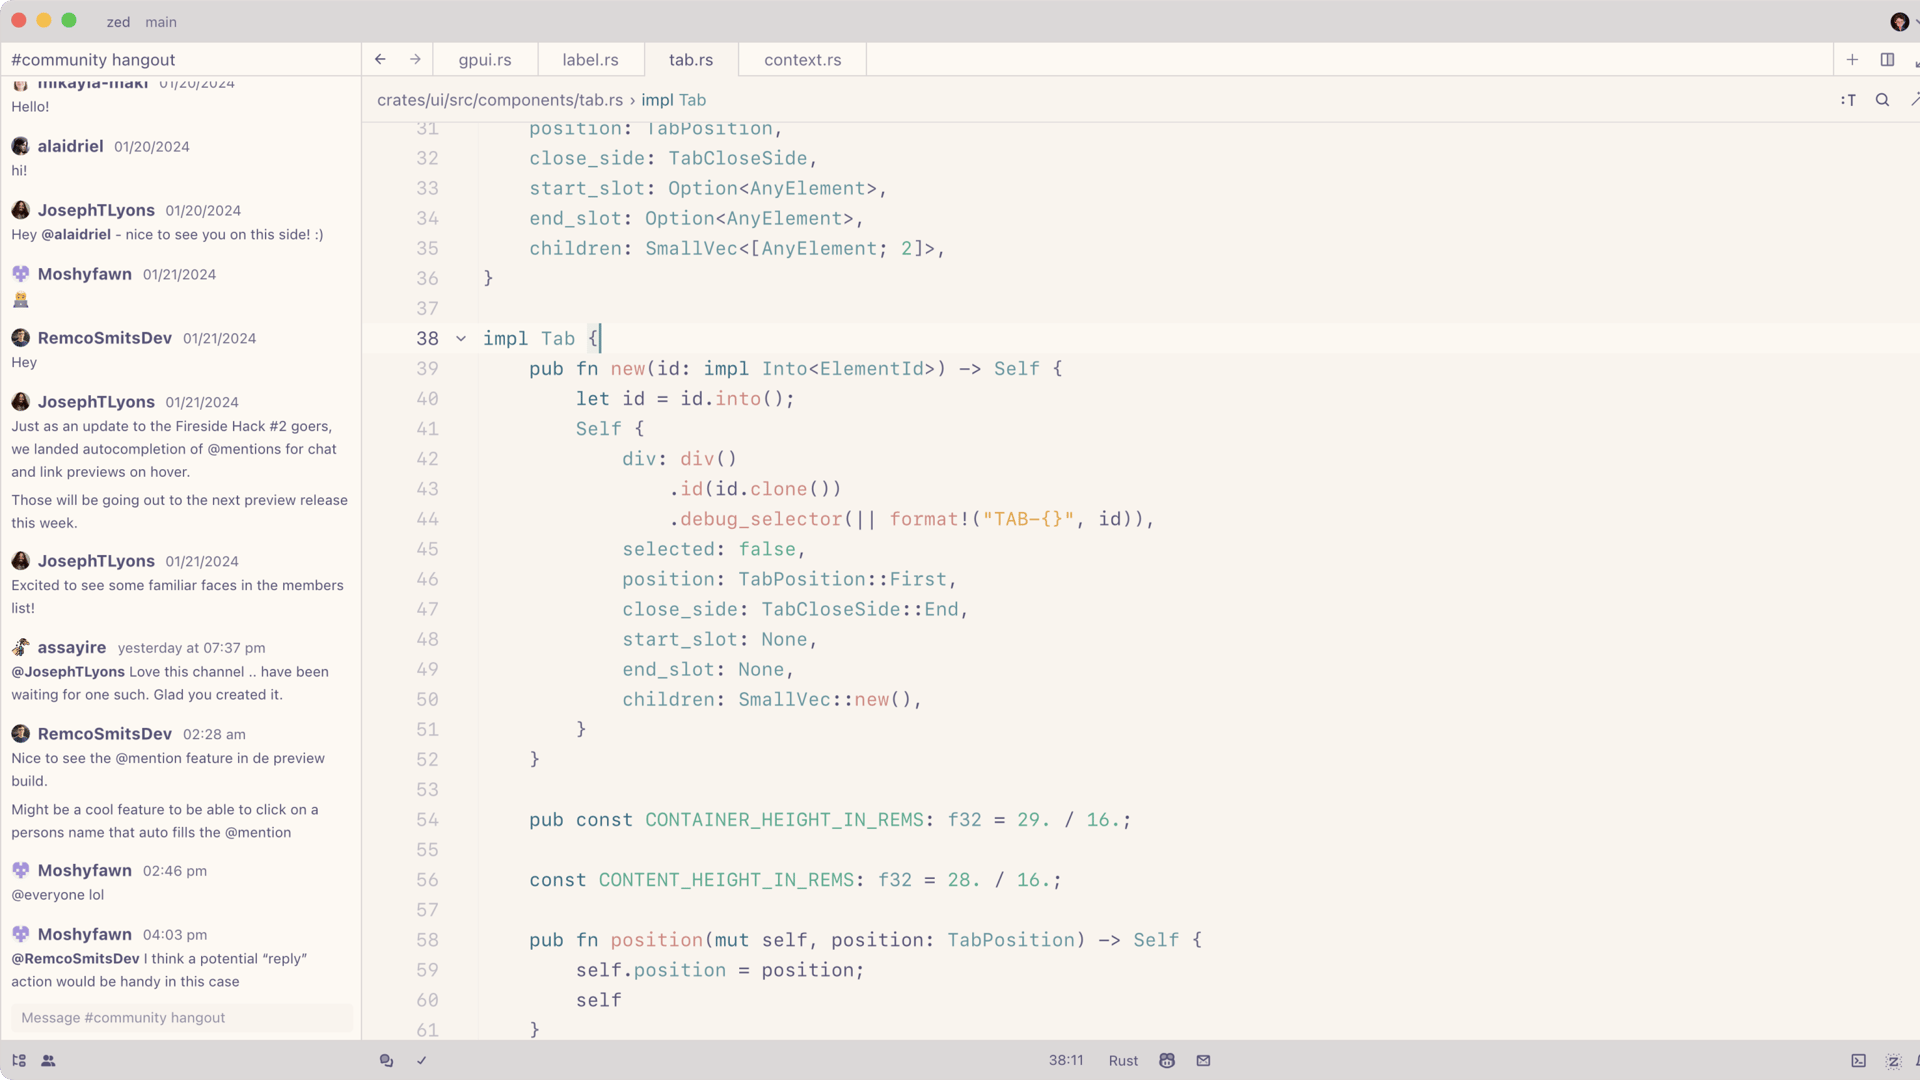
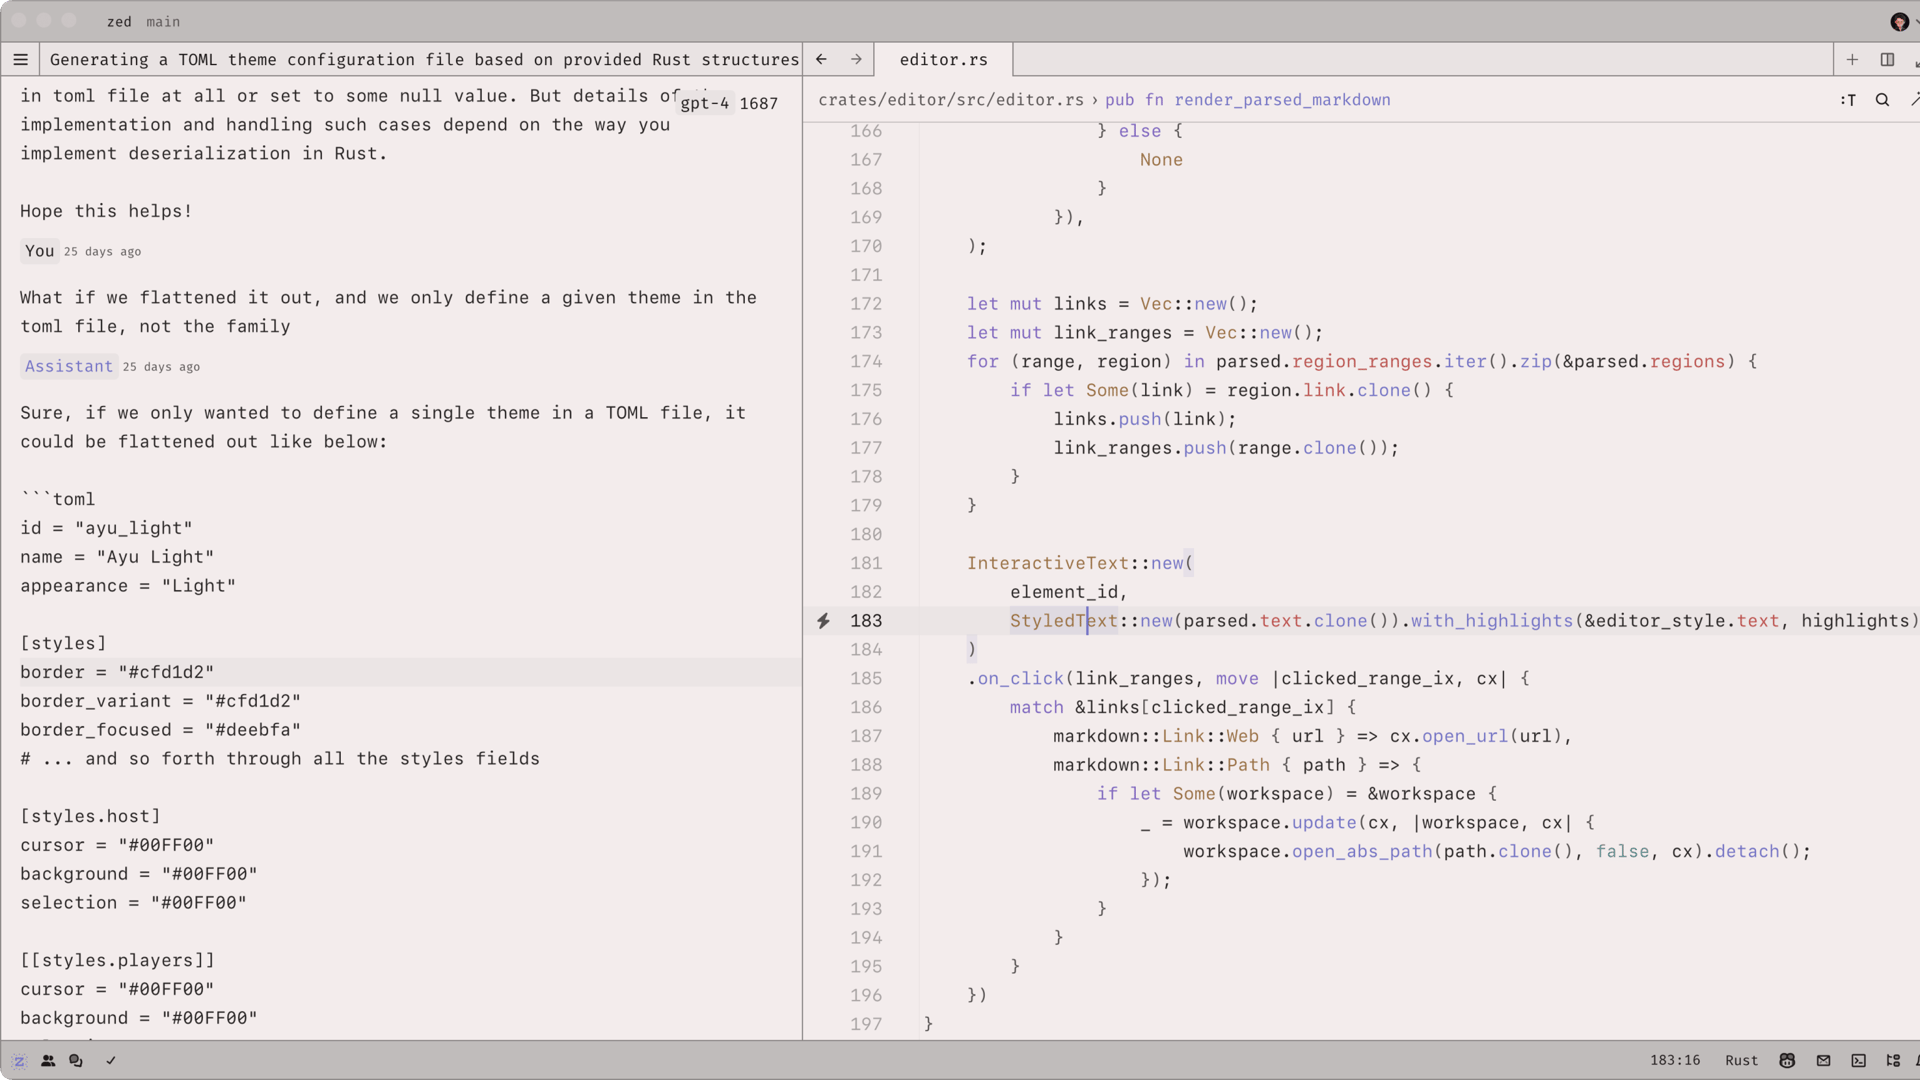
A breadcrumb trail below the tab bar that shows the path to the current file along with a summary of the containing syntax nodes
A breadcrumb trail is displayed at the top of multi-buffers and singleton buffers with the path of the file containing the cursor along with a summary of the containing syntax nodes. This can be especially helpful in multi-buffers or within large functions.
CLI
To install the zed command line tool, select Zed > Install CLI from
the application menu. Then you can type zed my-path on the command
line to open a directory or file in Zed. To use Zed as your $EDITOR to
edit Git commits etc, add export EDITOR="zed --wait" to your shell
profile.
Code Actions
Whenever you see a lightning bolt next to the gutter, it means a code
action is available for the current cursor location from the language
server. You can click the lightning bolt or press cmd-. to reveal
available actions.
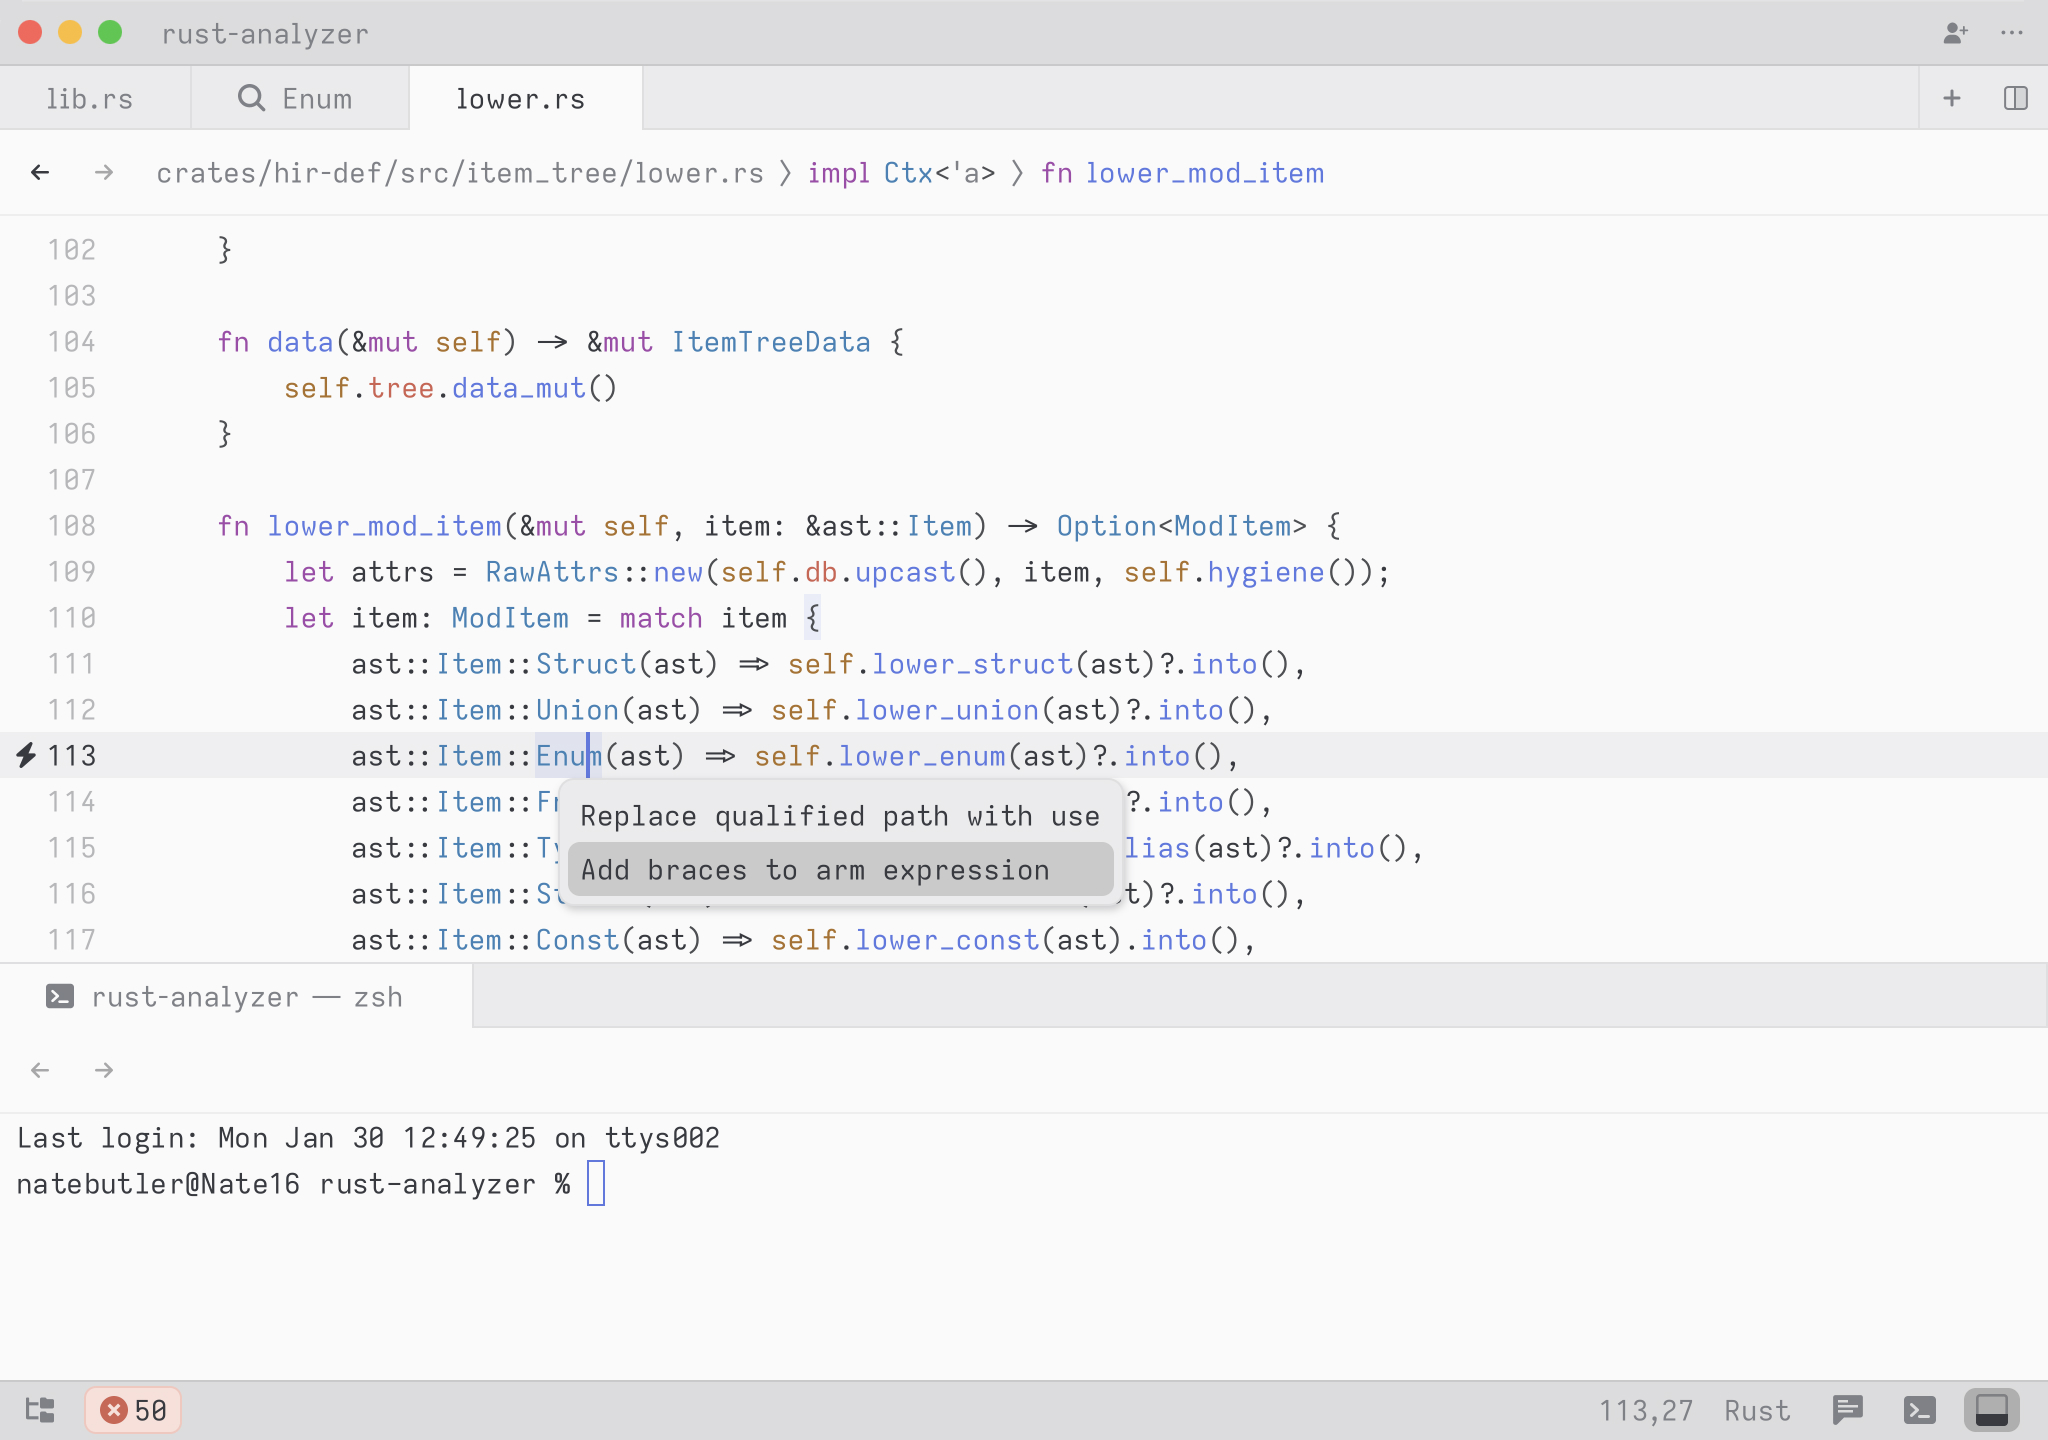
Code actions affecting multiple files will present the results of the
action in a multi-buffer. To undo the action, simply hit cmd-z in the
multi-buffer, although we don’t yet support undoing file-system changes.
To save the results of a multi-file code action, just save the
multi-buffer.
Collaboration
Adding contacts
You can add a contact from the collaboration menu, deployed from the
icon in the upper right corner of the window, or by pressing
cmd-shift-c and then clicking the add button to the right of the
search box.
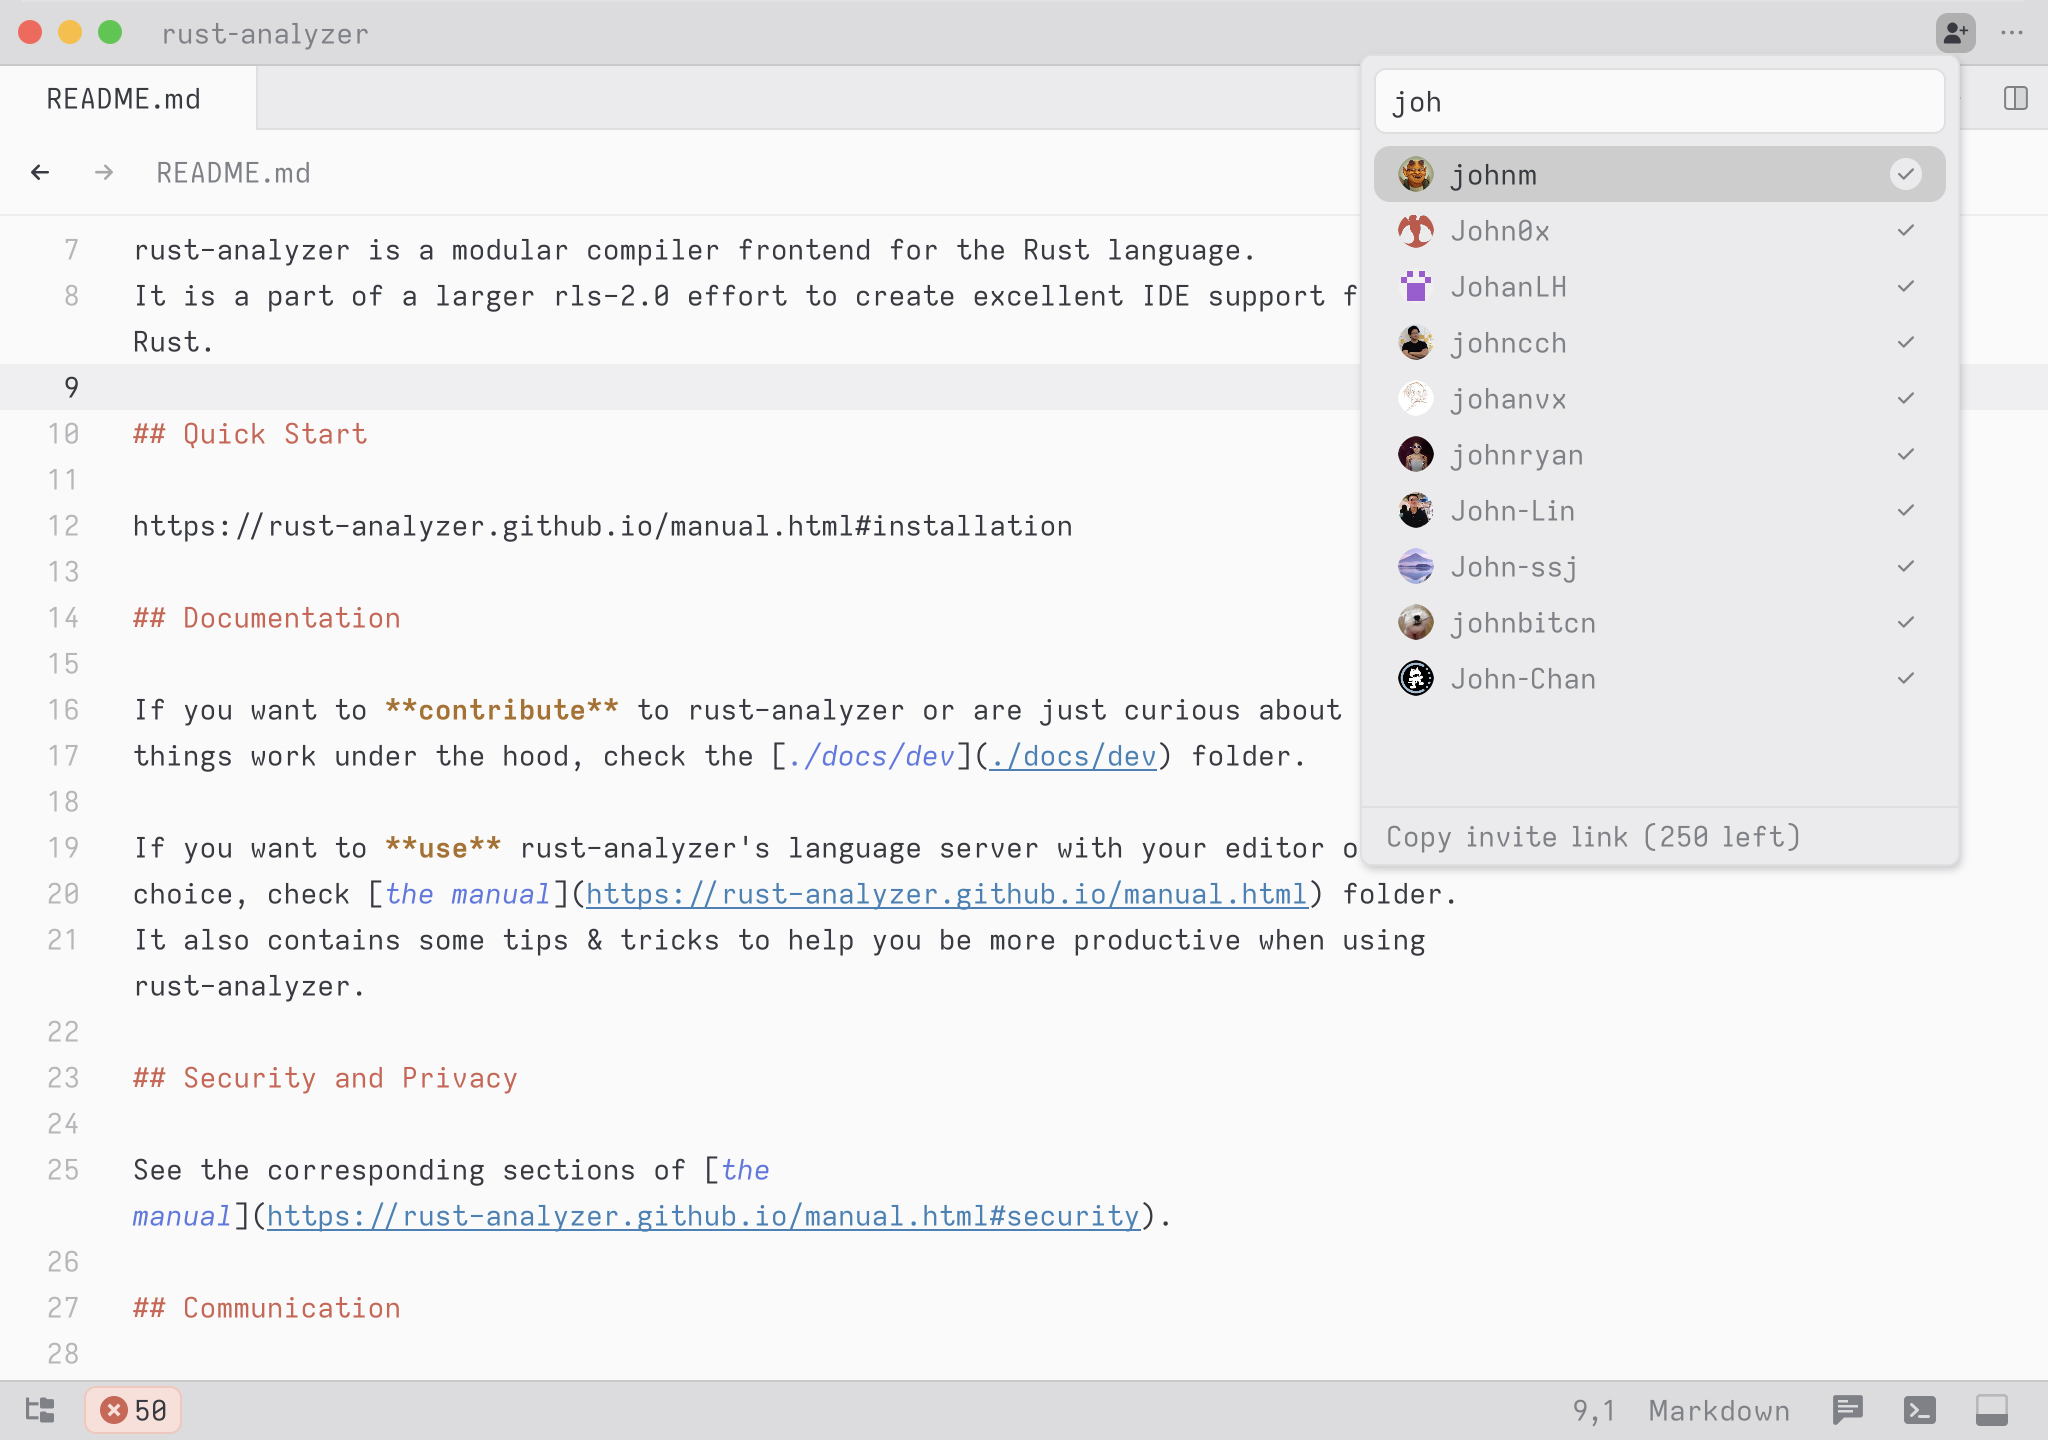
If you are trying to collaborate with someone who hasn’t started using Zed yet, get them to download Zed and sign in, then you can add them.
Sharing a project
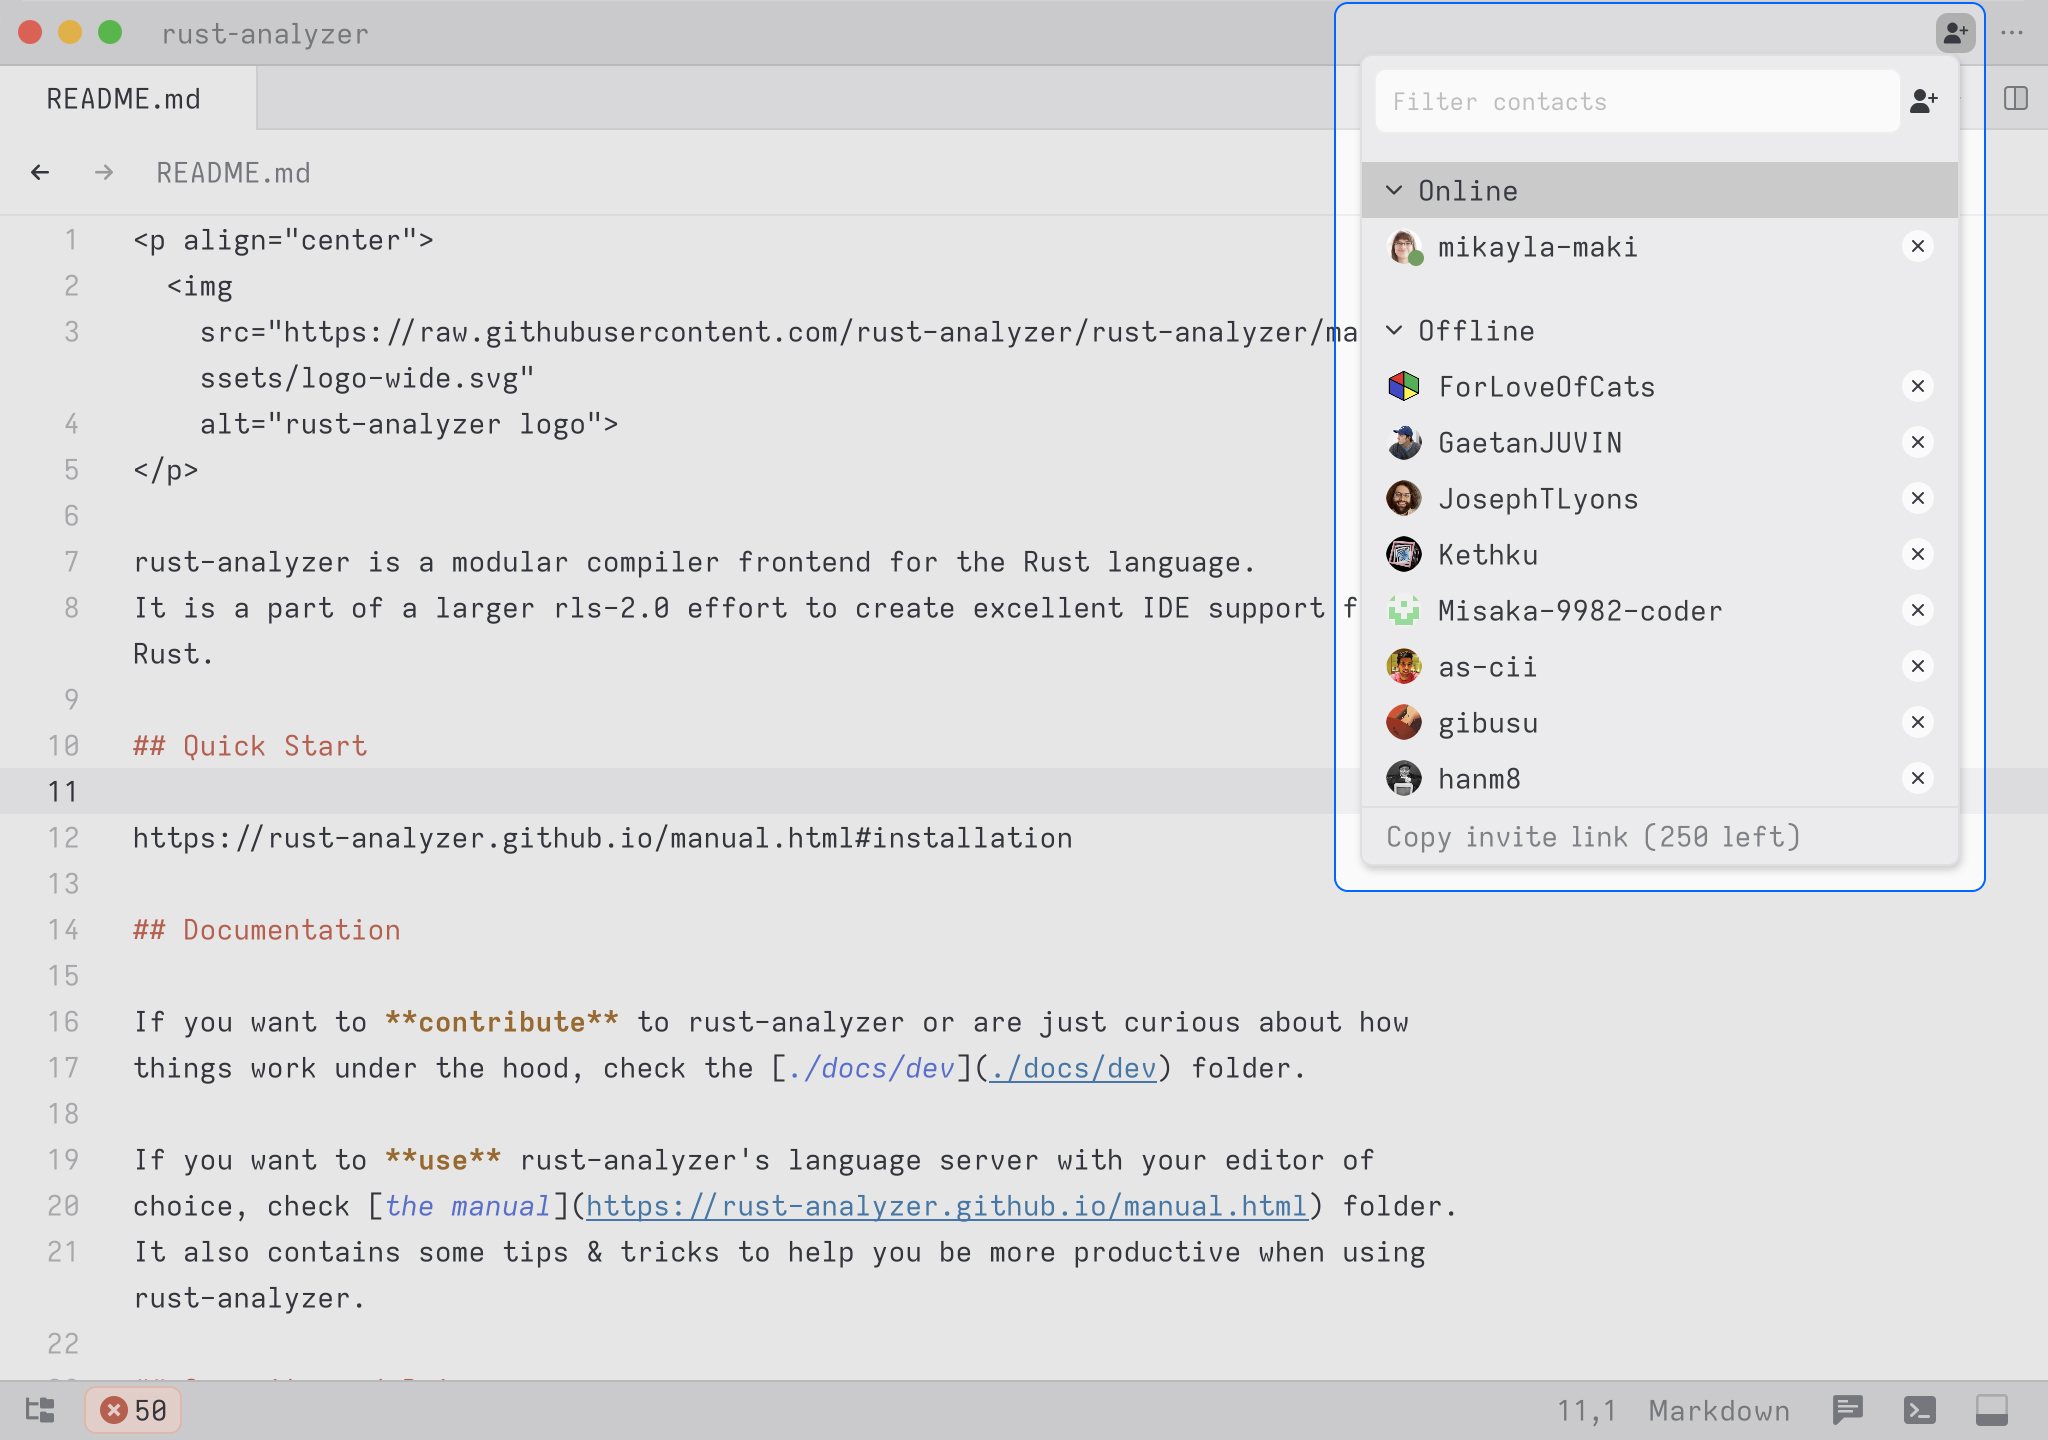
You’ll see all your online contacts in the collaboration menu. Searching or clicking on them will send a request to start a call and share your current project with them. They will receive a notification to join your call.
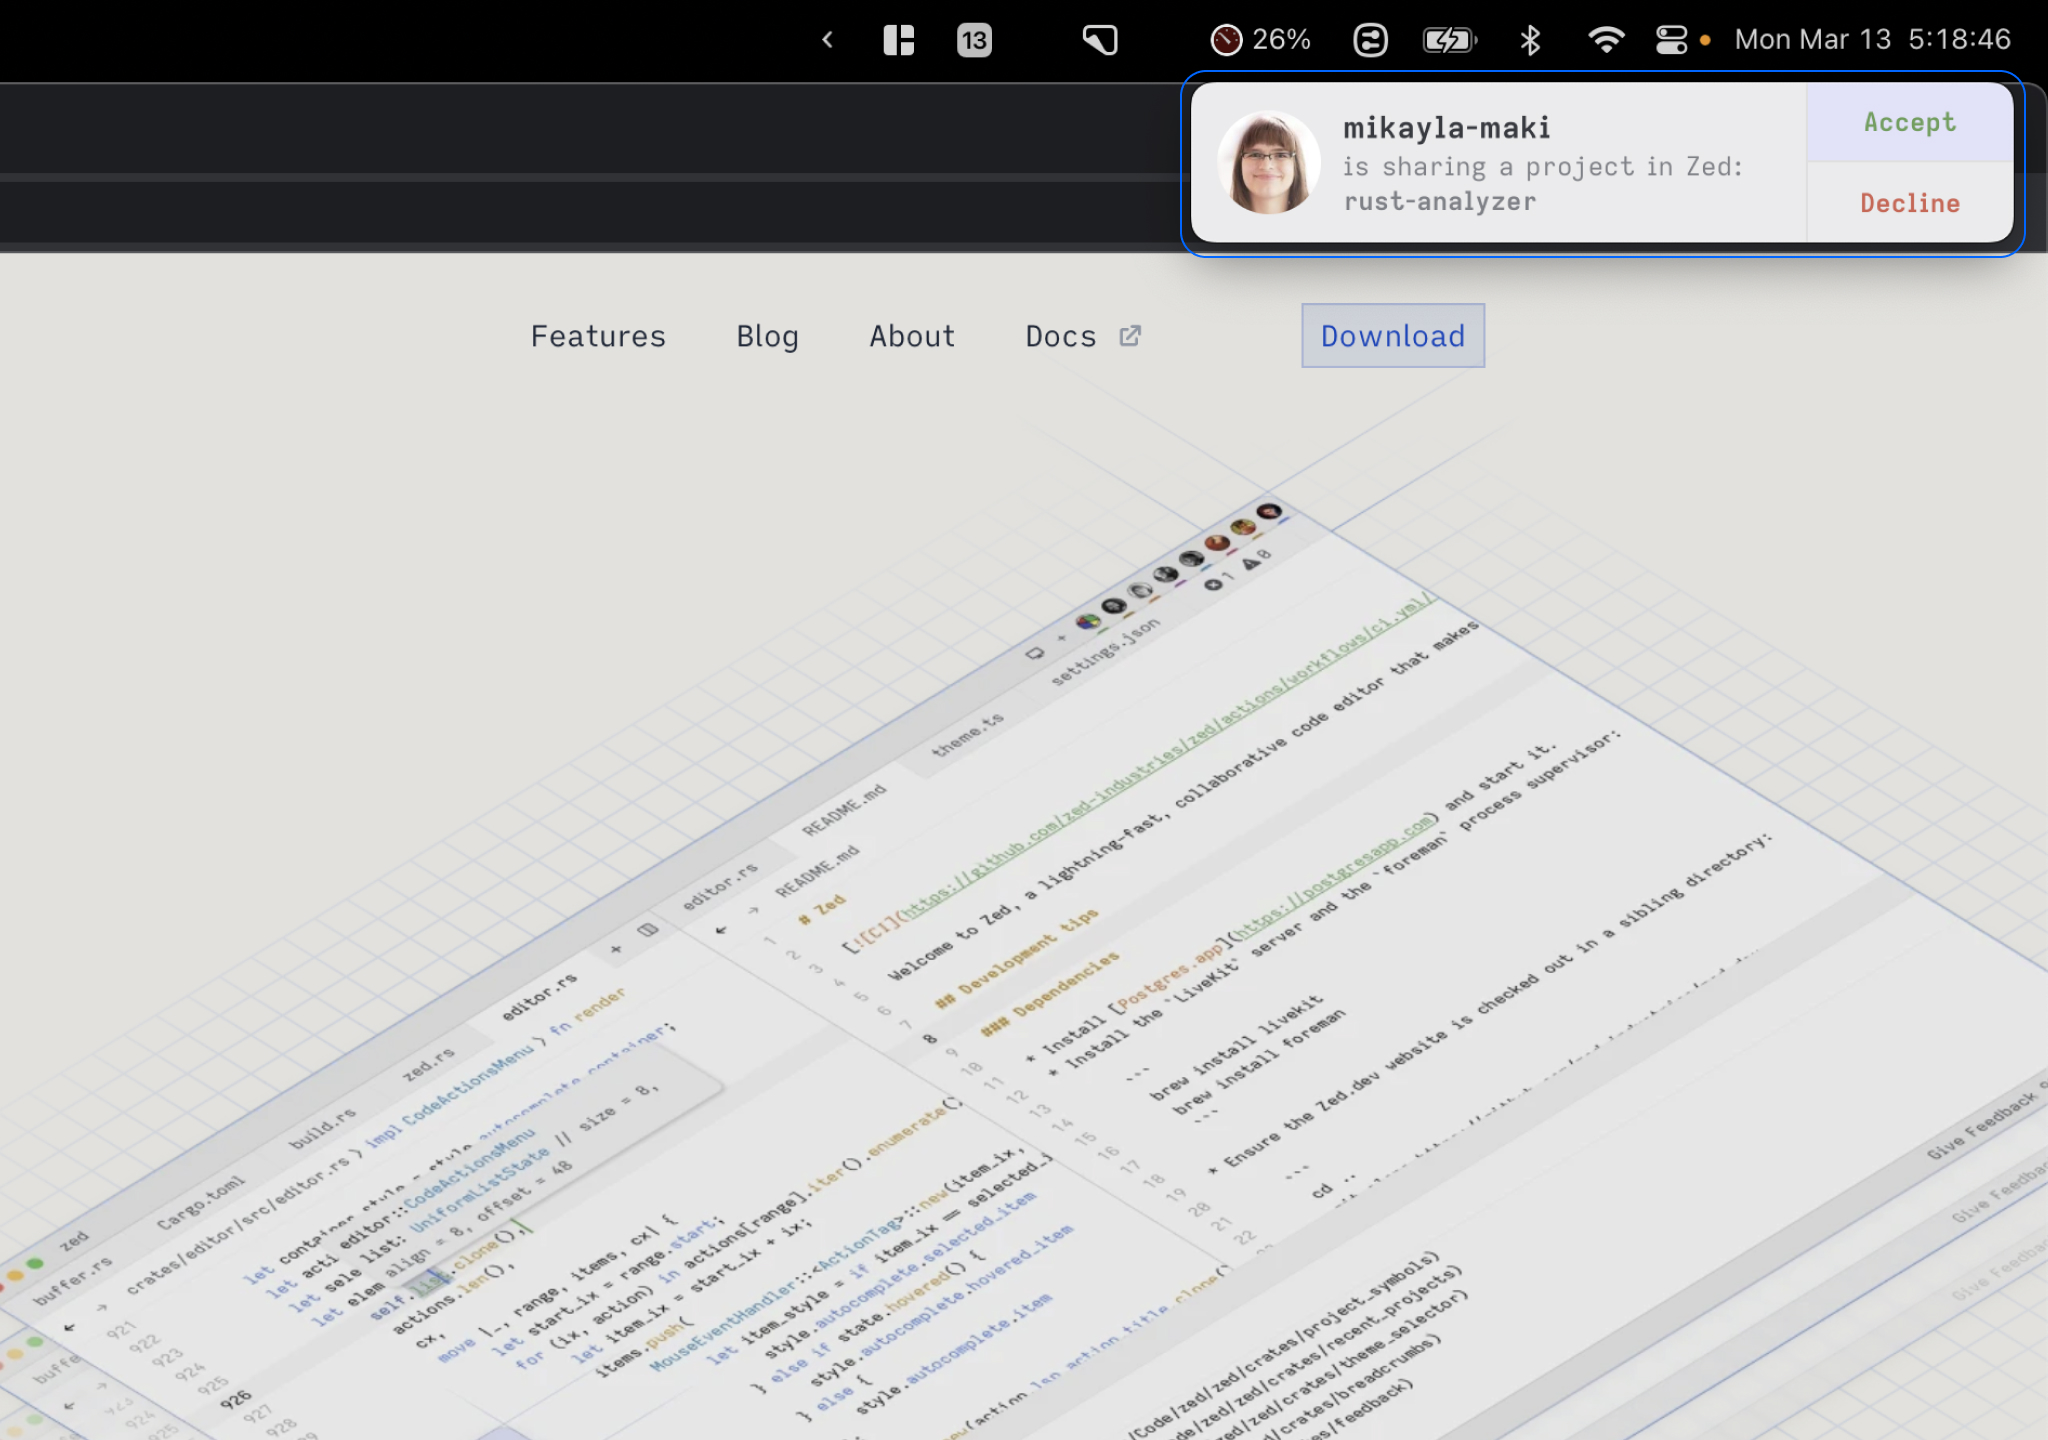
This will open a new window containing their project. Once you have joined the call, your zed windows will show the participants of the call next to your icon in the top right. Grayscale participants are in the call but currently viewing a different project. Non-grayscale participants are in the same project as you.
Projects not yet shared with the call will have a share button in which will enable others to join your project.
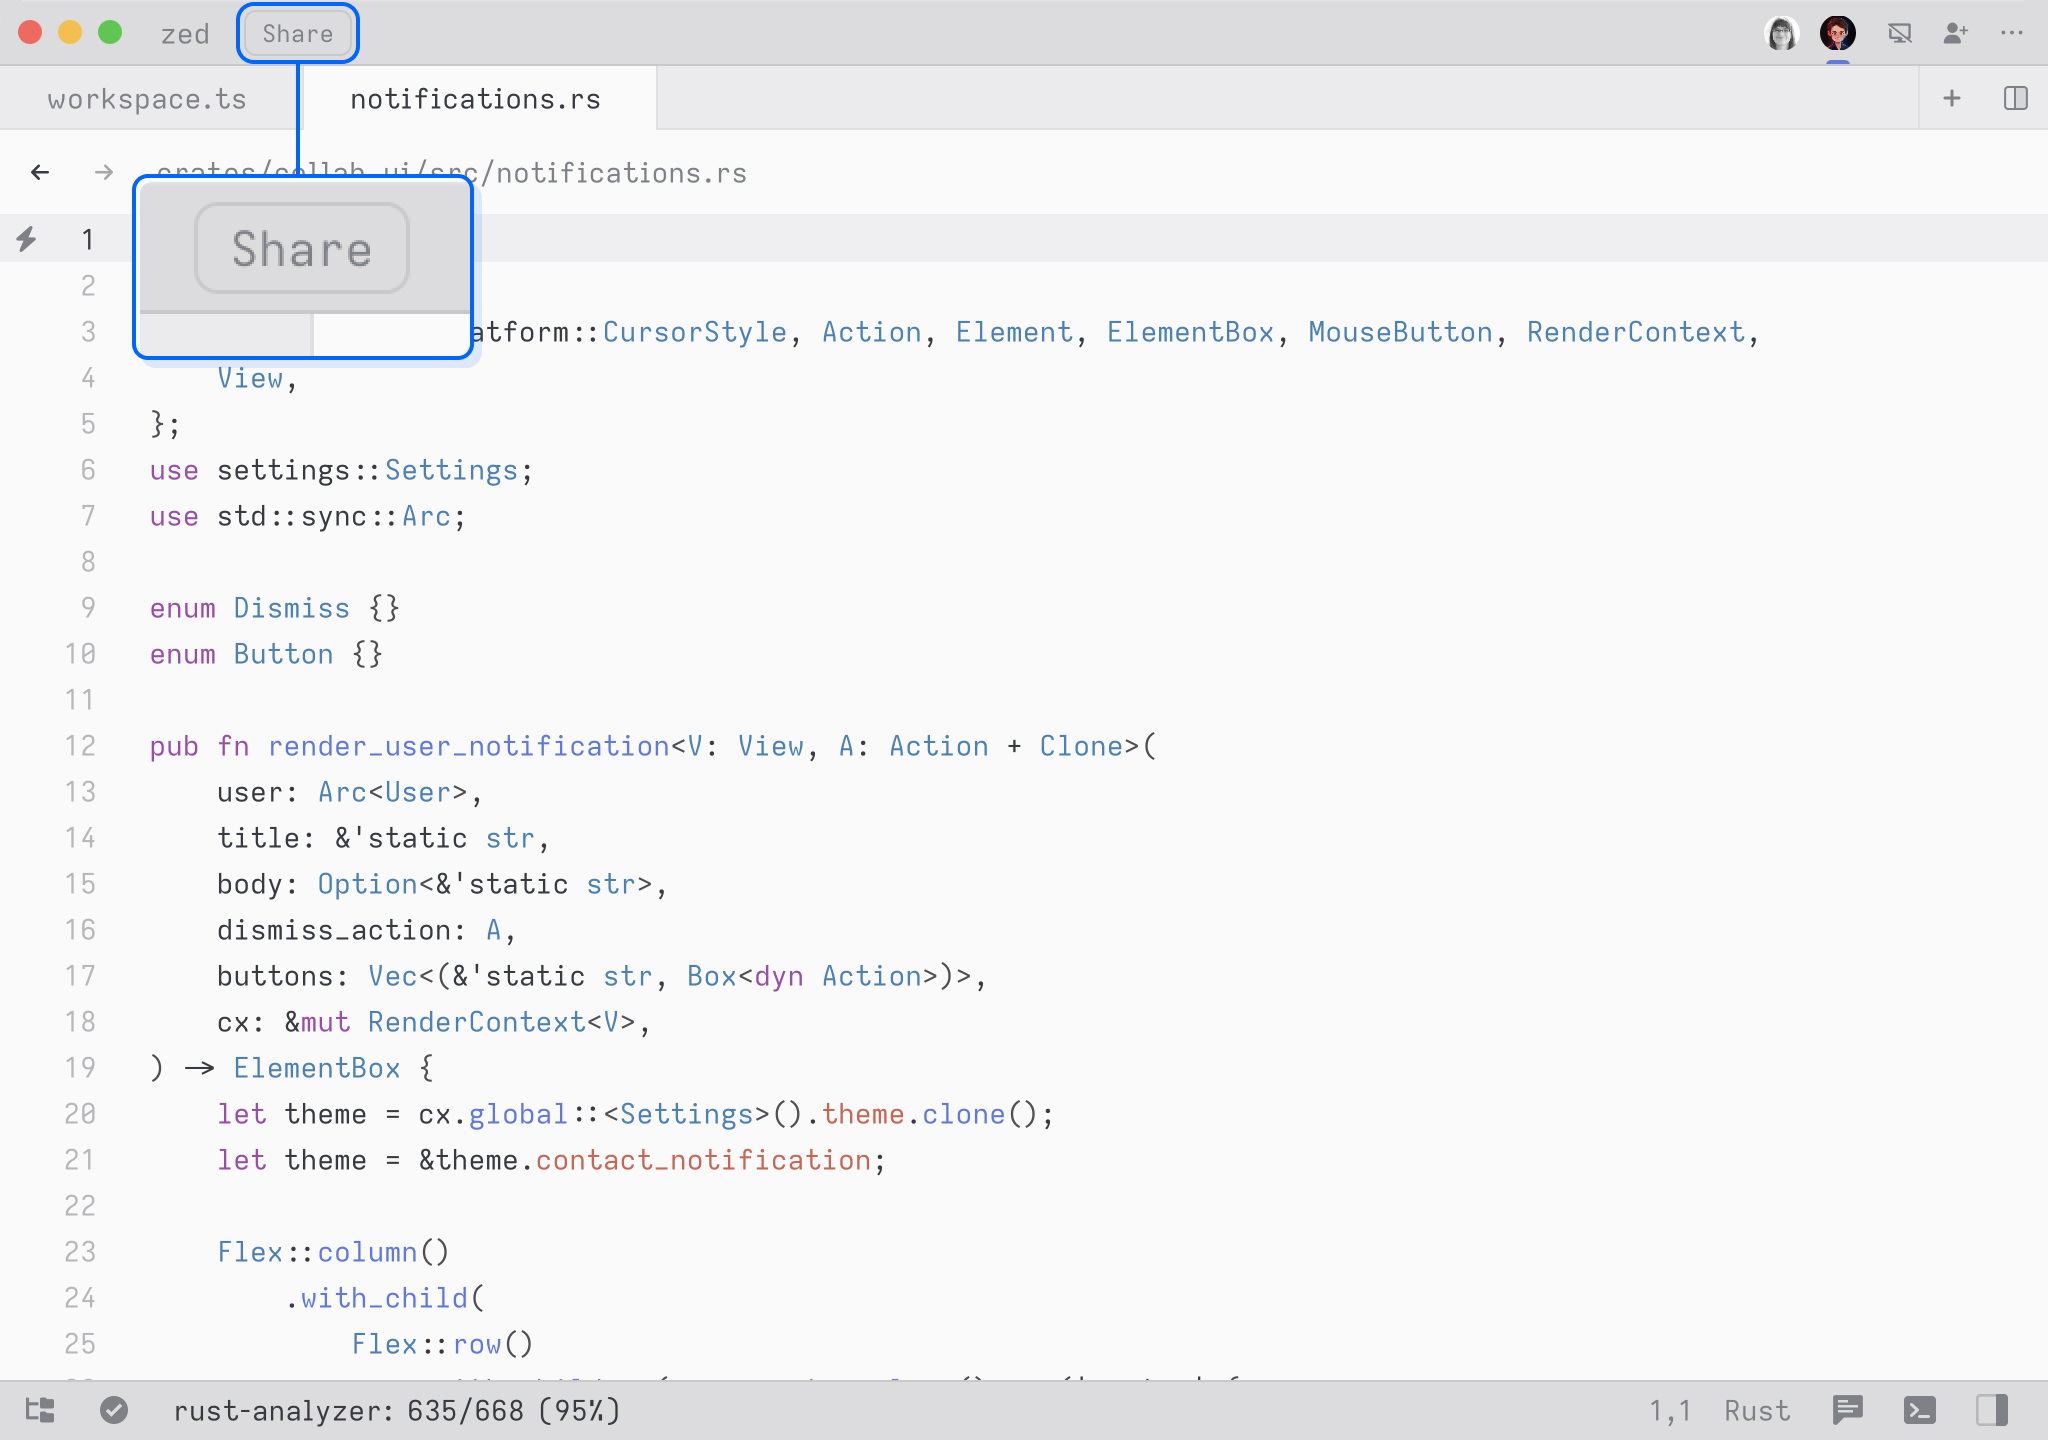
Our goal is to eliminate the distinction between local and remote projects as much as possible. Guests can open, edit, and save files, perform searches, interact with the language server, etc.
Following a collaborator
When you join a project, you’ll immediately start following the host as they move within and between files. This is represented by a border around the editor.
You automatically stop following whenever you move the cursor or edit.
To start following again, you can click on a collaborator’s avatar or
cycle through following different participants by pressing
ctrl-alt-cmd-f.
Following is confined to a particular pane. When a pane is following a collaborator, it is outlined in their cursor color. This pane-specific behavior allows you to follow someone in one pane while navigating independently in another, and can be an effective layout for some styles of collaboration.
You may switch projects via the collaboration menu which shows current participants and any projects they may be sharing.
Screensharing
Sometimes you must go beyond code when collaborating, like looking at a website or a drawing. Zed’s built-in screen-sharing allows you to share your screen without additional tools easily. Click the “Share Screen” button in the upper right to share your screen.
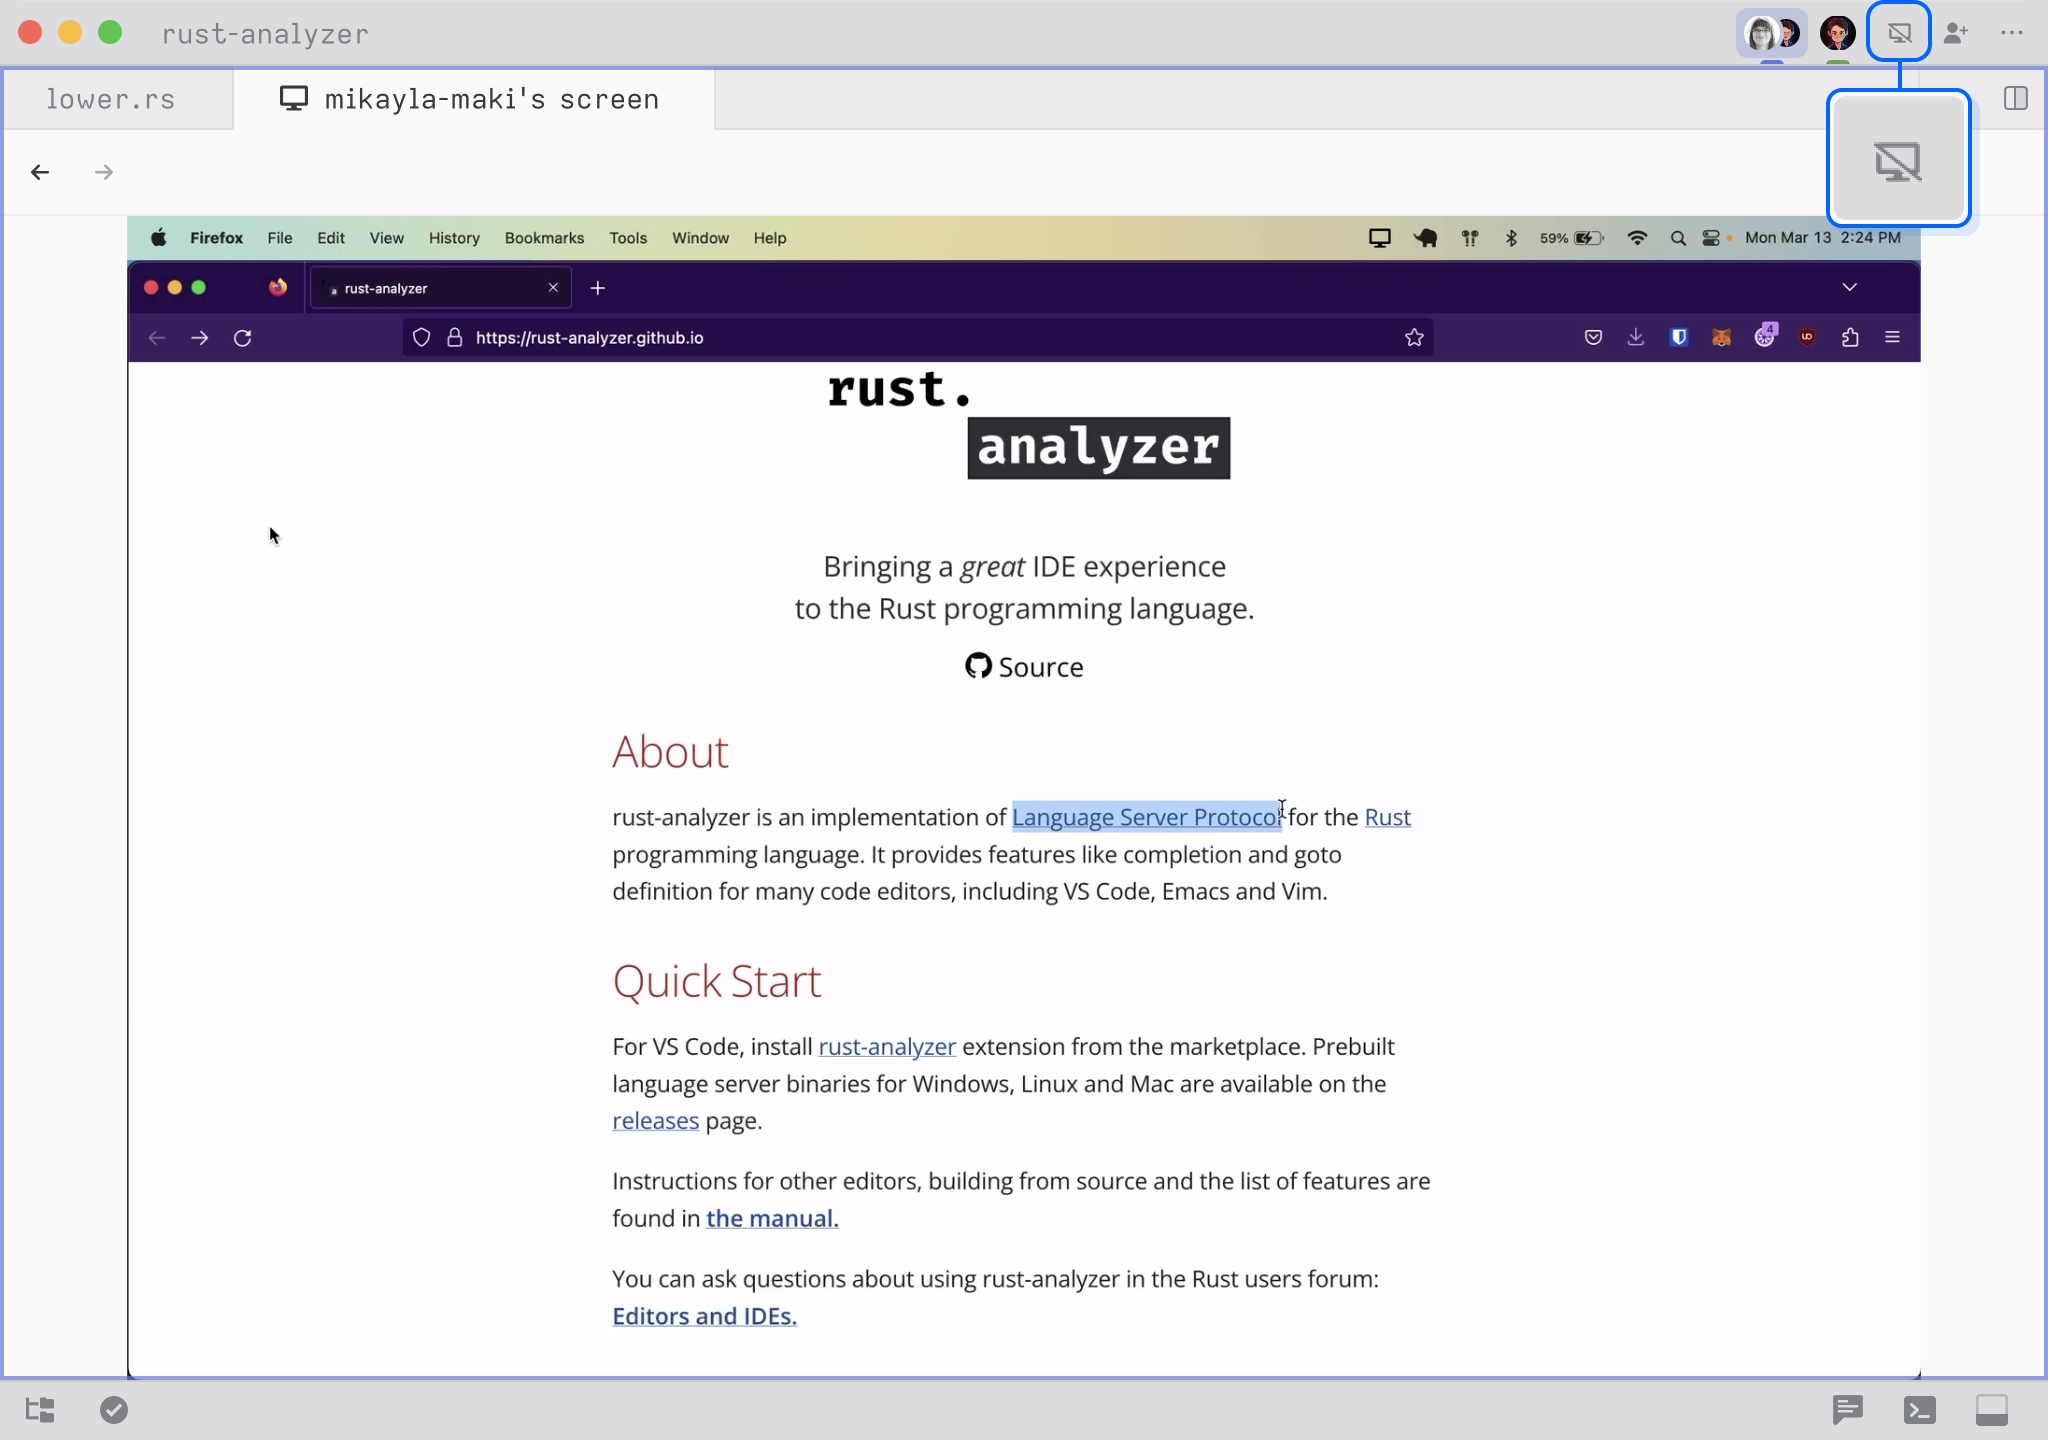
Once you start sharing your screen, the other participants in the call can see everything on your screen. This can be helpful for collaboration, troubleshooting, or simply sharing information with others.
Always be cautious when screen sharing– avoid accidentally exposing personal information, passwords, or secrets.
Currently, Zed only supports sharing your entire screen.
Command Palette
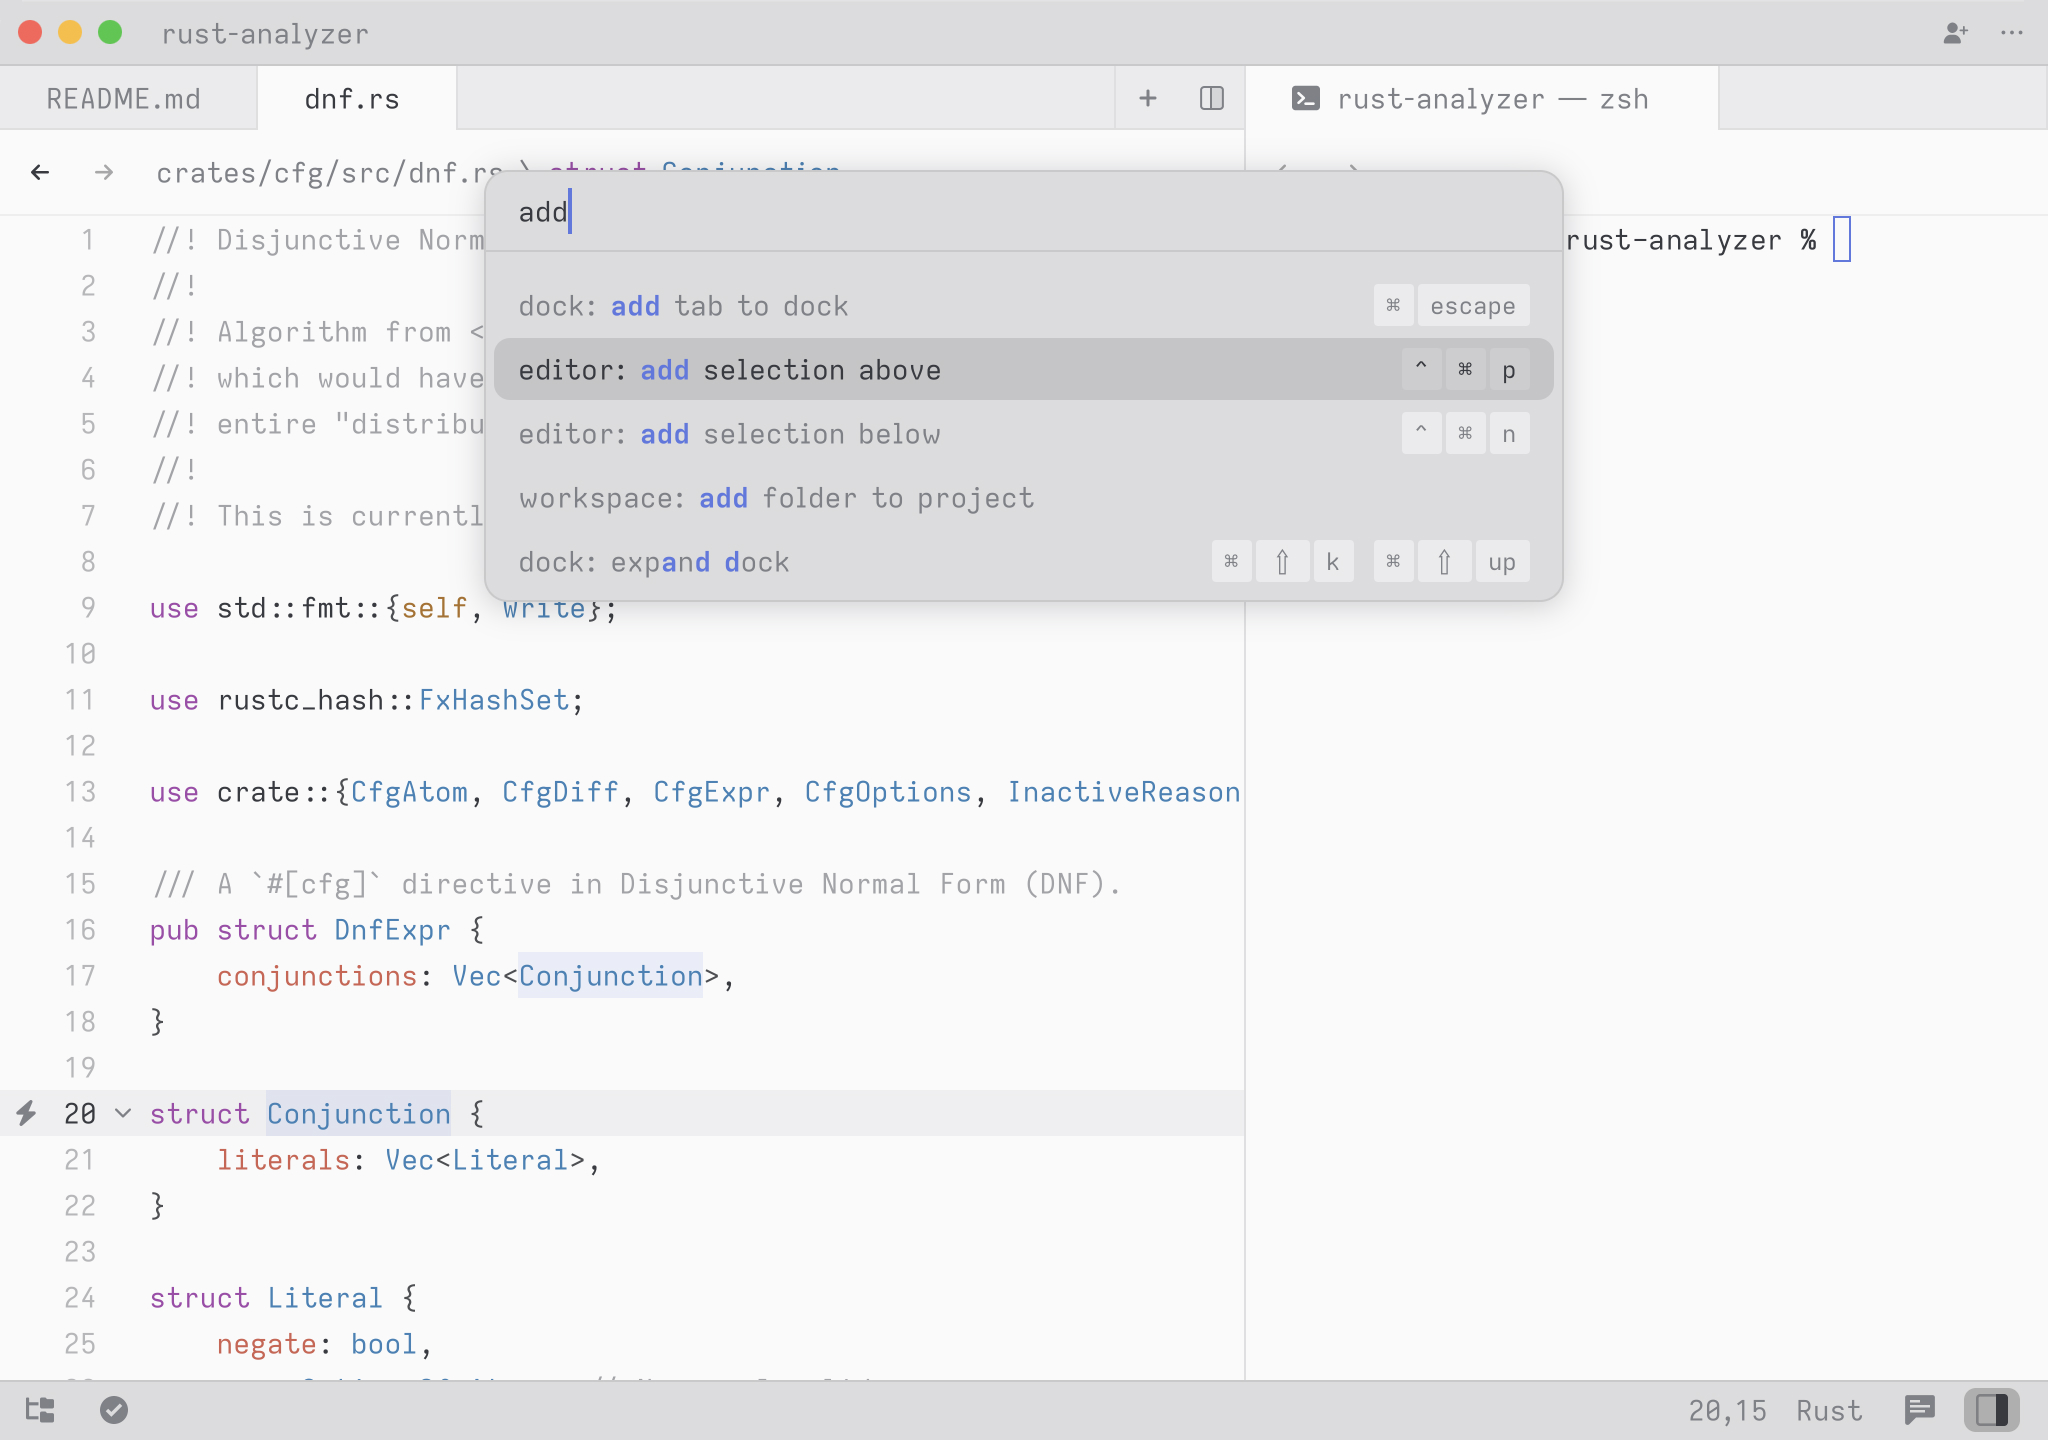
The Zed Command palette, a modal palette use to navigate the editor’s commands using text input.
If there’s one default key binding to remember, it’s cmd-shift-p. This
deploys the command palette, which is a gateway to much of the other
functionality that Zed offers and a convenient tool for learning key
bindings.
Available commands depend of what is focused. For example, if you focus
the project panel, you’ll see project panel: add file in the command
palette, but you won’t see that command if an editor is focused.
Diagnostics
Buffer diagnostics
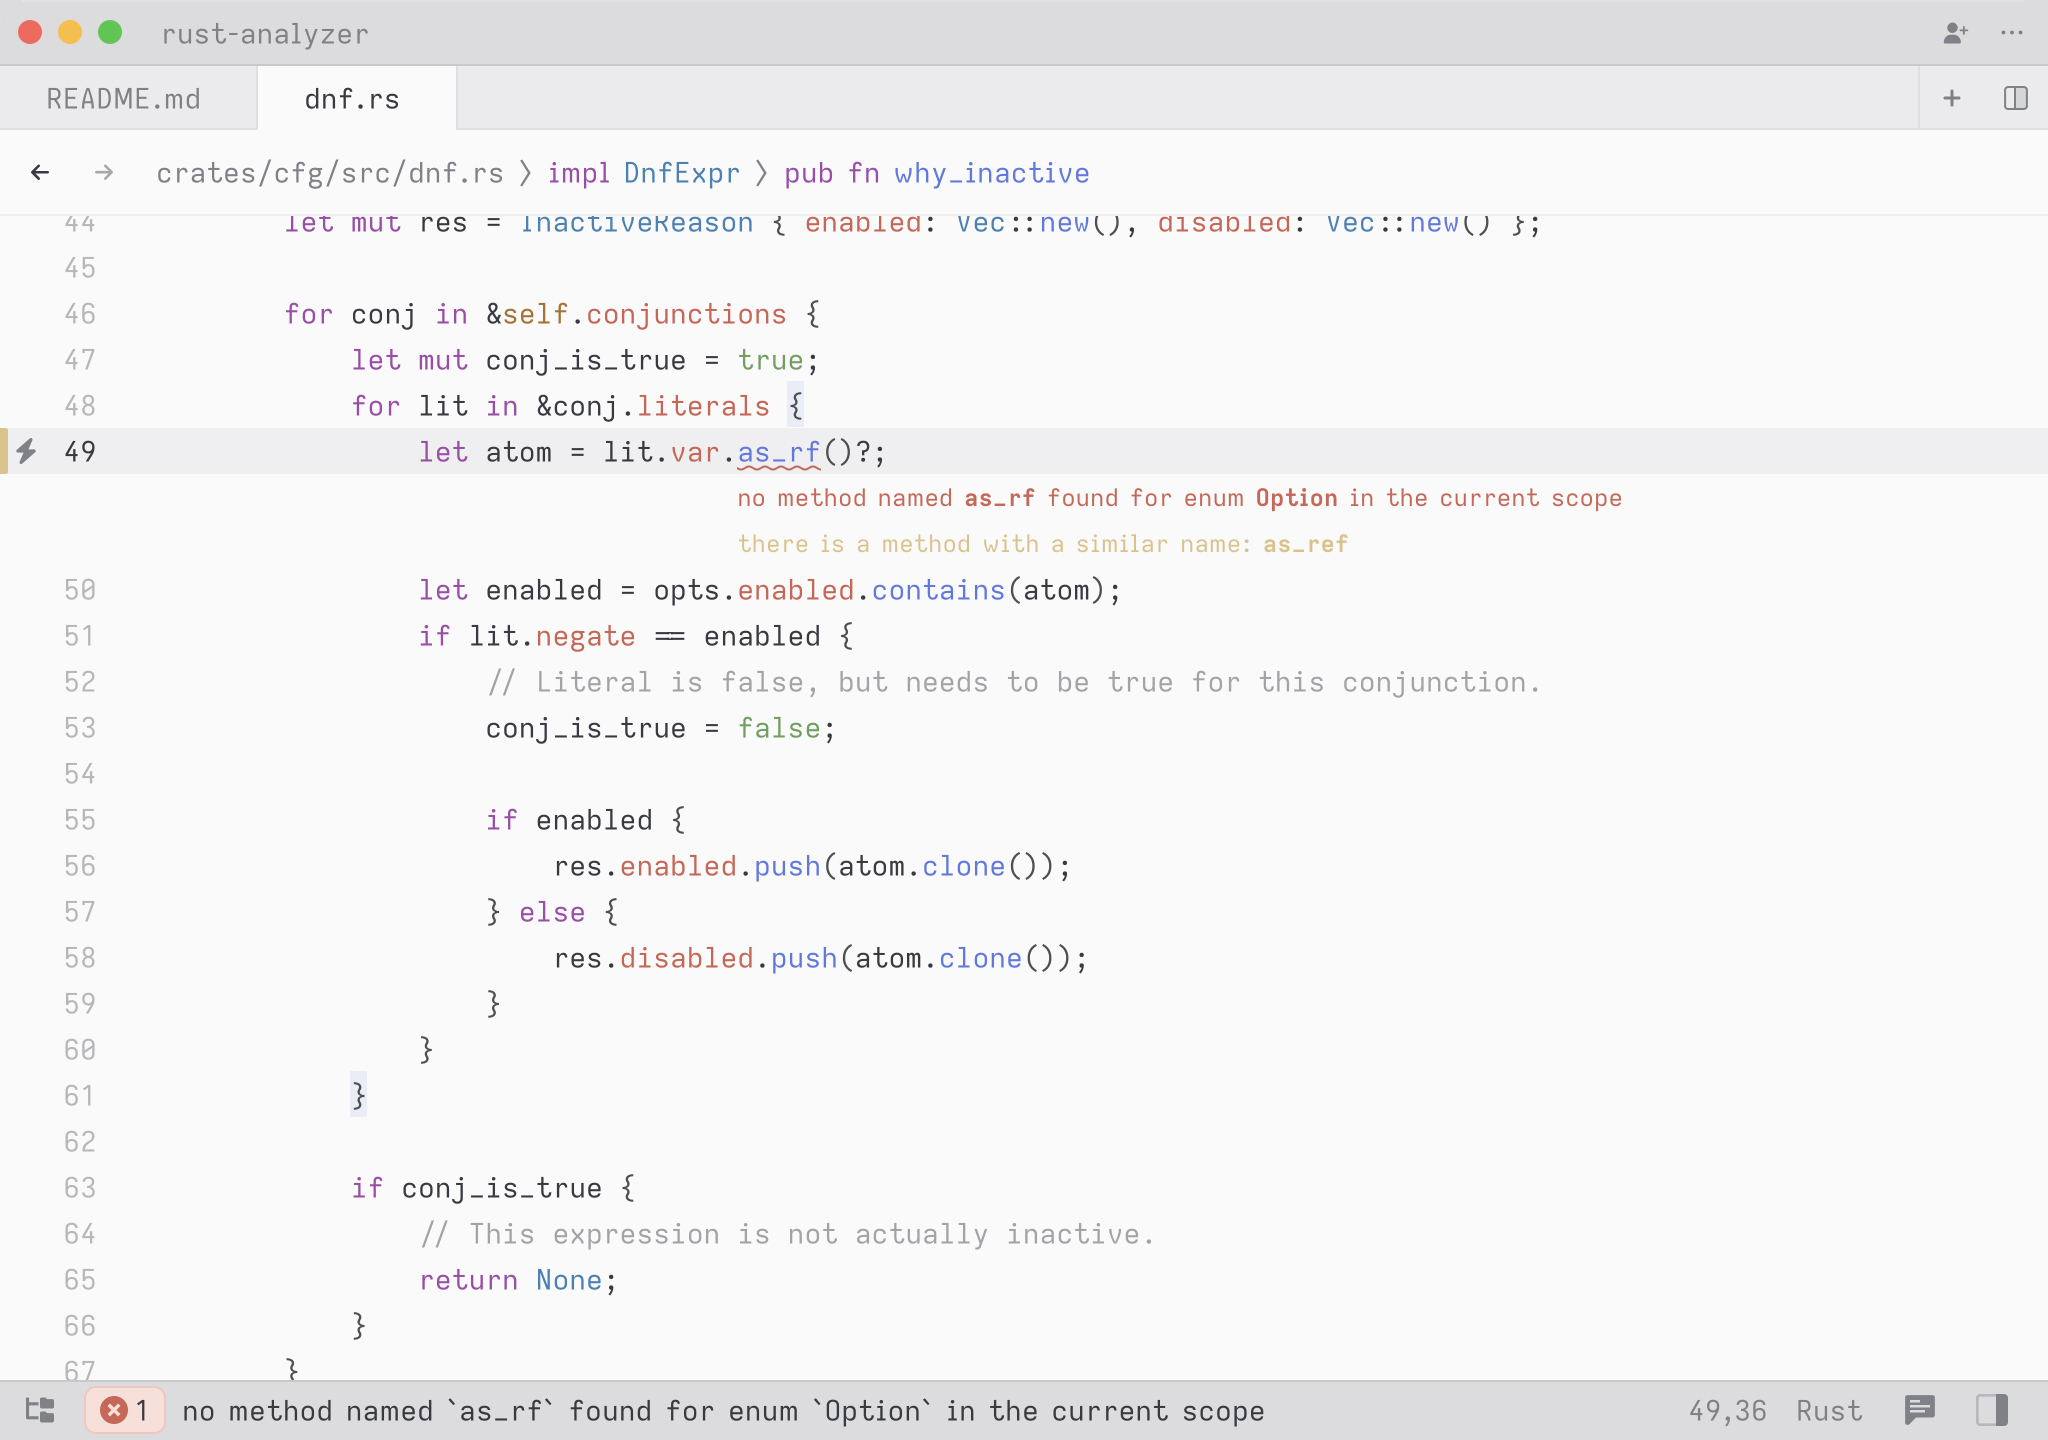
When your perfectly-imperfect self introduces an error or warning into the code, you’ll see it indicated with a wavy underline. If you place your cursor within the underlined text, you’ll see the first line of the error in the status bar.
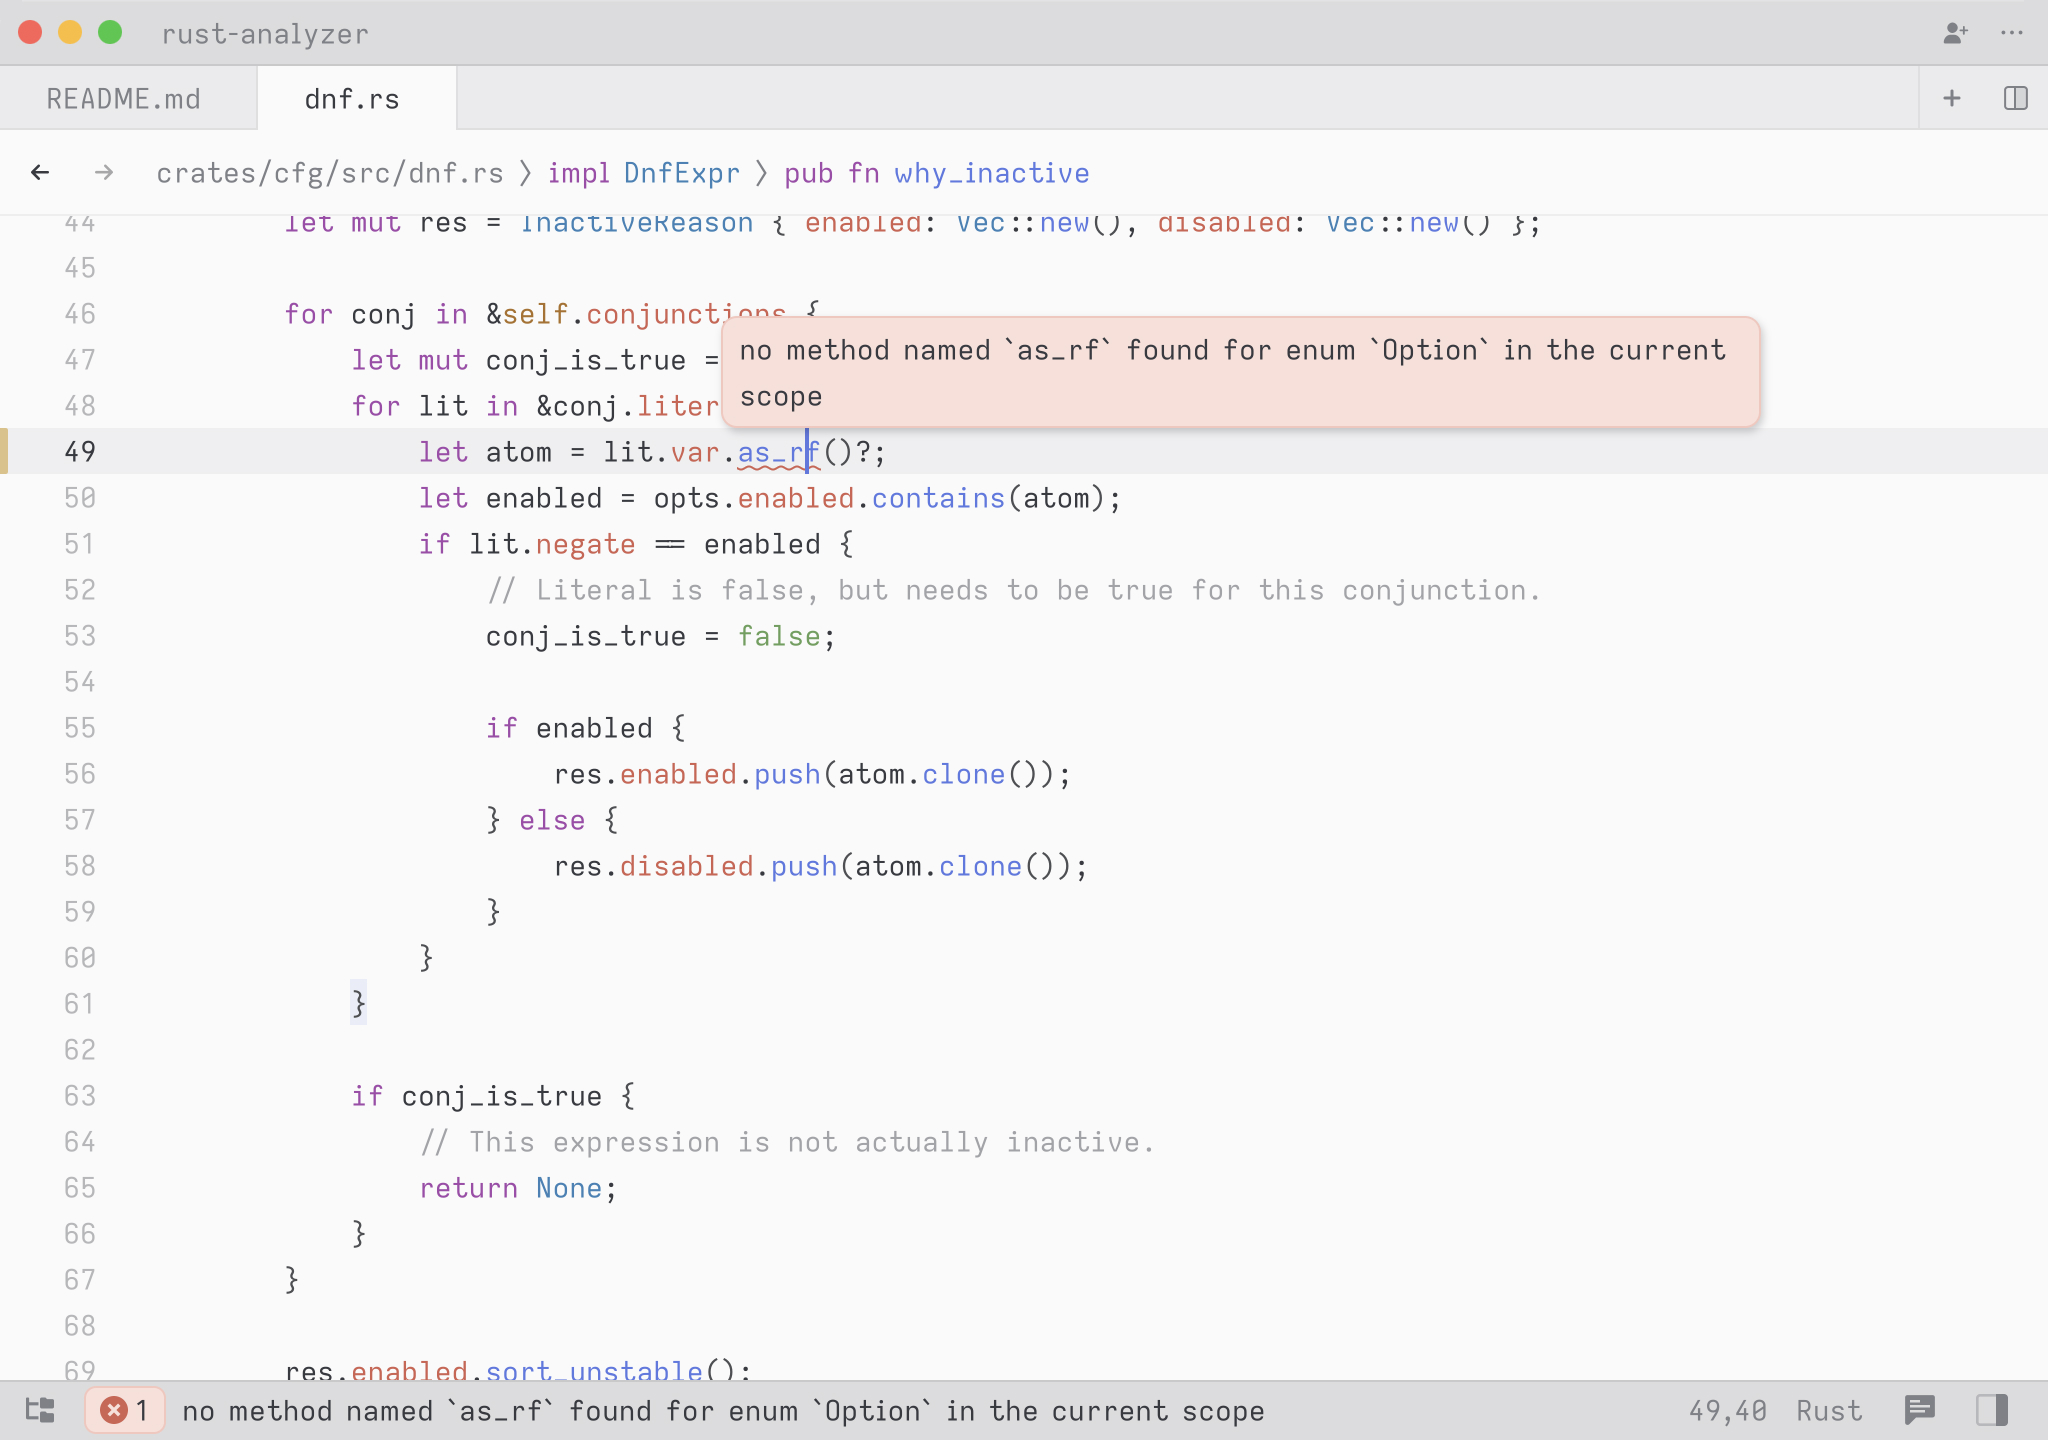
A buffer diagnostic showing an error on hover. The cursor position diagnostics can also be seen in the status bar.
For more details, you can expand the error by hitting f8. You can
cycle through all errors in the current buffer with f8 and shift-f8
to cycle backwards. Once you fix the error, you’ll see it grayed out, at
which point you can press escape to dismiss it.
Project-wide diagnostics
Zed displays the number of errors and warnings that exist across your
entire project in the status bar at the lower left corner of the
workspace. If you click this indicator or press cmd-shift-M, you’ll
open the project diagnostics multi-buffer.
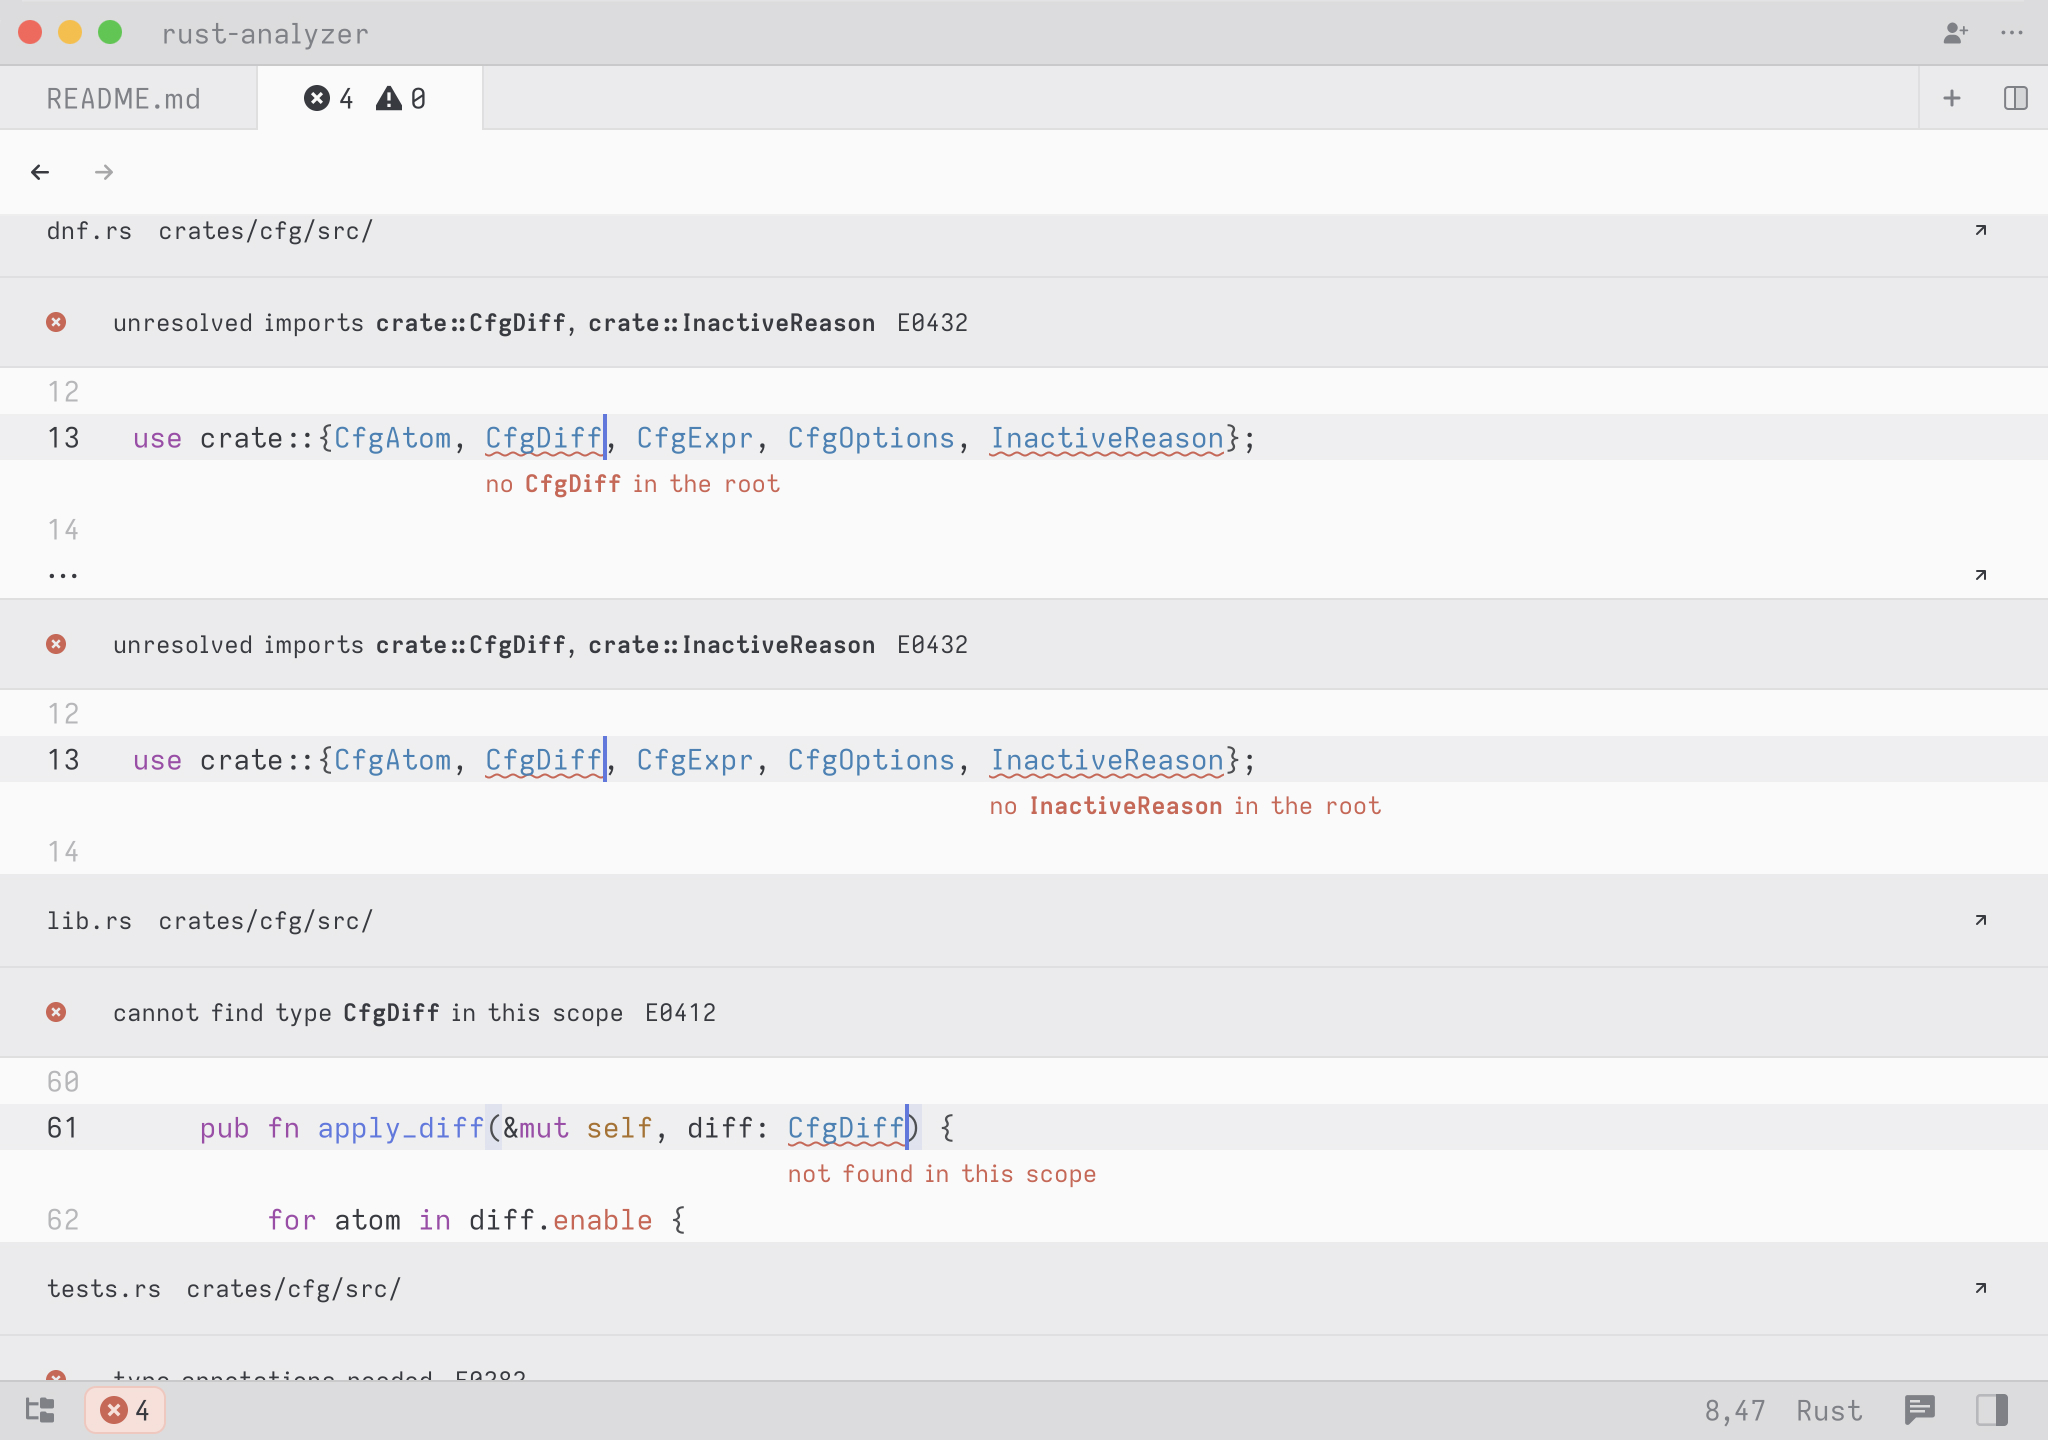
This multi-buffer contains an excerpt for every error in your project, and its contents will update as you fix errors and save. Sometimes the language server reports multiple errors for the same piece of code.
We’ve chosen to be faithful to the output of the compiler and present an excerpt for each error, even if this means you’ll sometimes see multiple excerpts for overlapping sections of a file.
As with any multi-buffer, you can jump to the location of your cursor in
an ordinary singleton buffer by pressing alt-enter. Don’t forget you
can navigate back to the multi-buffer with ctrl-- after making your
fix.
The Dock
There is one special pane called the dock which can be opened and dismissed while keeping its contents.
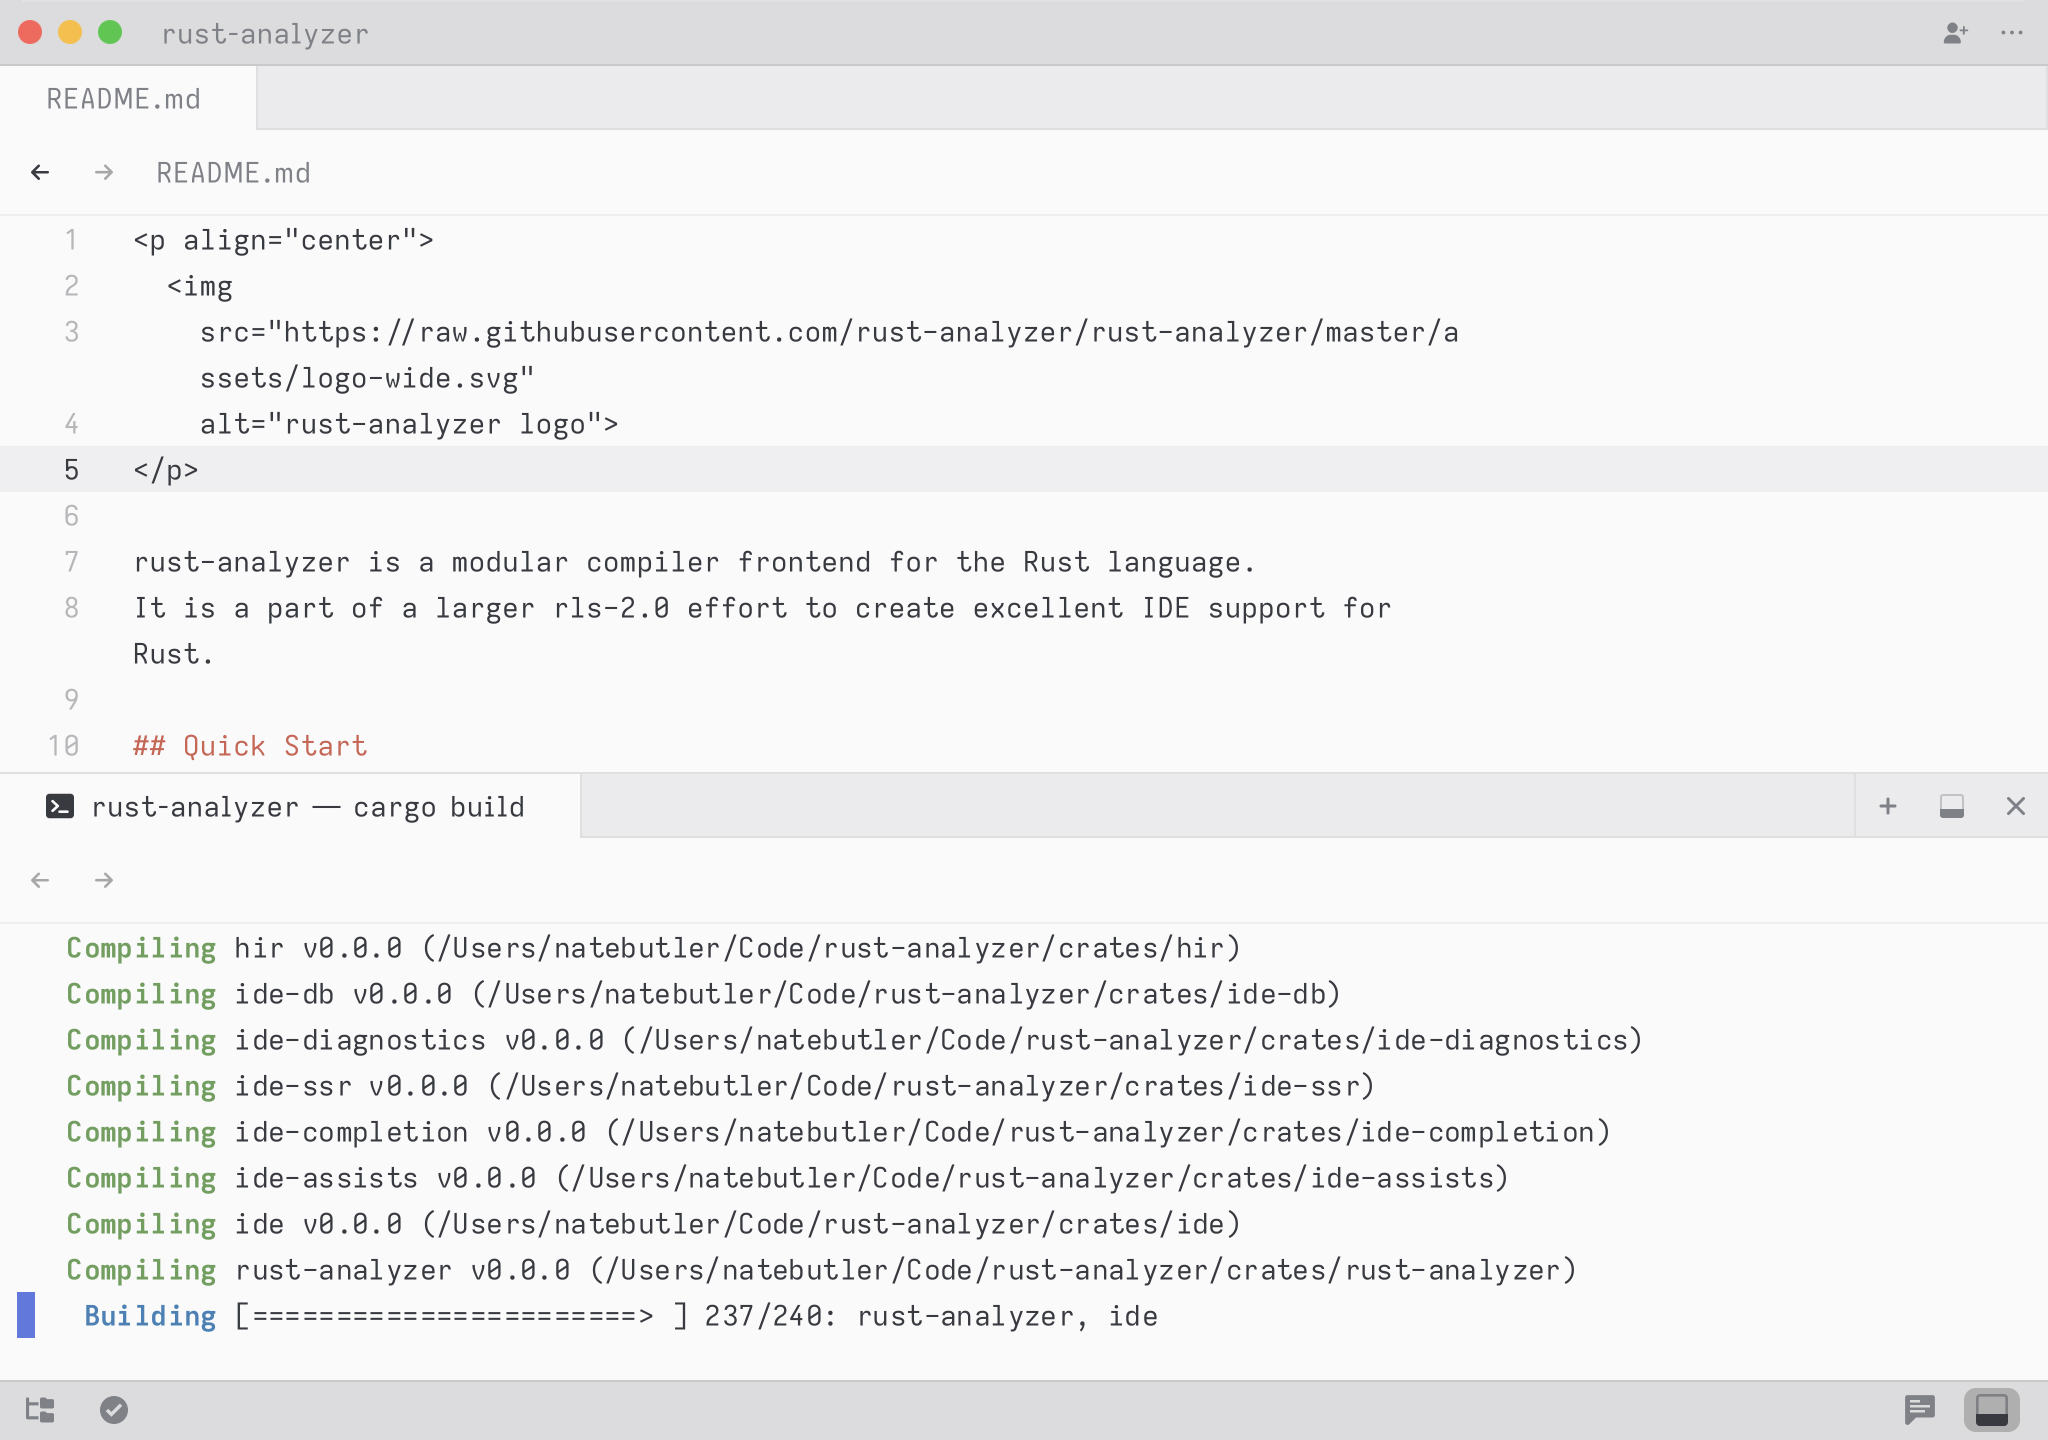
It can be fetched and dismissed with shift-escape. By default it opens
with a terminal but any editor or tab may be dragged into it.
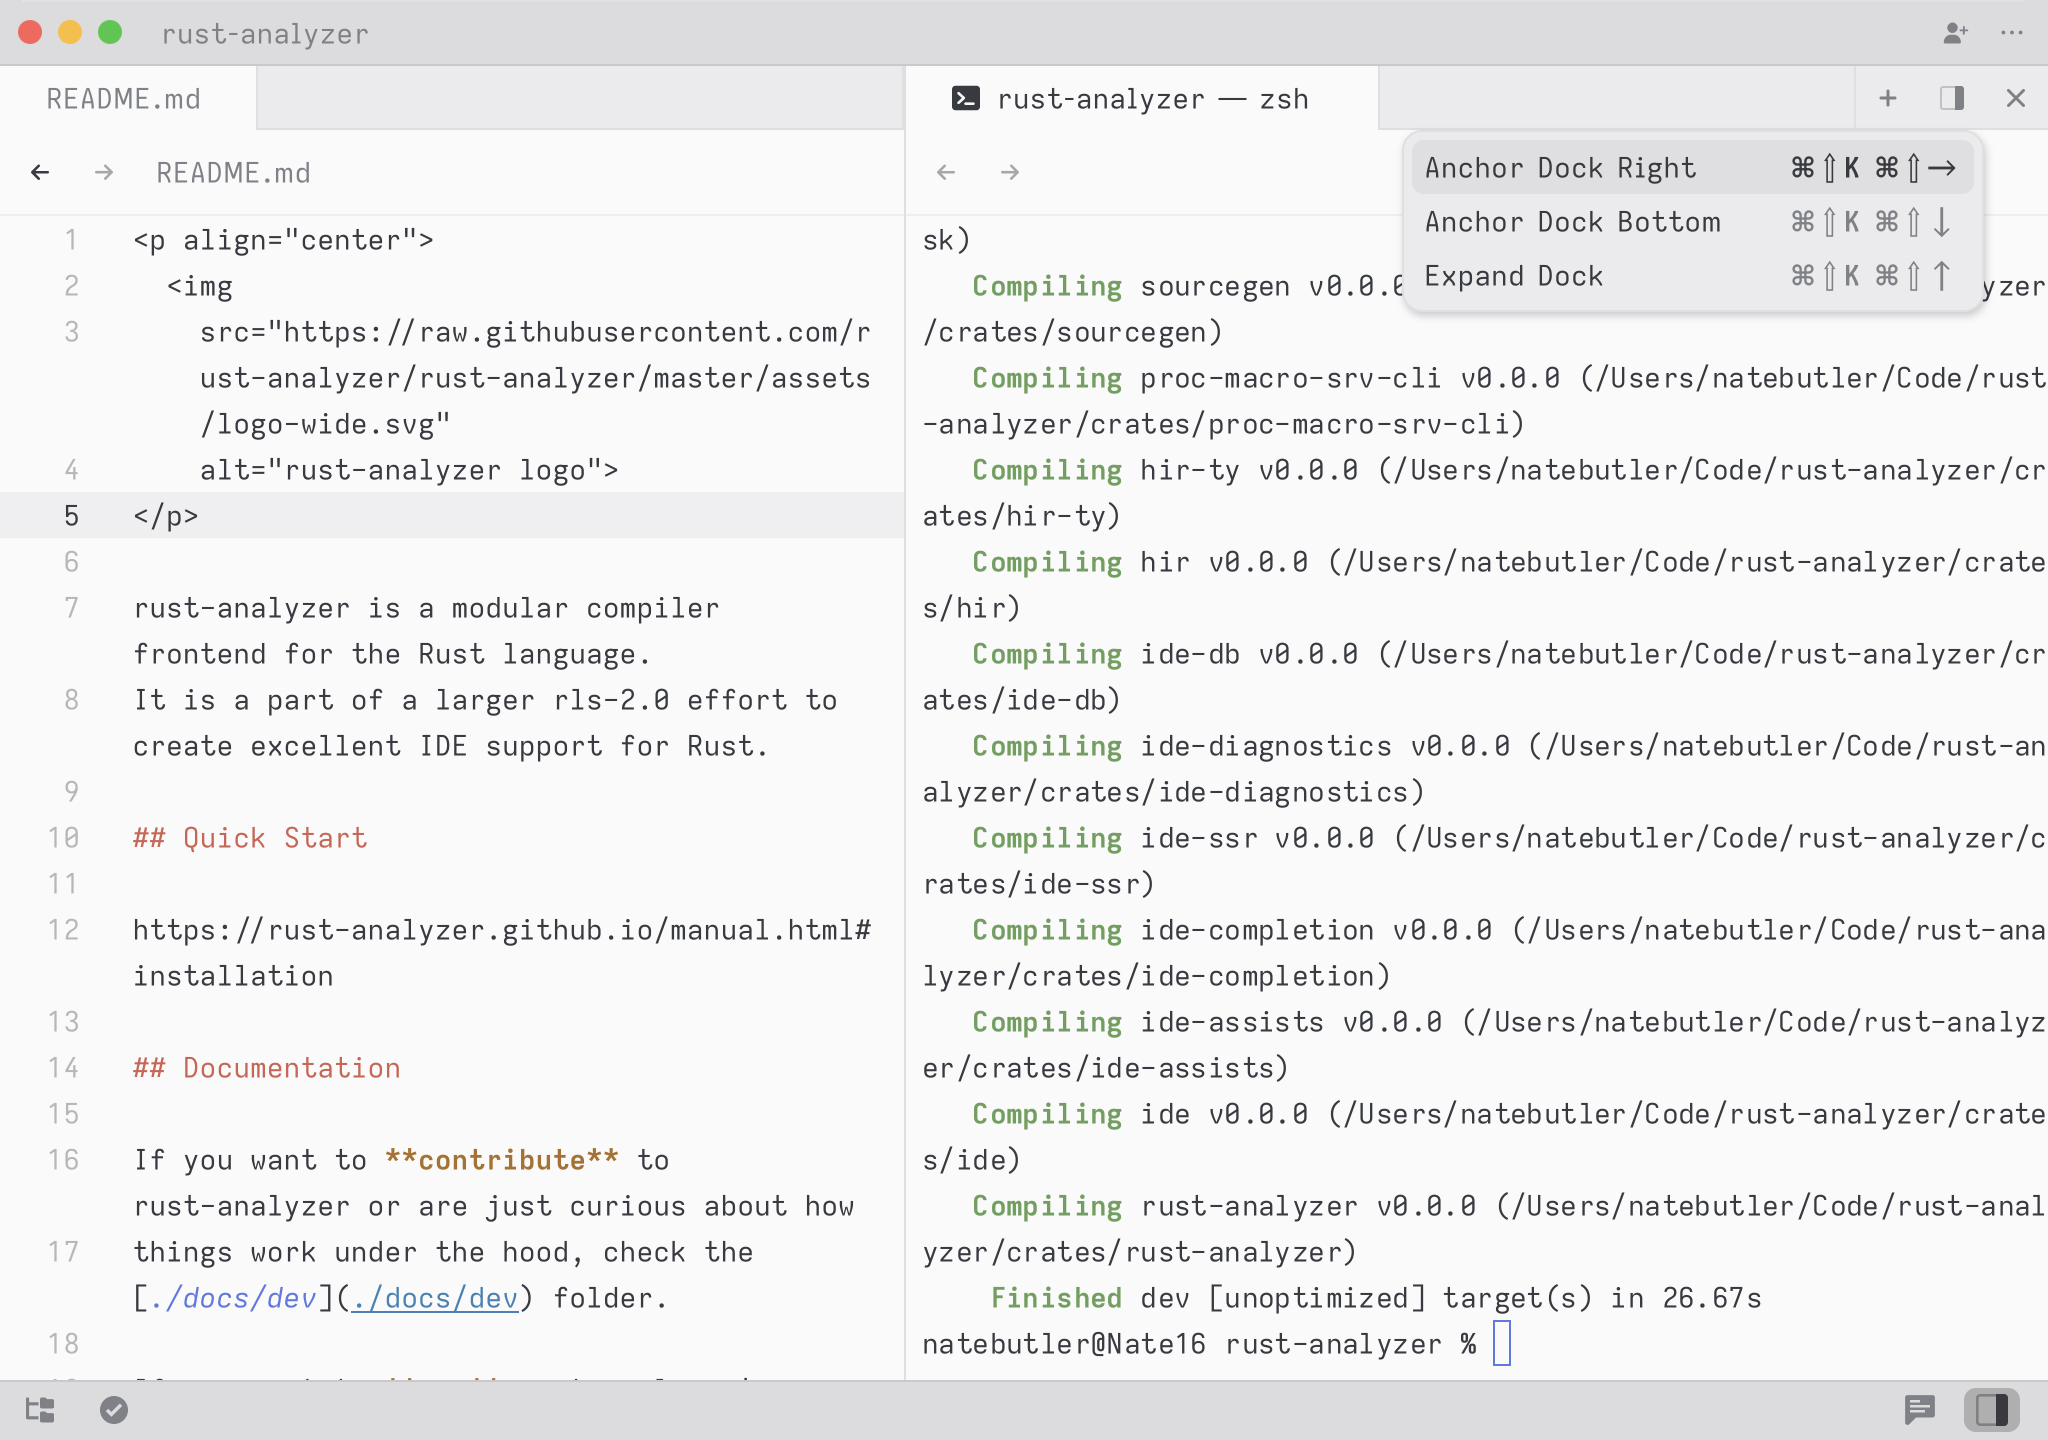
The dock may be anchored to the right, bottom, and as a modal via the dock anchor menu in the top right of its pane or by the associated key bindings.
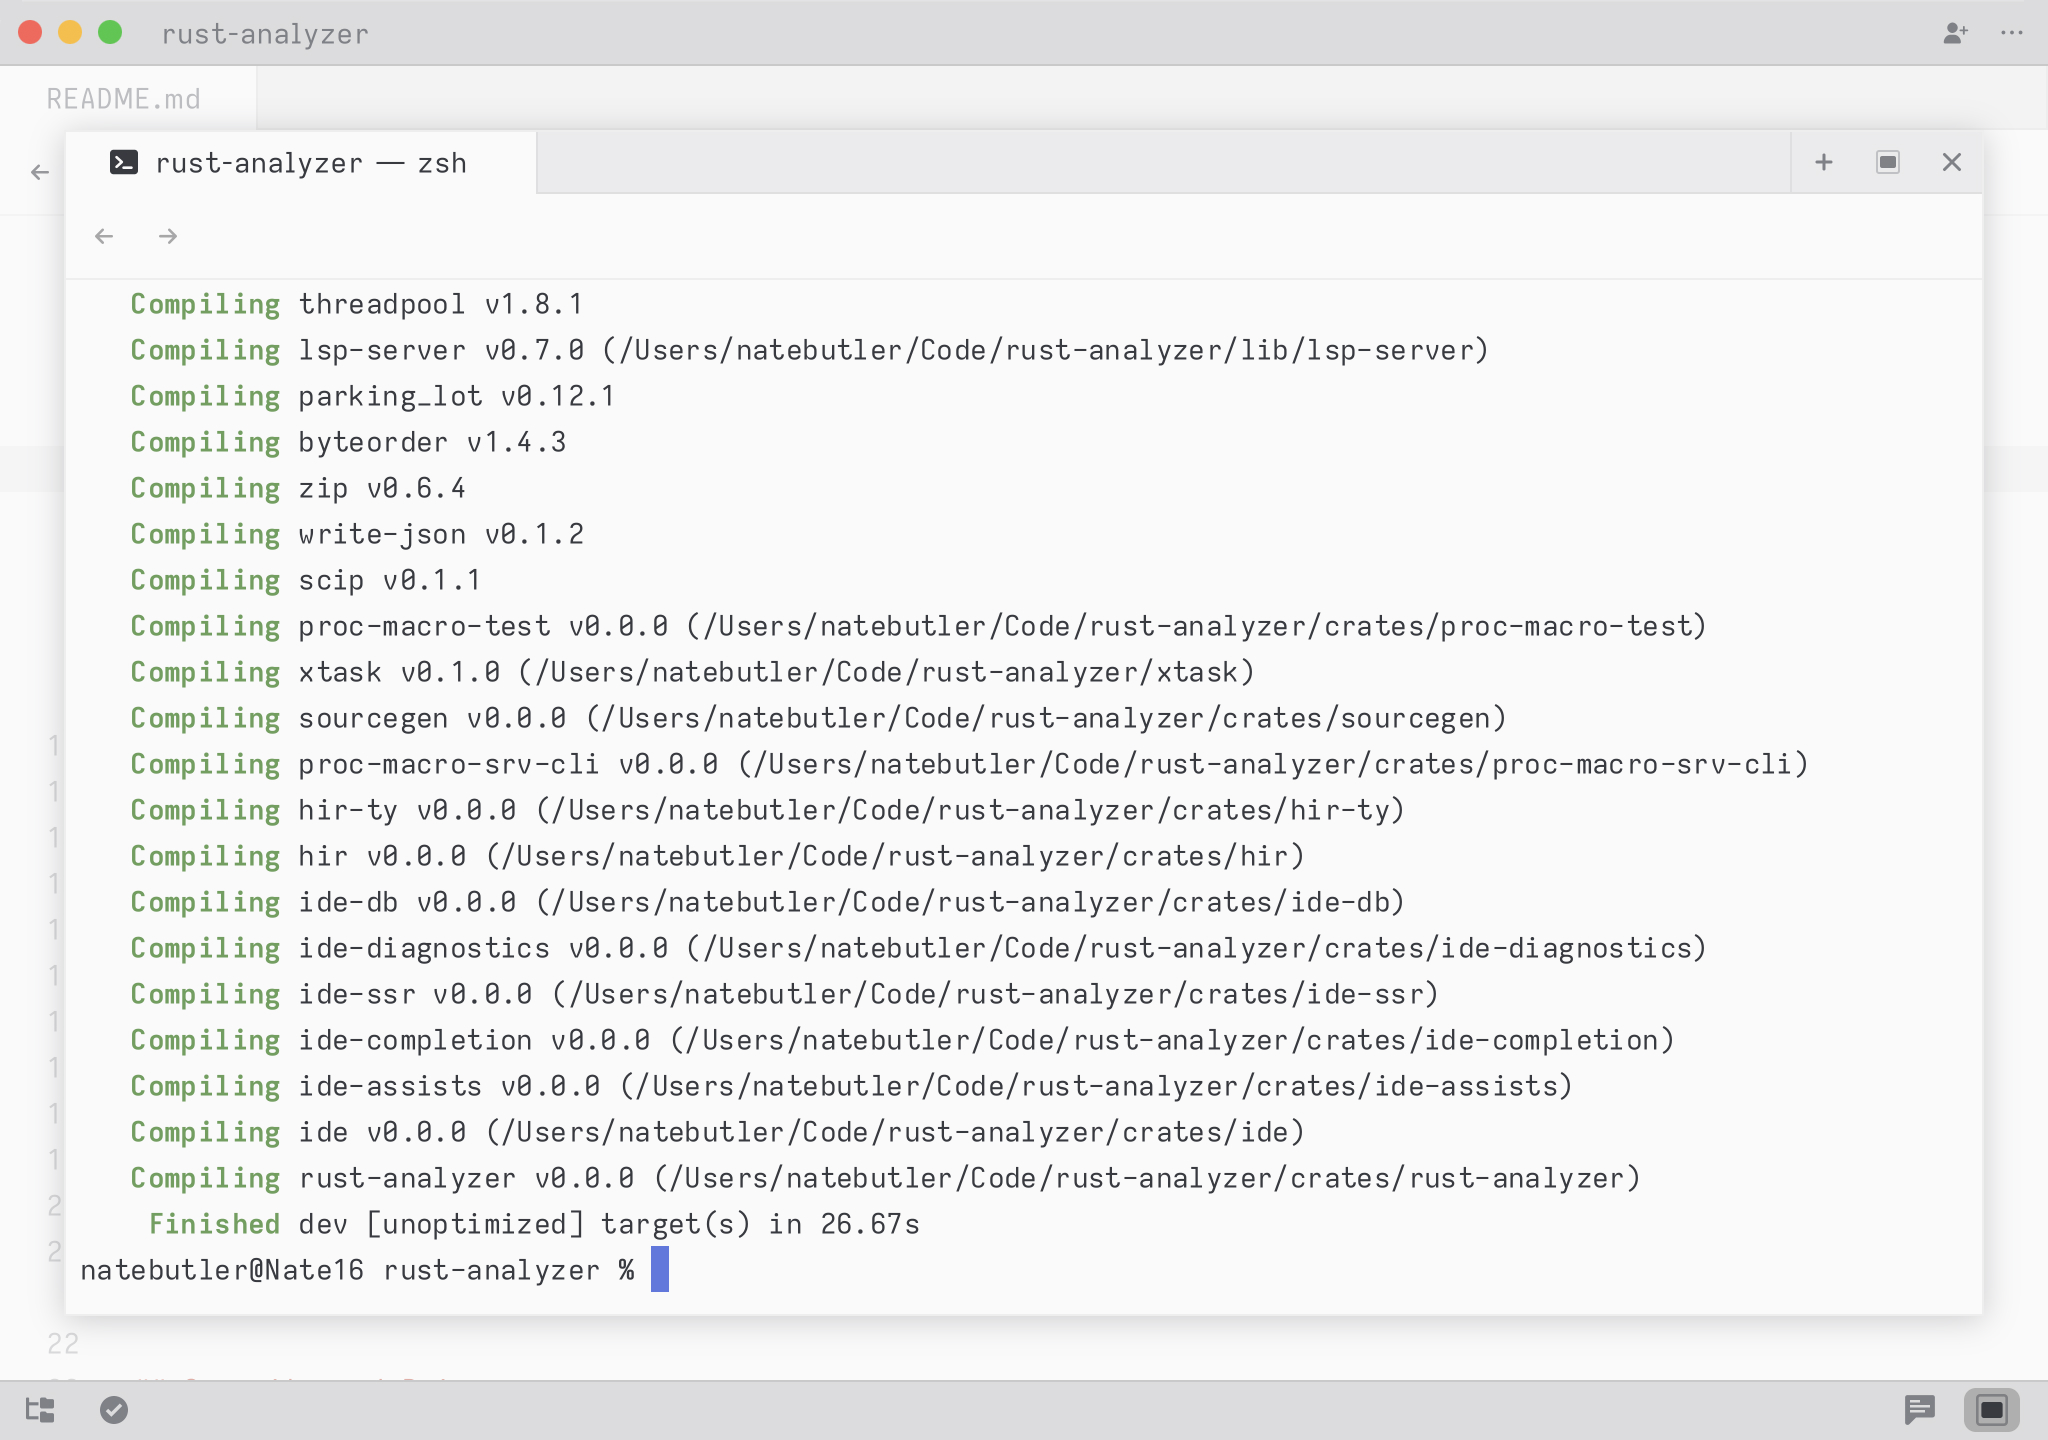
Common dock use cases:
- easily fetchable persistent terminal
- quick reference information for documentation pages or related source files
- a place for the diagnostics page
If an item in the dock is focused via a key binding such as the
diagnostics item via cmd-shift-m, the dock will be revealed and
focused making it convenient for those global singleton tabs.
Editing
Syntactic Editing
To fold and unfold code based on the syntax tree, press cmd-alt-{ and
cmd-alt-}.
To grow and shrink the selection based on the syntax tree, press
alt-up and alt-down.
To jump to the nearest enclosing bracket or its matching counterpart,
press ctrl-m.
Multi-cursor editing
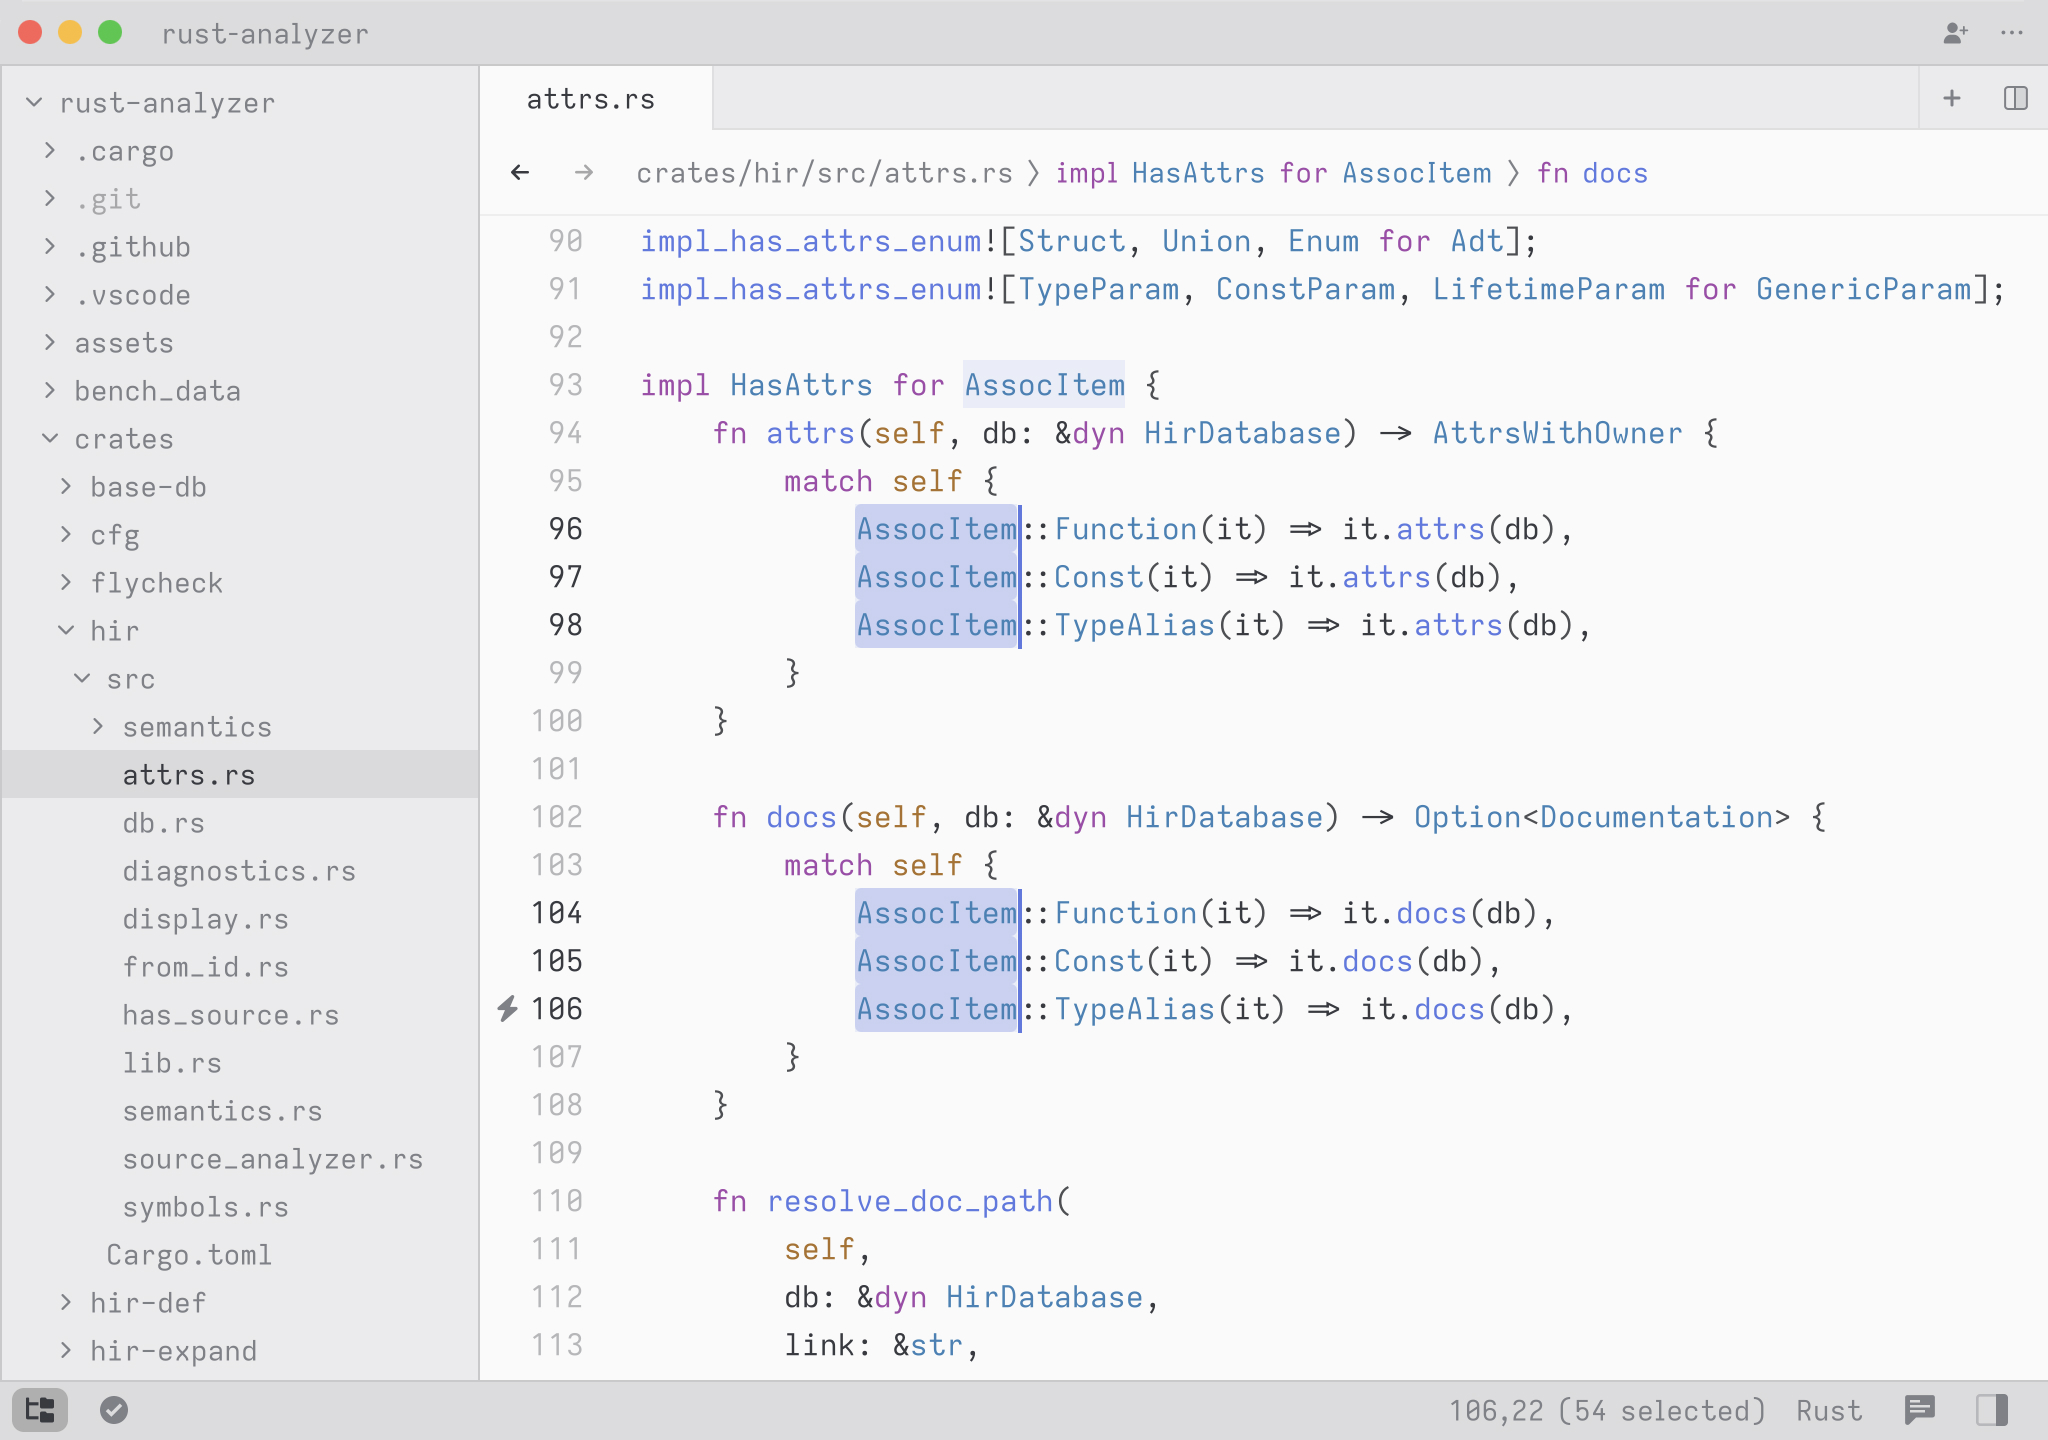
You can create multiple cursors/selections via the mouse by alt-clicking/dragging.
To add a new selection above or below the current, press alt-cmd-up or
alt-cmd-down.
To select the word under the cursor, then the next matching piece of
text, press cmd-d. To skip a word, press cmd-d to select it, then
cmd-k cmd-d to select the next. To undo your selection, press cmd-u.
File Finder
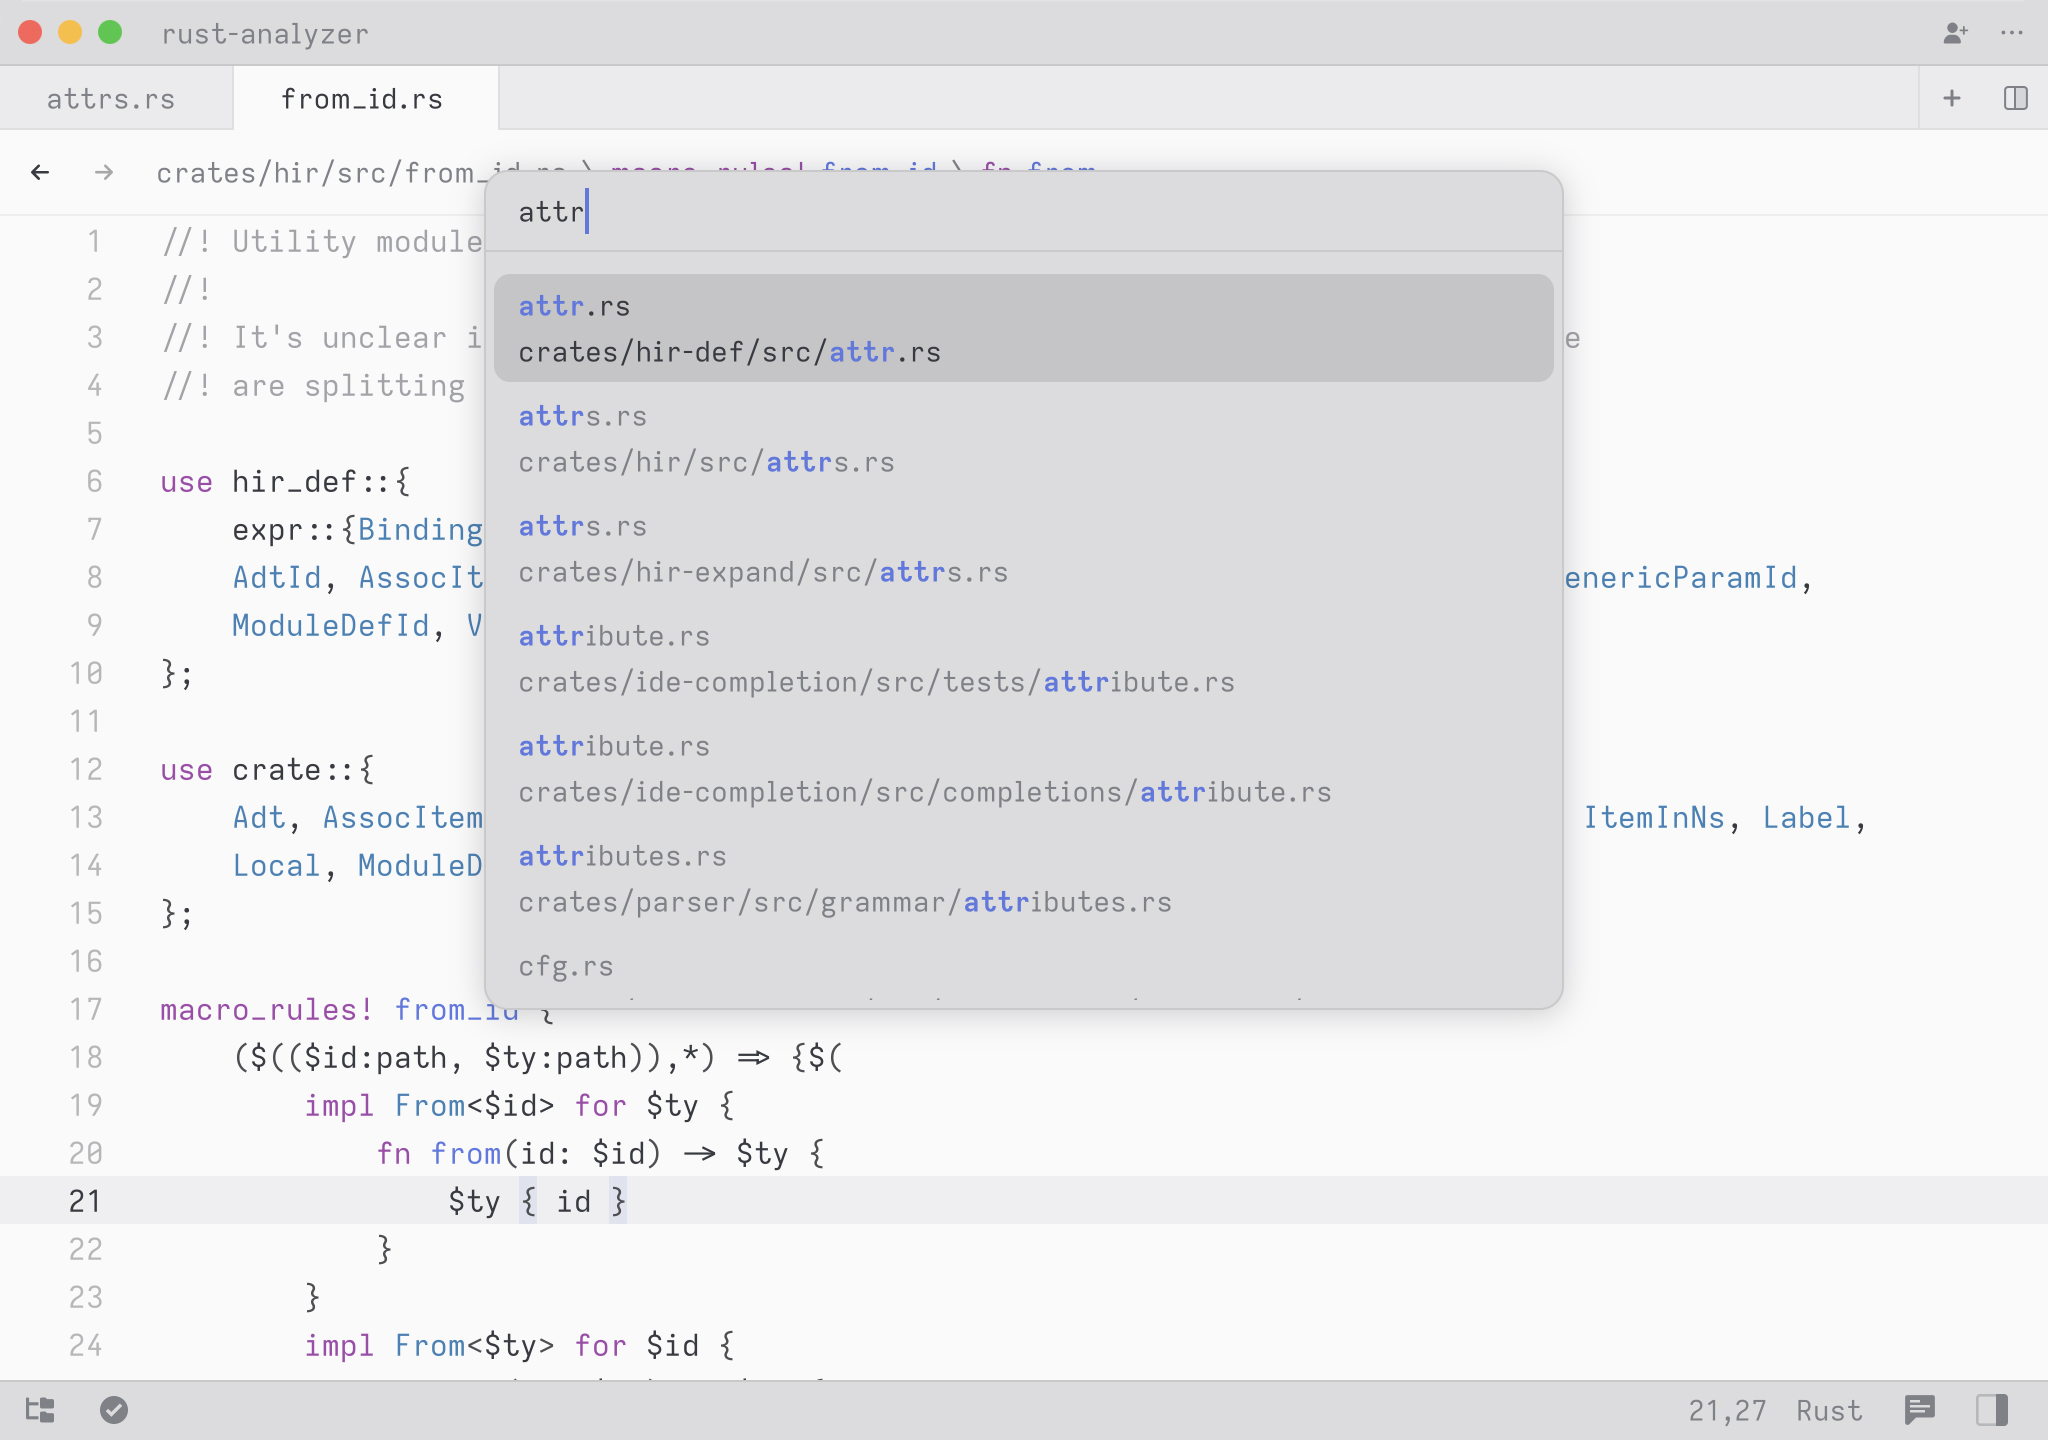
The file finder modal, used to open files in the current project.
To fuzzy-search all files in your project by path, use the file finder,
which you can toggle with cmd-p.
Language Servers
When you first open a file in a specific language, Zed will download and start the appropriate language server if it’s supported. Rust remains our primary focus in the short term, but Zed currently has hard-coded language server support for:
The ability to connect Zed with an arbitrary language server is under active development.
Multi-buffers
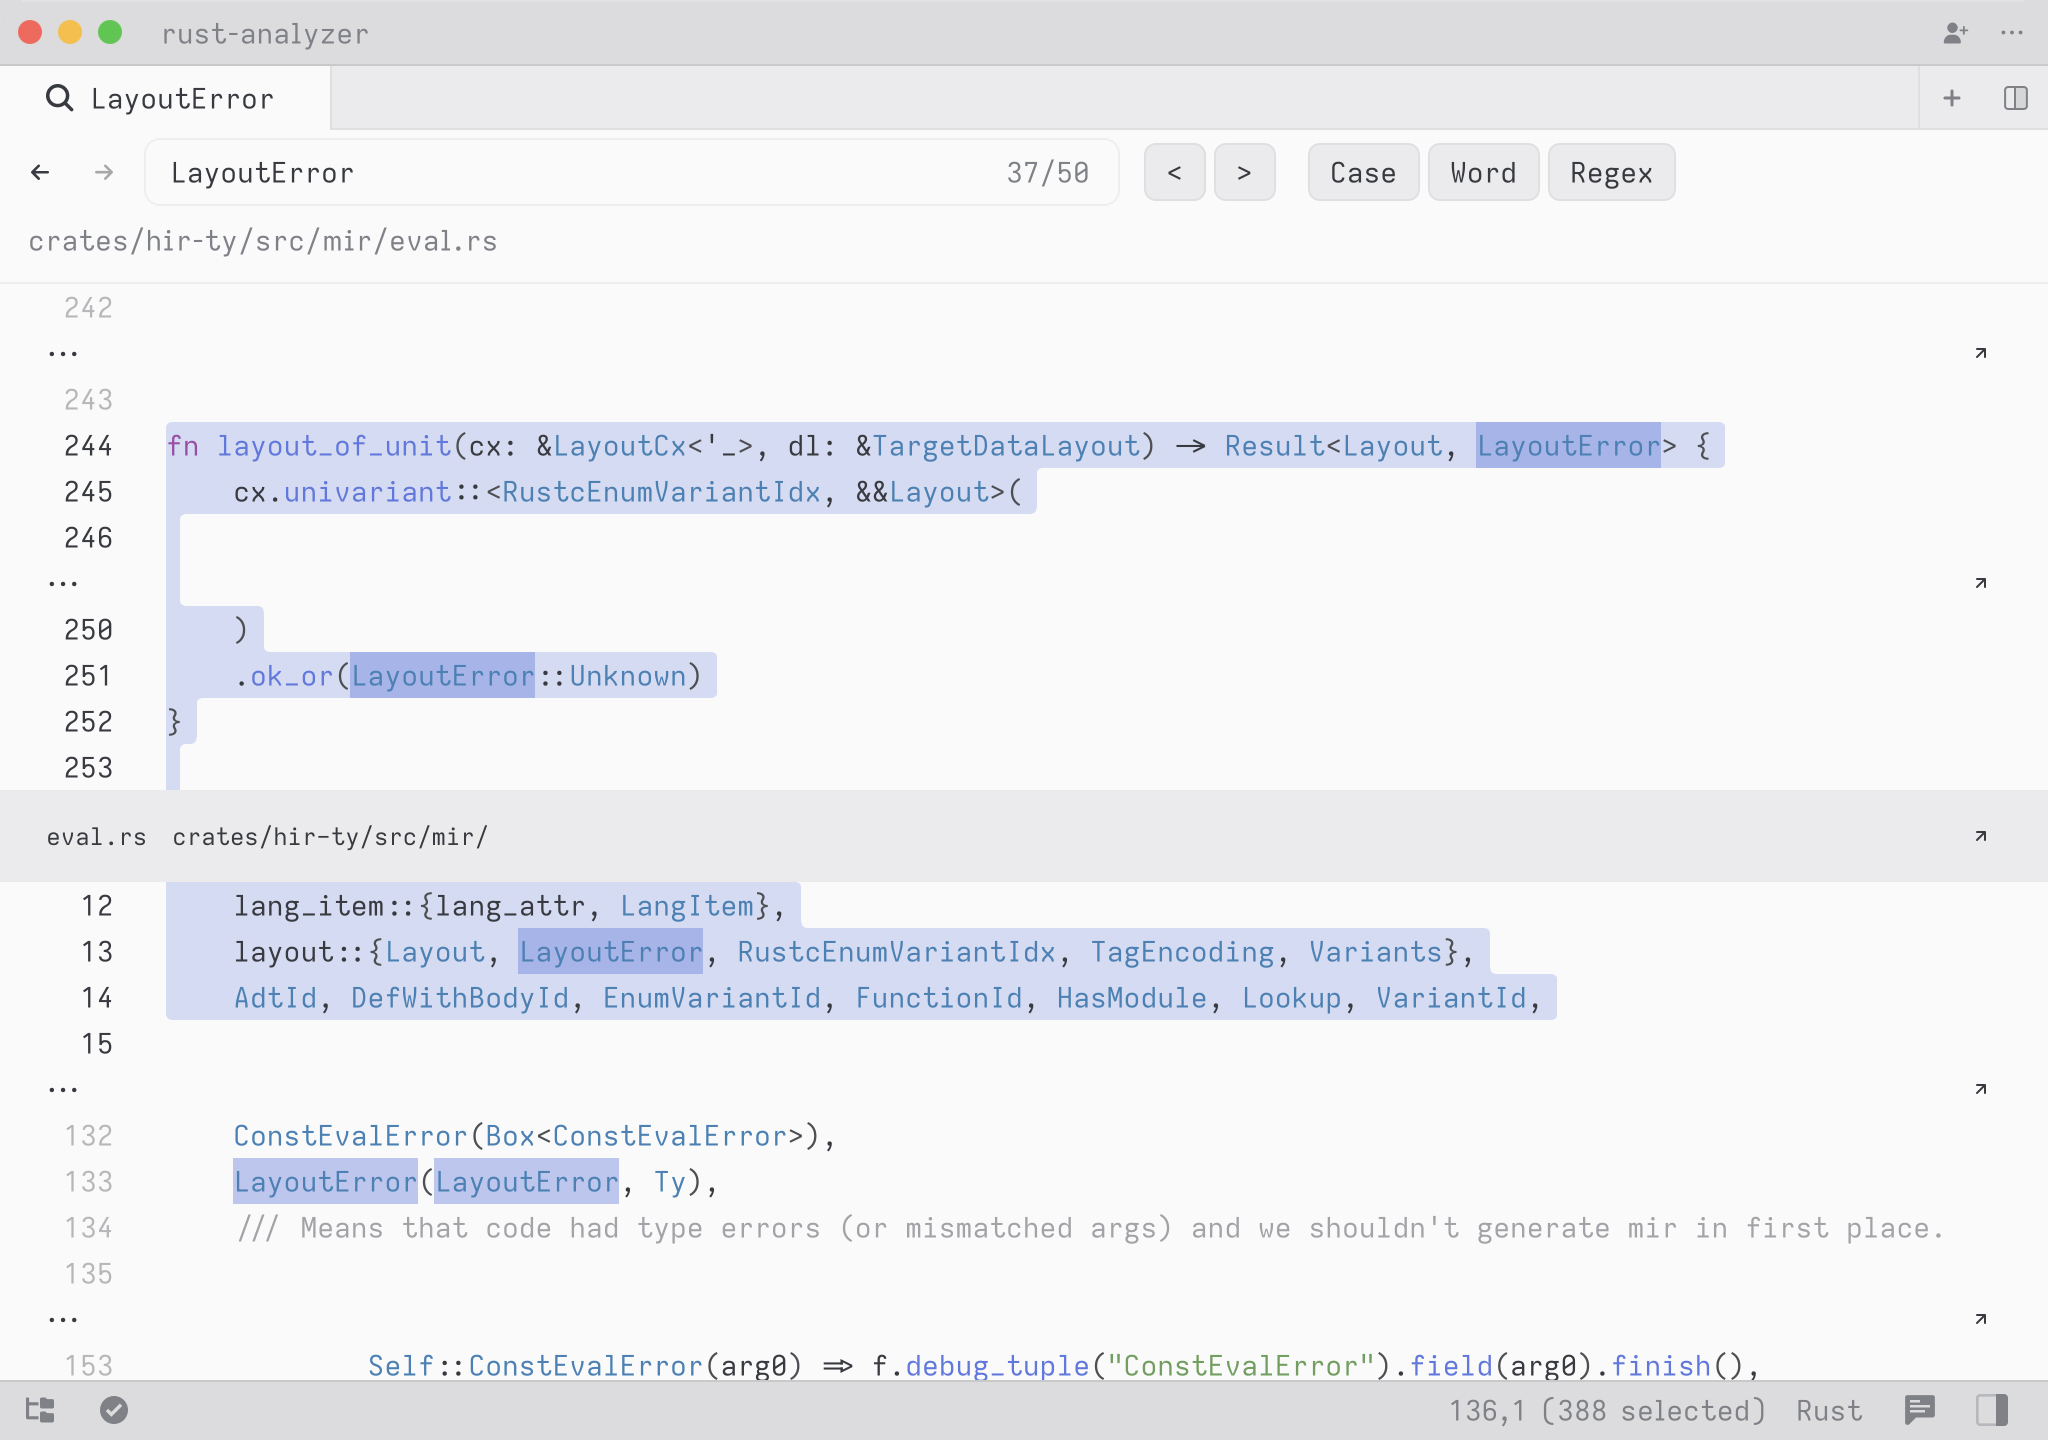
A multibuffer, containing editable excerpts from multiple different files in a single tab.
Multi-buffers are edited much like ordinary buffers, but they contain editable excerpts from multiple different files. They’re used in multiple ways in Zed. In the case of project search, you’ll see an excerpt with a few context lines surrounding every match.
Multi-buffers allow you to perform multi-cursor edits that span multiple files. When you save a multi-buffer, every excerpted file is saved.
To jump to the cursor’s location in a dedicated buffer for the excerpted
file, press alt-enter. If you have multiple cursors, a tab will be
opened for the location of each cursor.
Navigation
Code Navigation
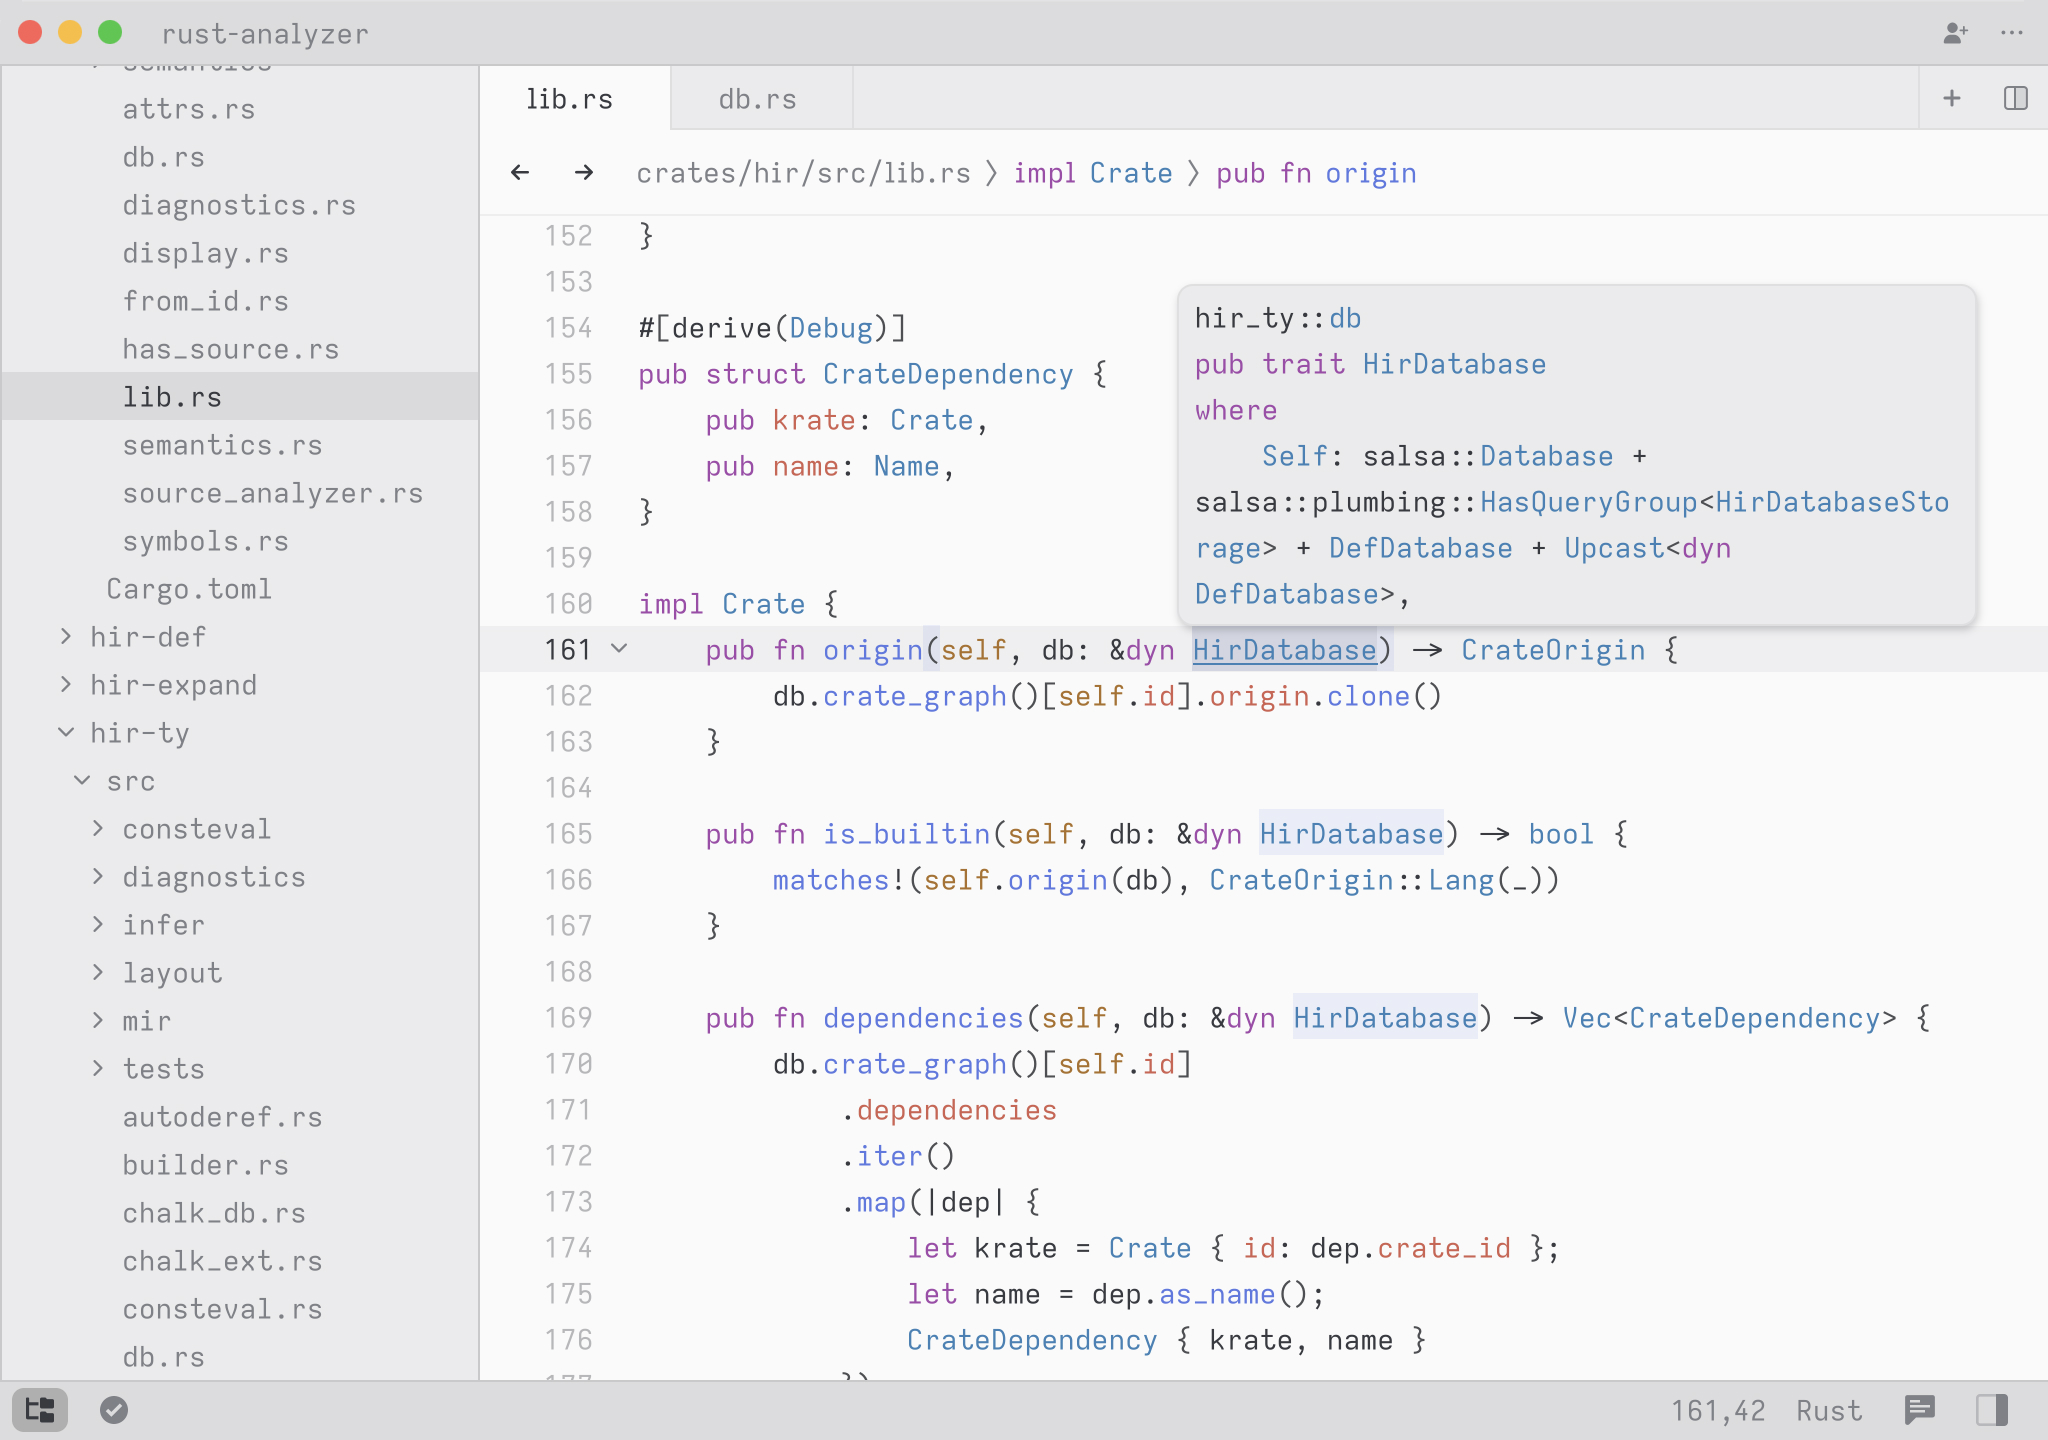
You can jump to the symbol definition under your cursor with f12 or by
cmd-clicking on the symbol.
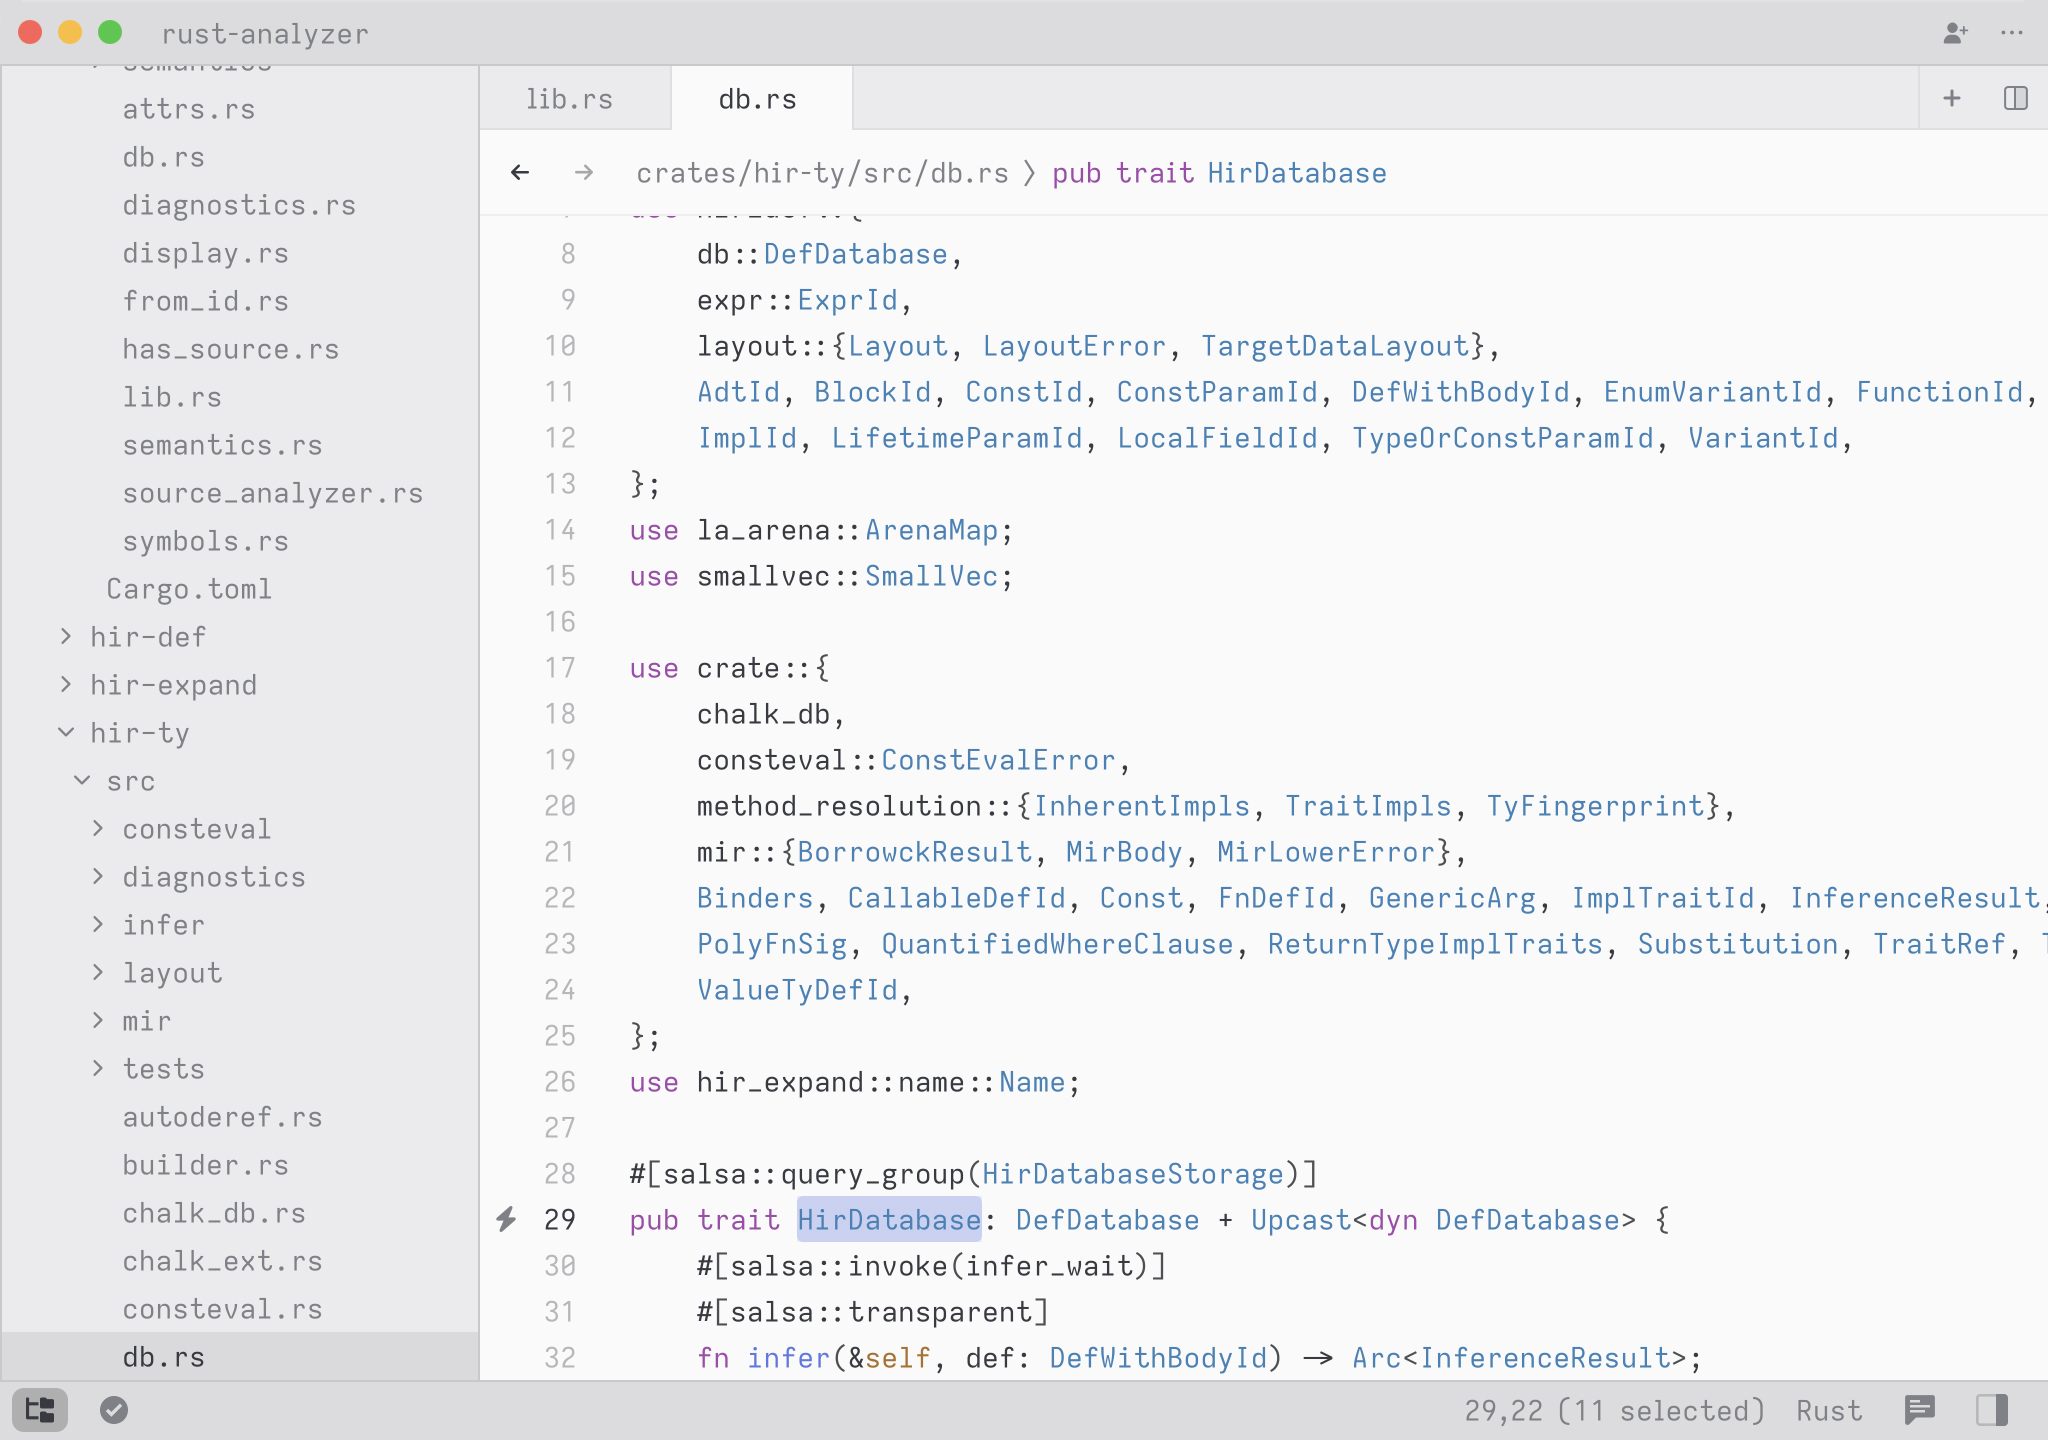
Once you’ve jumped to a definition or performed any non-local
navigation, you can use the navigation history to navigate backward with
ctrl-- and forwards with ctrl-shift-_. The navigation history is
intentionally scoped per-pane, so we’ll never switch your focus to
another pane when navigating forwards and backwards.
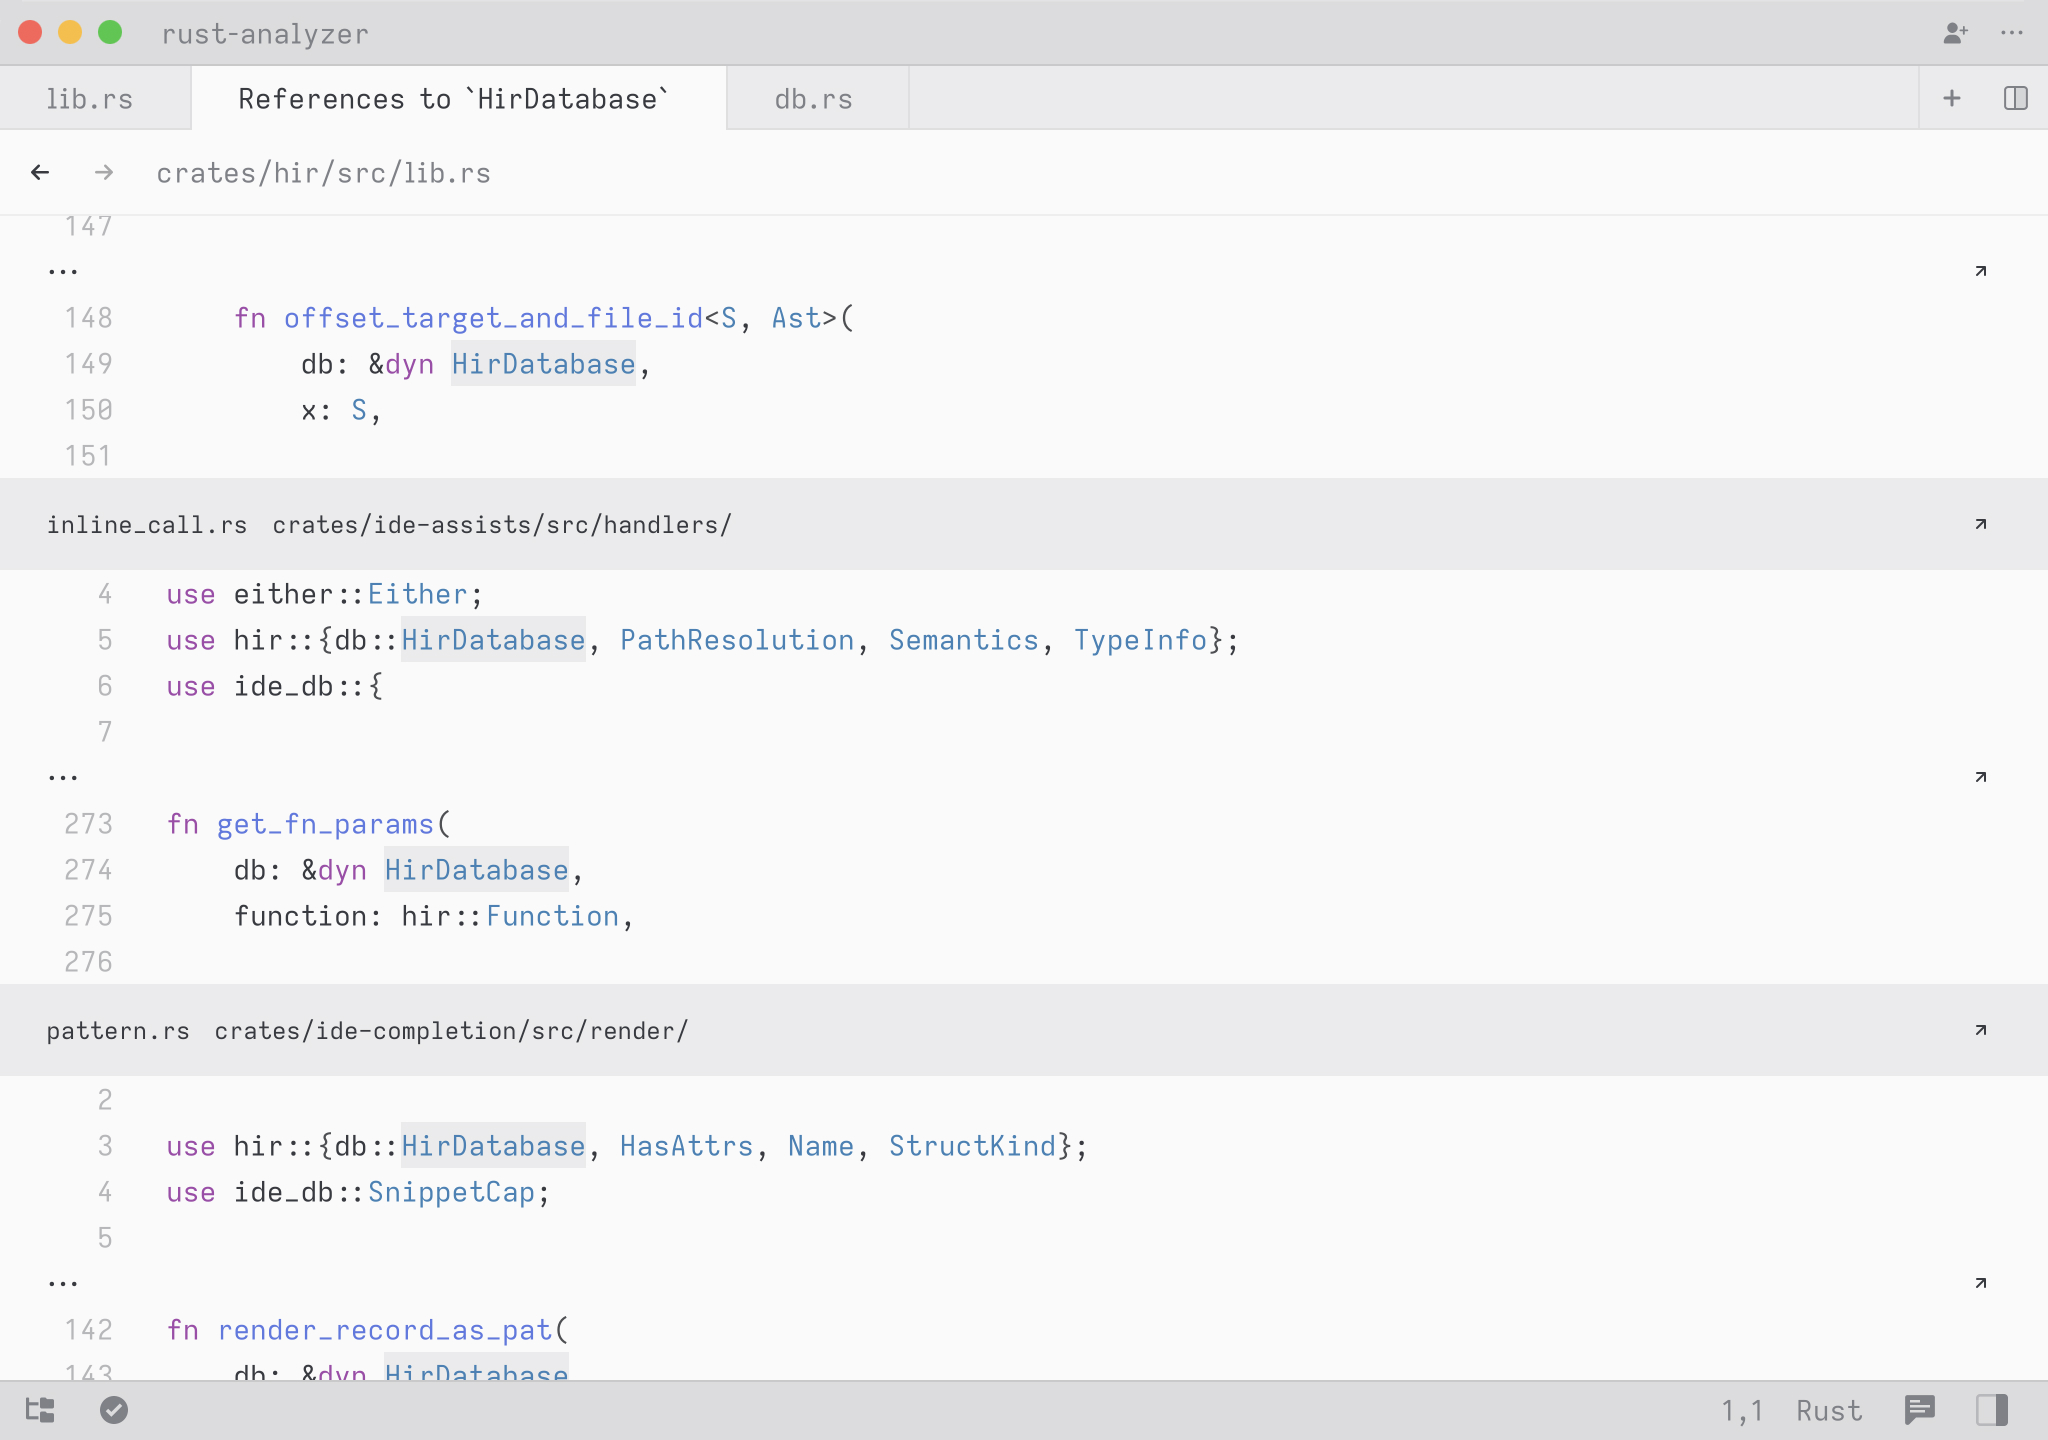
Find all references
To find all references to the symbol under your cursor, press
alt-shift-f12. References will be displayed in a multi-buffer with
excerpts for each occurrence, similar to how project-wide search works.
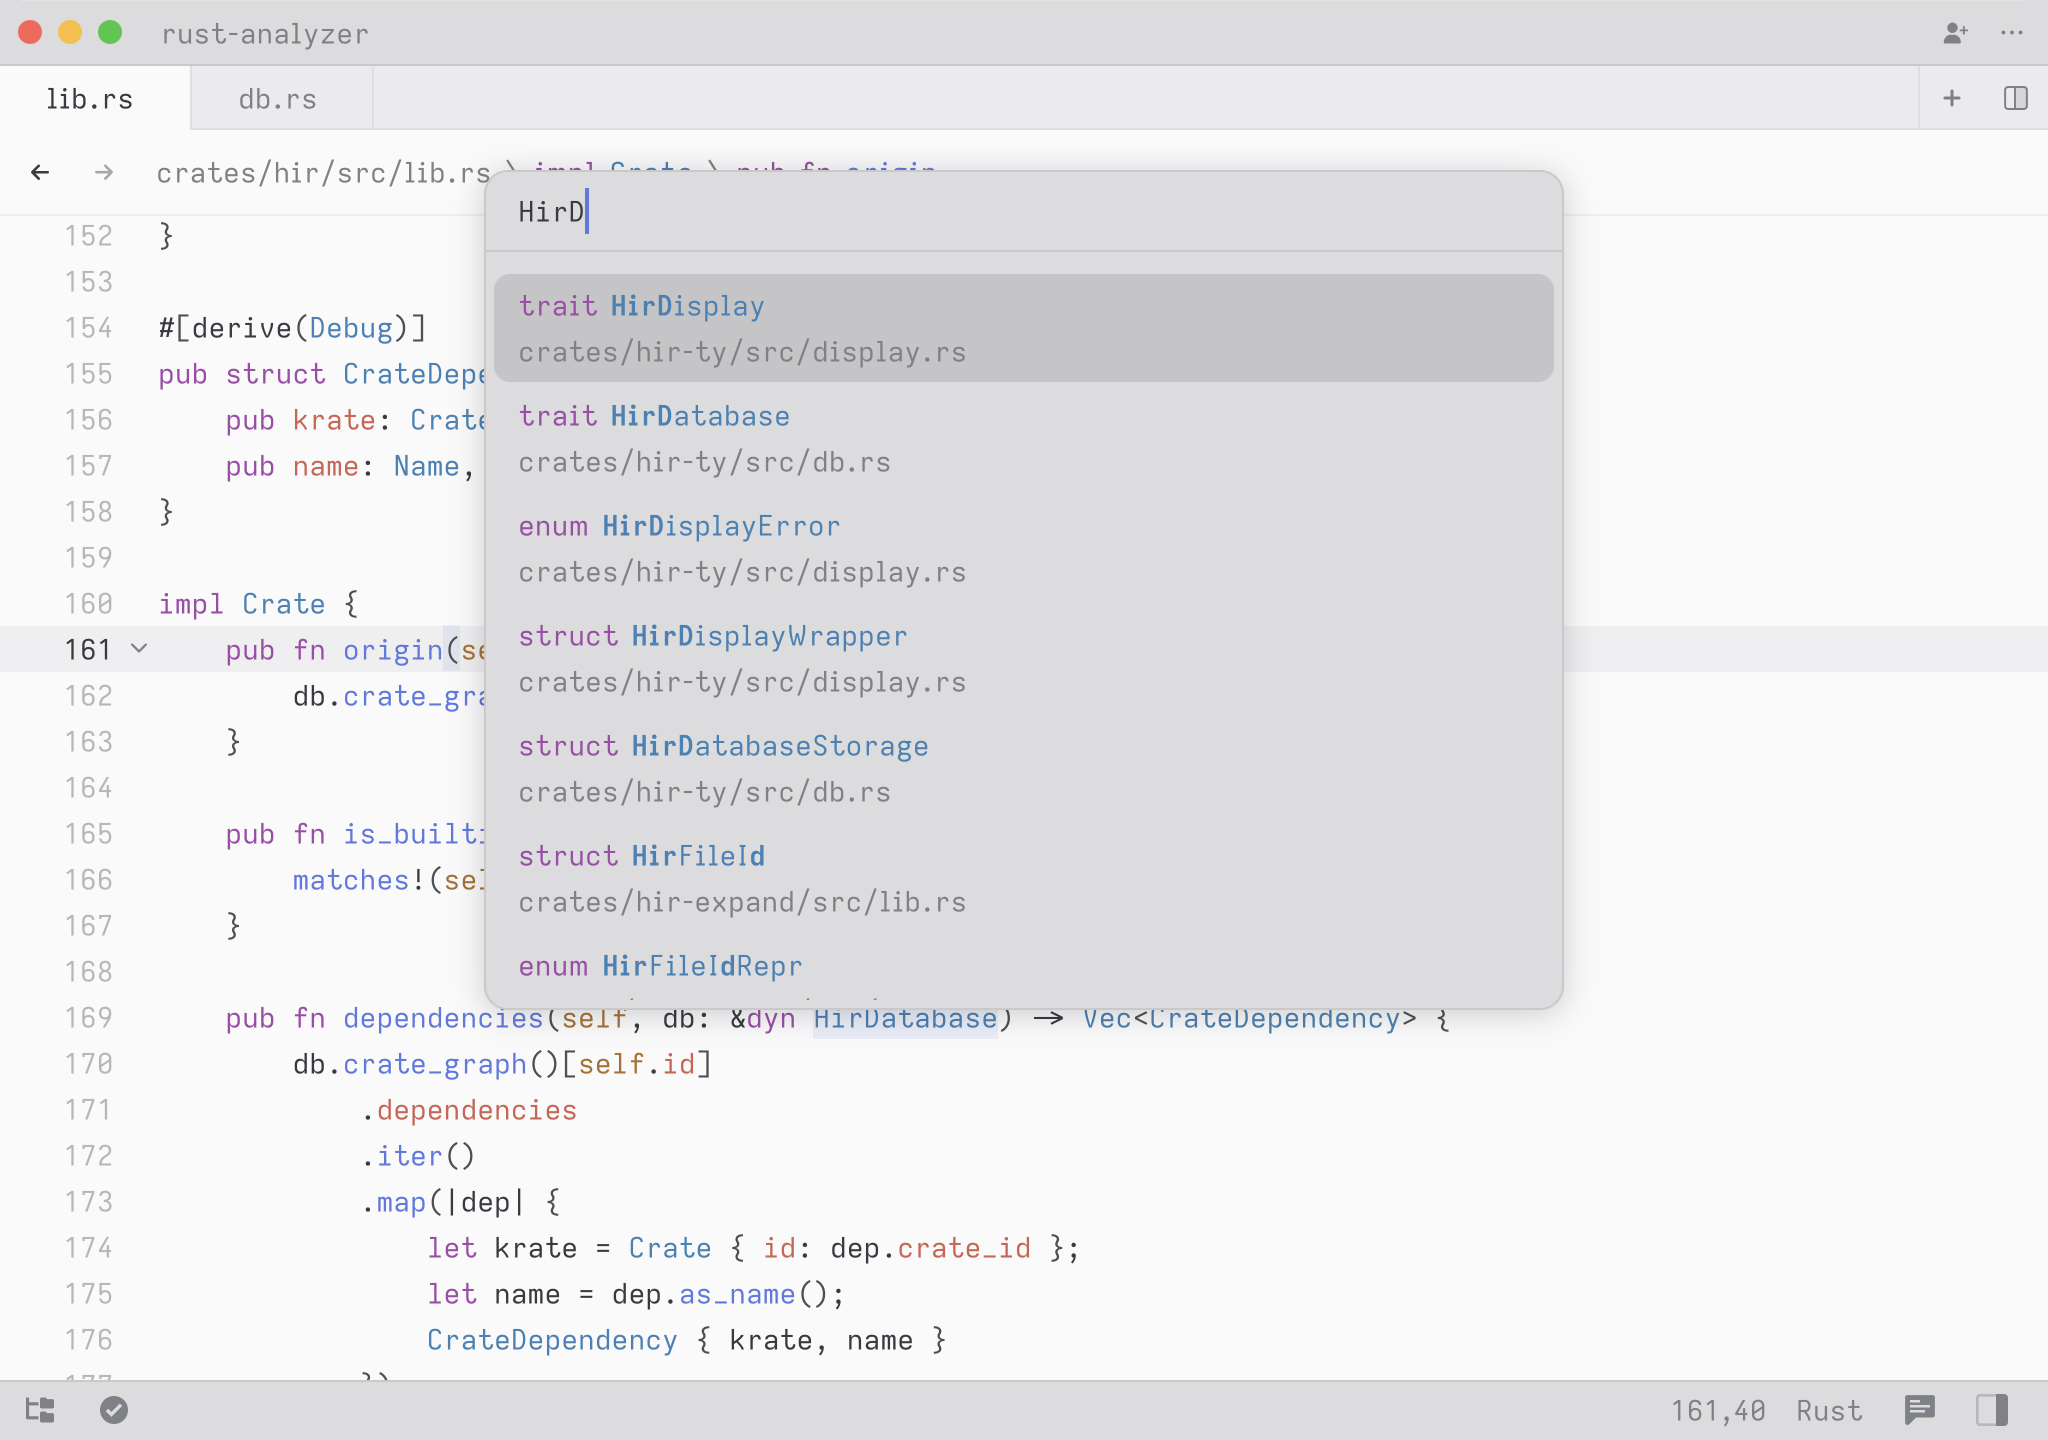
To use the language server to search for a symbol across the project,
press cmd-t.
Buffer Navigation
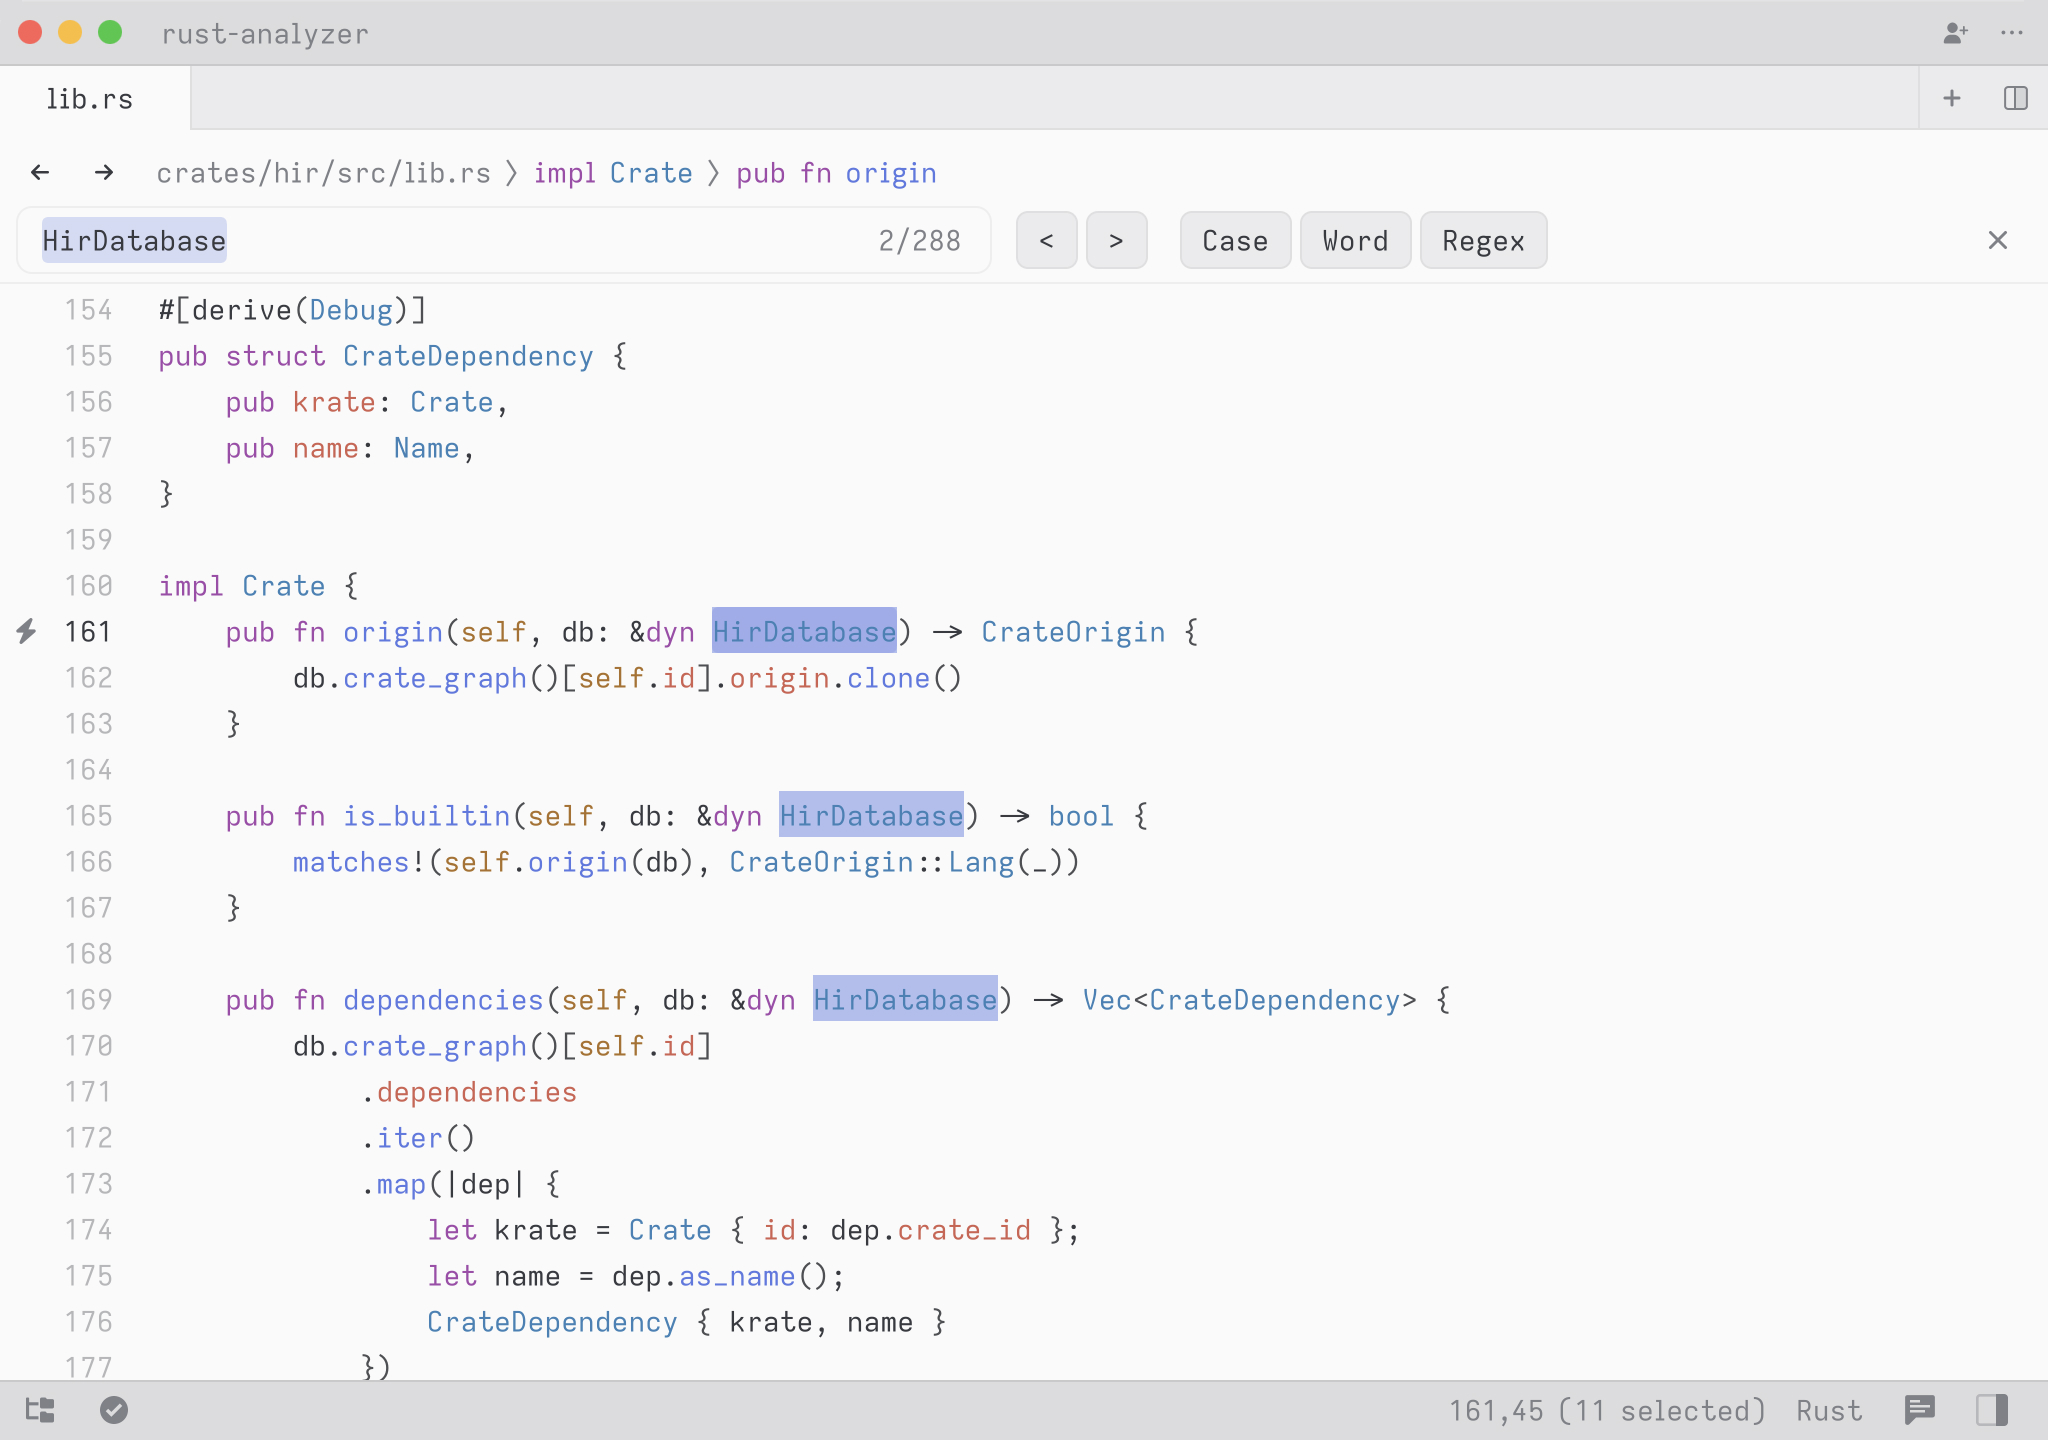
Zed’s find in buffer. Searching for “HirDatabase” inside of the open lib.rs buffer.
There are a few ways to navigate. You can search a buffer with cmd-f,
or open all results for the project in an editable multibuffer with
cmd-shift-f.
You can quickly find a definition in the current file by opening the
outline view with cmd-shift-o. You can also jump to a specific line
with ctrl-g.
Outline View
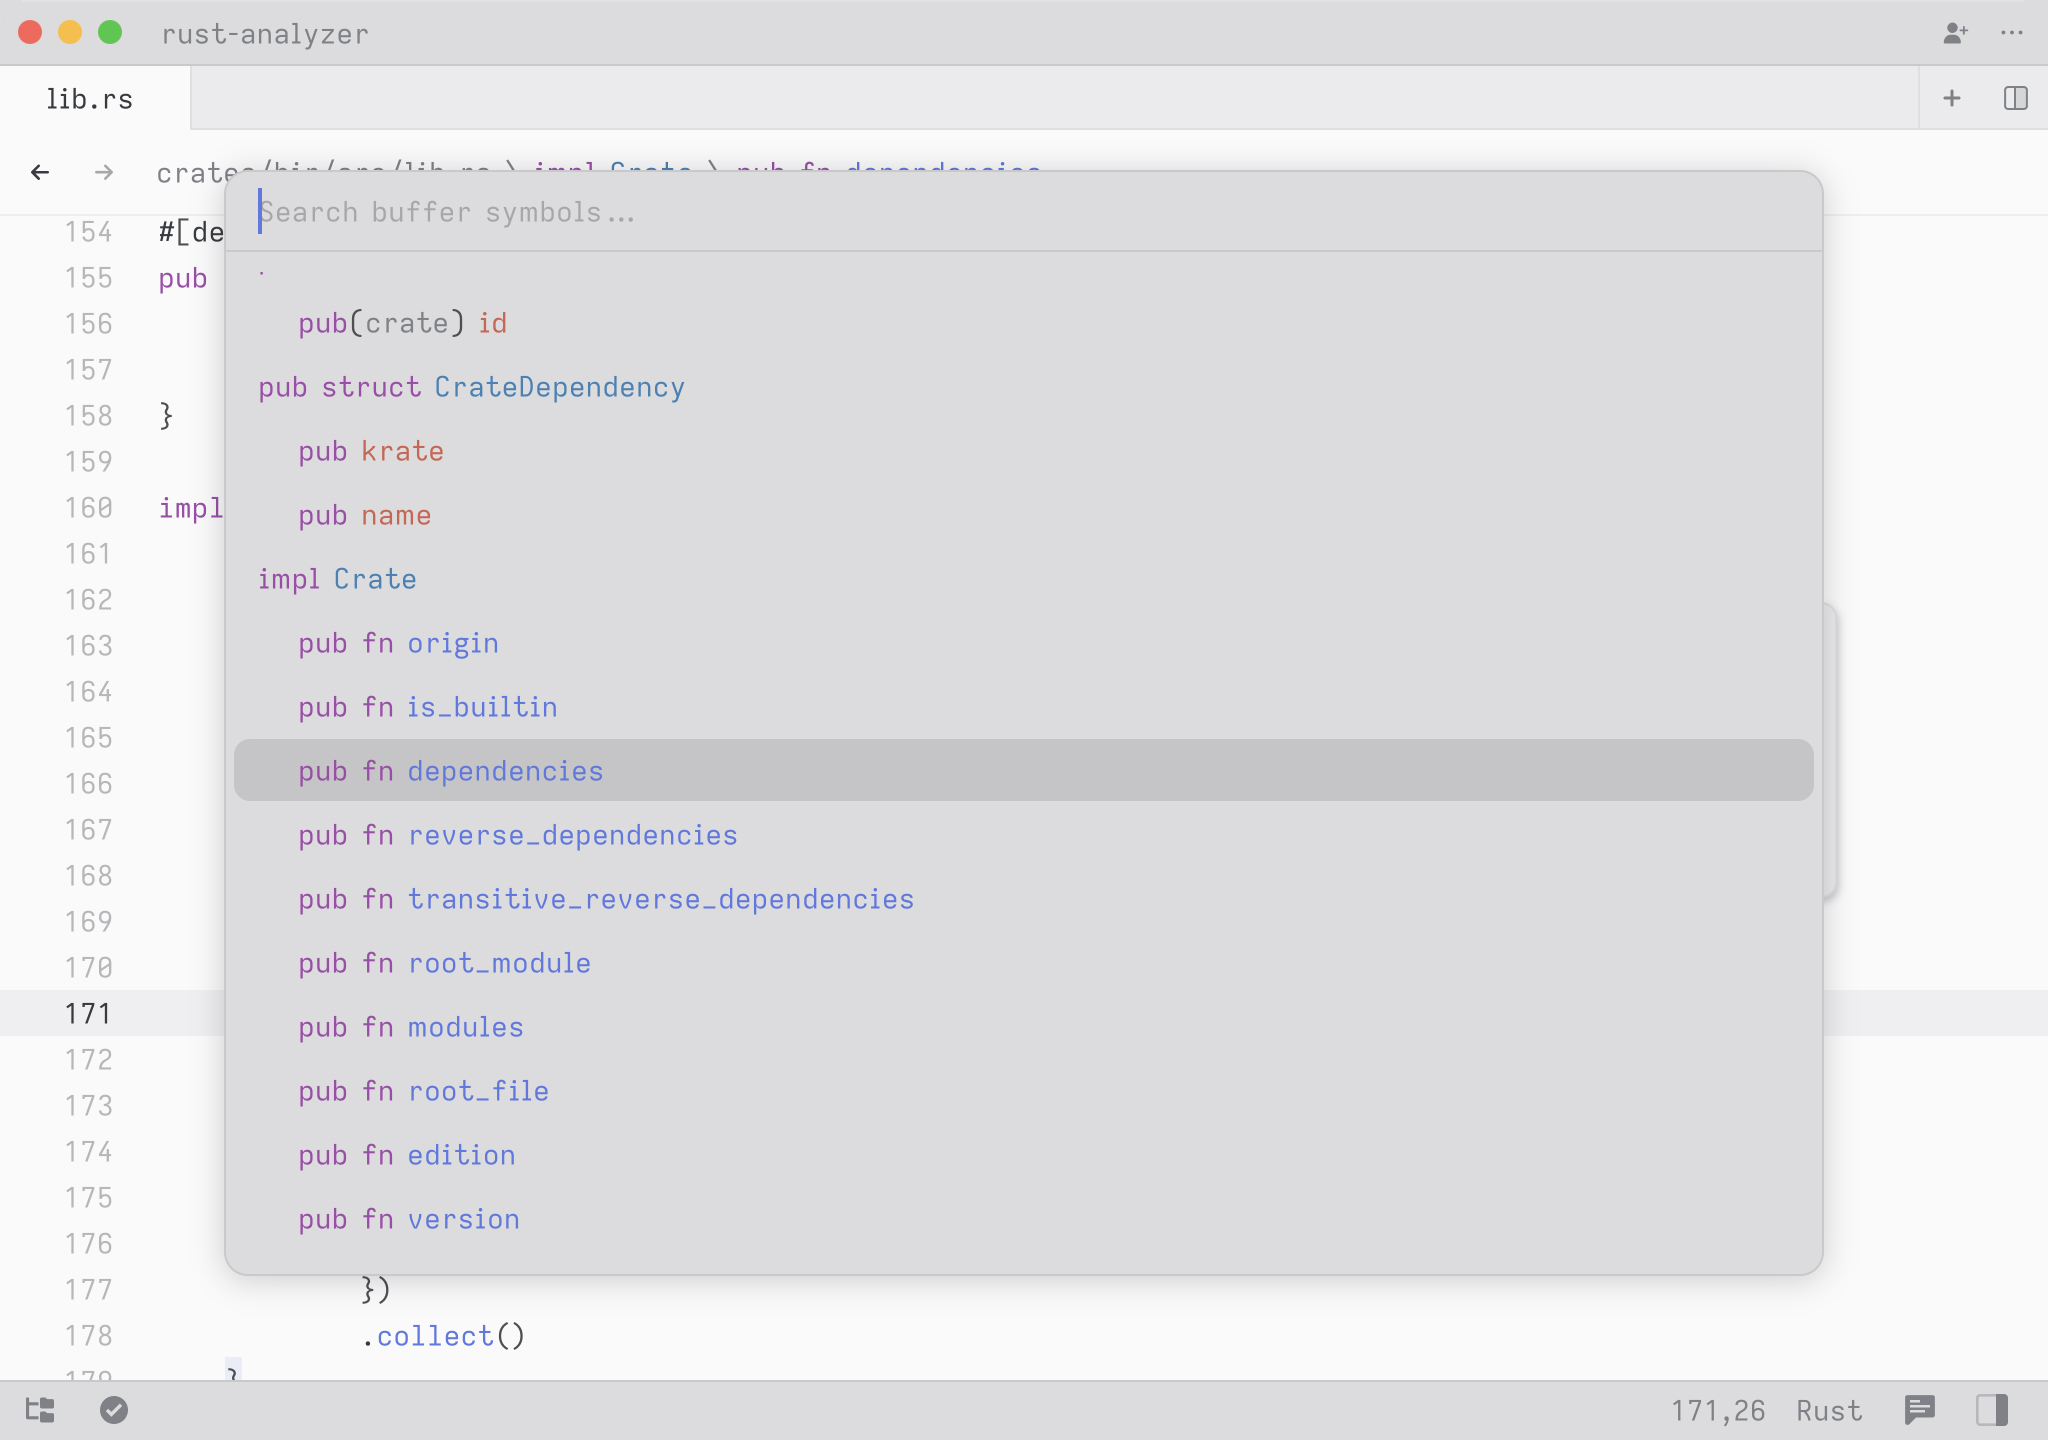
Zed’s outline view open on top of a editor.
The most powerful way to navigate within a buffer is Zed’s outline view.
When you press cmd-shift-O with an editor focused, Zed presents a
summary of the file based on the syntax tree. This is useful in a few
ways.
It can be a good way to understand the layout of a file, which can be helpful when browsing code or when deciding where to insert a new definition. When you first open the outline view, Zed always highlights the entry closest to your current location within the file.
You can also use it to quickly jump to a named definition in a file by fuzzy searching. The file order is preserved, but the best match to your query is automatically selected.
A cool hidden feature is that when your query contains a space, we
expand the search to match on contextual keywords. So in Rust, you could
type select to search for any definition whose names matches the word
select. But you could type pub fn select to search all public
methods or functions matching the word select. You could also type
pub fn to simply see all public functions or struct to see all
struct definitions.
Project Browser
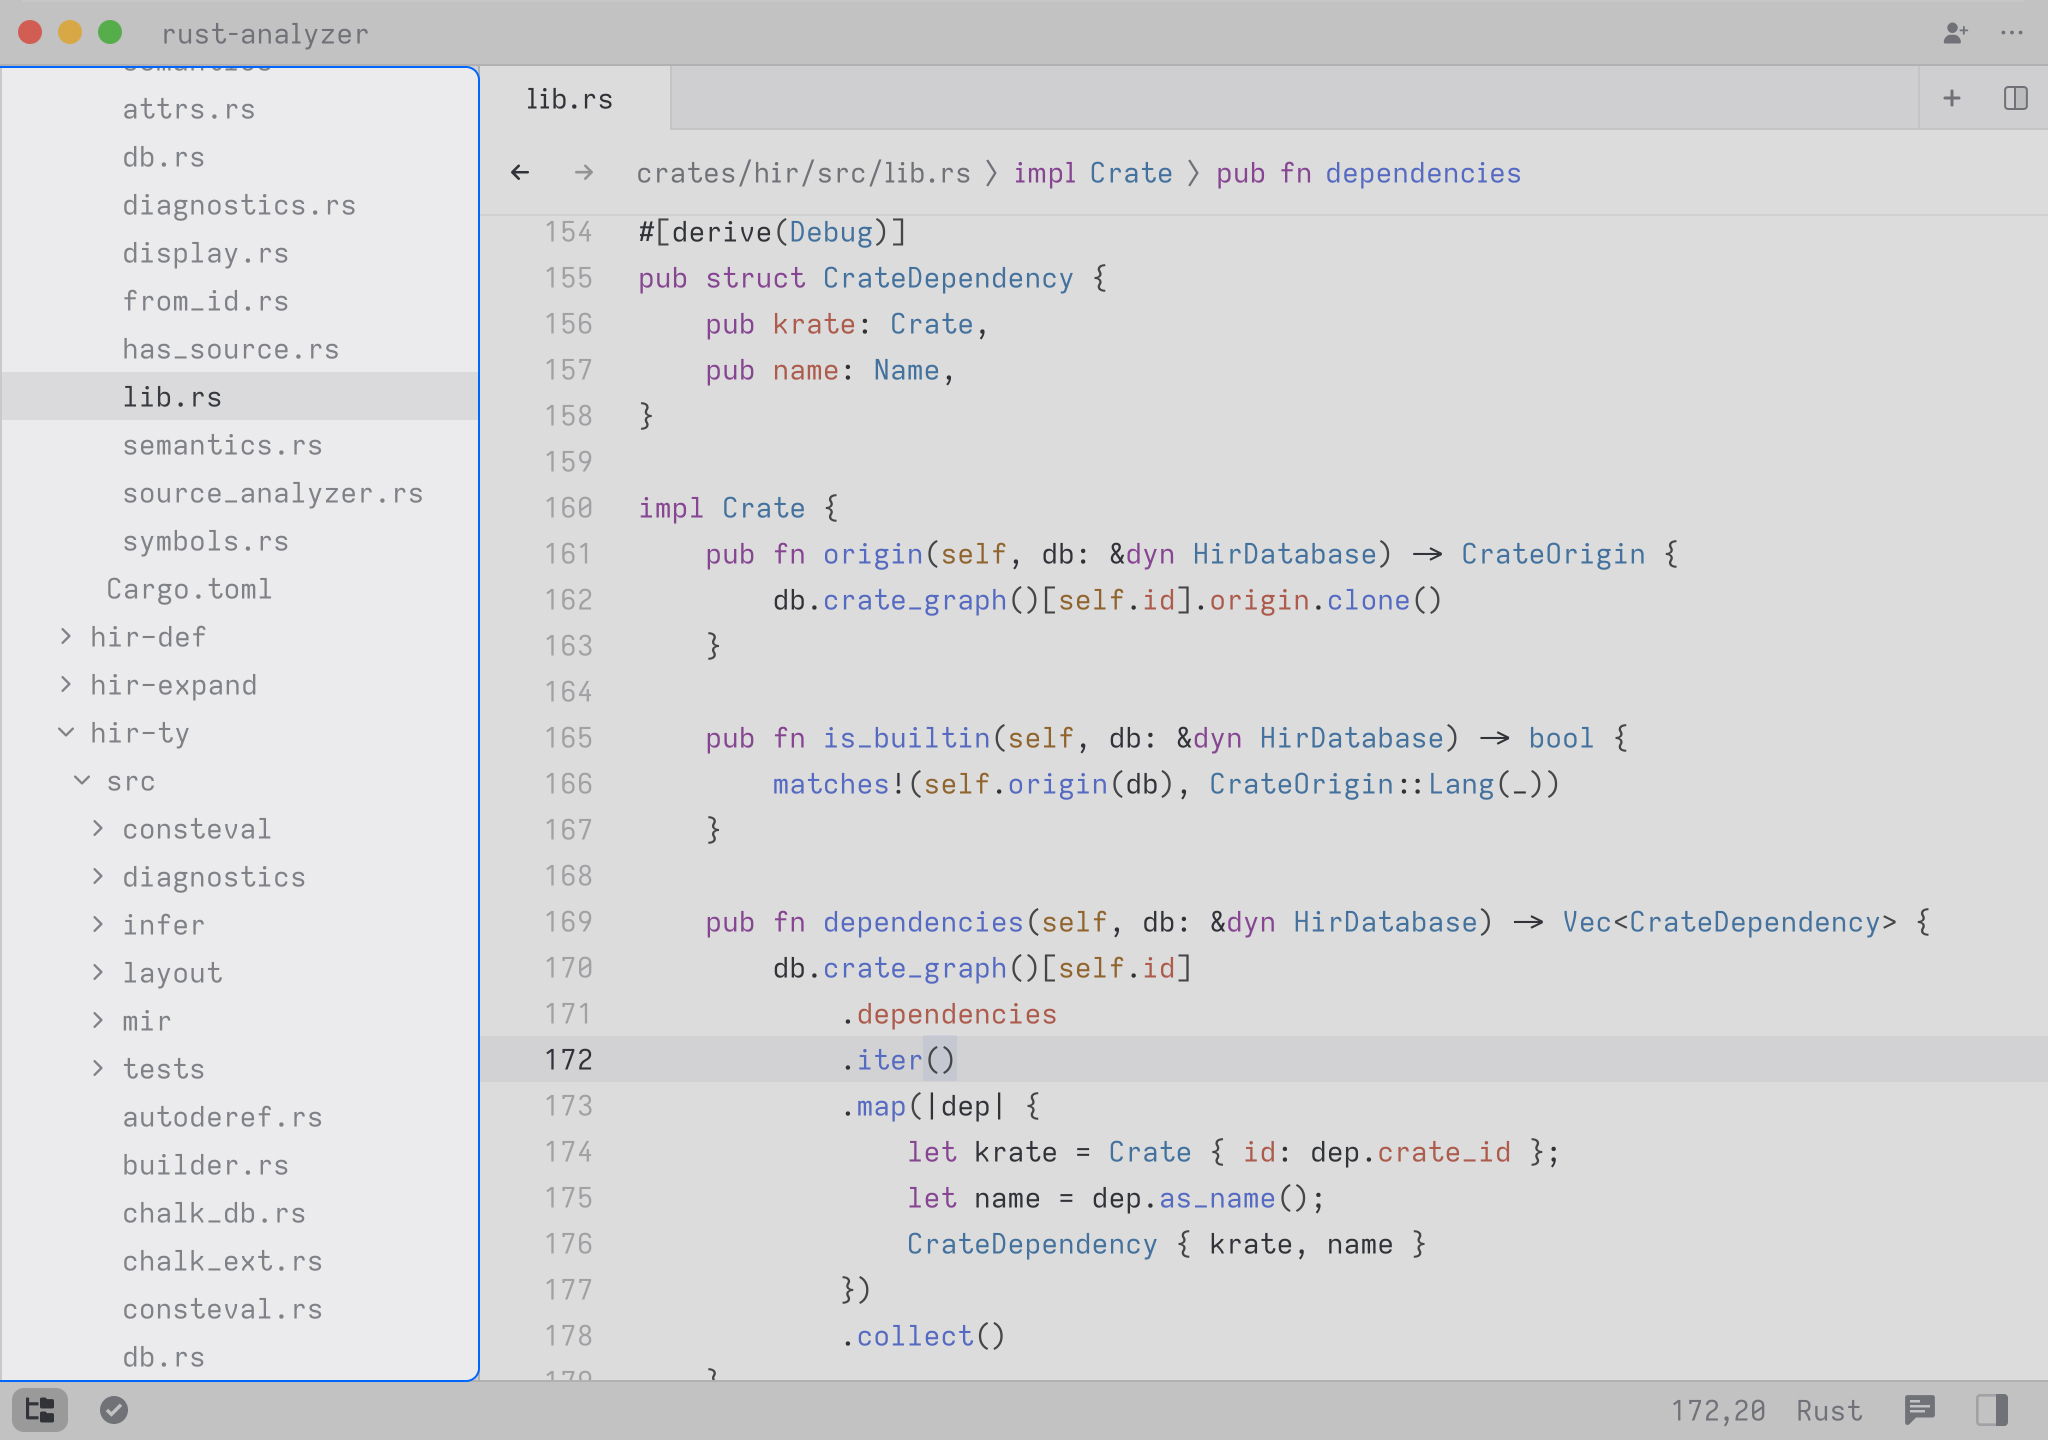
The project browser panel, a panel on the left side of that app that contains a tree view for each folder added to the project.
The project browser is the panel at the left that displays the contents
of your project as directory trees. You can toggle focus to and from the
project browser with cmd-shift-e. You can toggle its visibility with
cmd-b. It can also be toggled with the file tree icon in the lower
left corner of the workspace.
Every Zed window corresponds to a project, and you can add multiple folders or even individual files to a project. Project-wide interactions apply to all folders that you add.
For now, projects aren’t persistent. Once you close the window, your project disappears.
Project-Wide Search
Search your entire project with cmd-shift-f. This pulls up a dedicated
tab in which to search and display your results. You can make your
search case-sensitive, regular-expression-based, and apply to whole
words only. We don’t yet support restricting the search to specific
paths.
To create multiple project searches, confirm your search query with
cmd-enter instead of enter. This will open the results of this new
search as an additional tab and leave the old results tab in place.
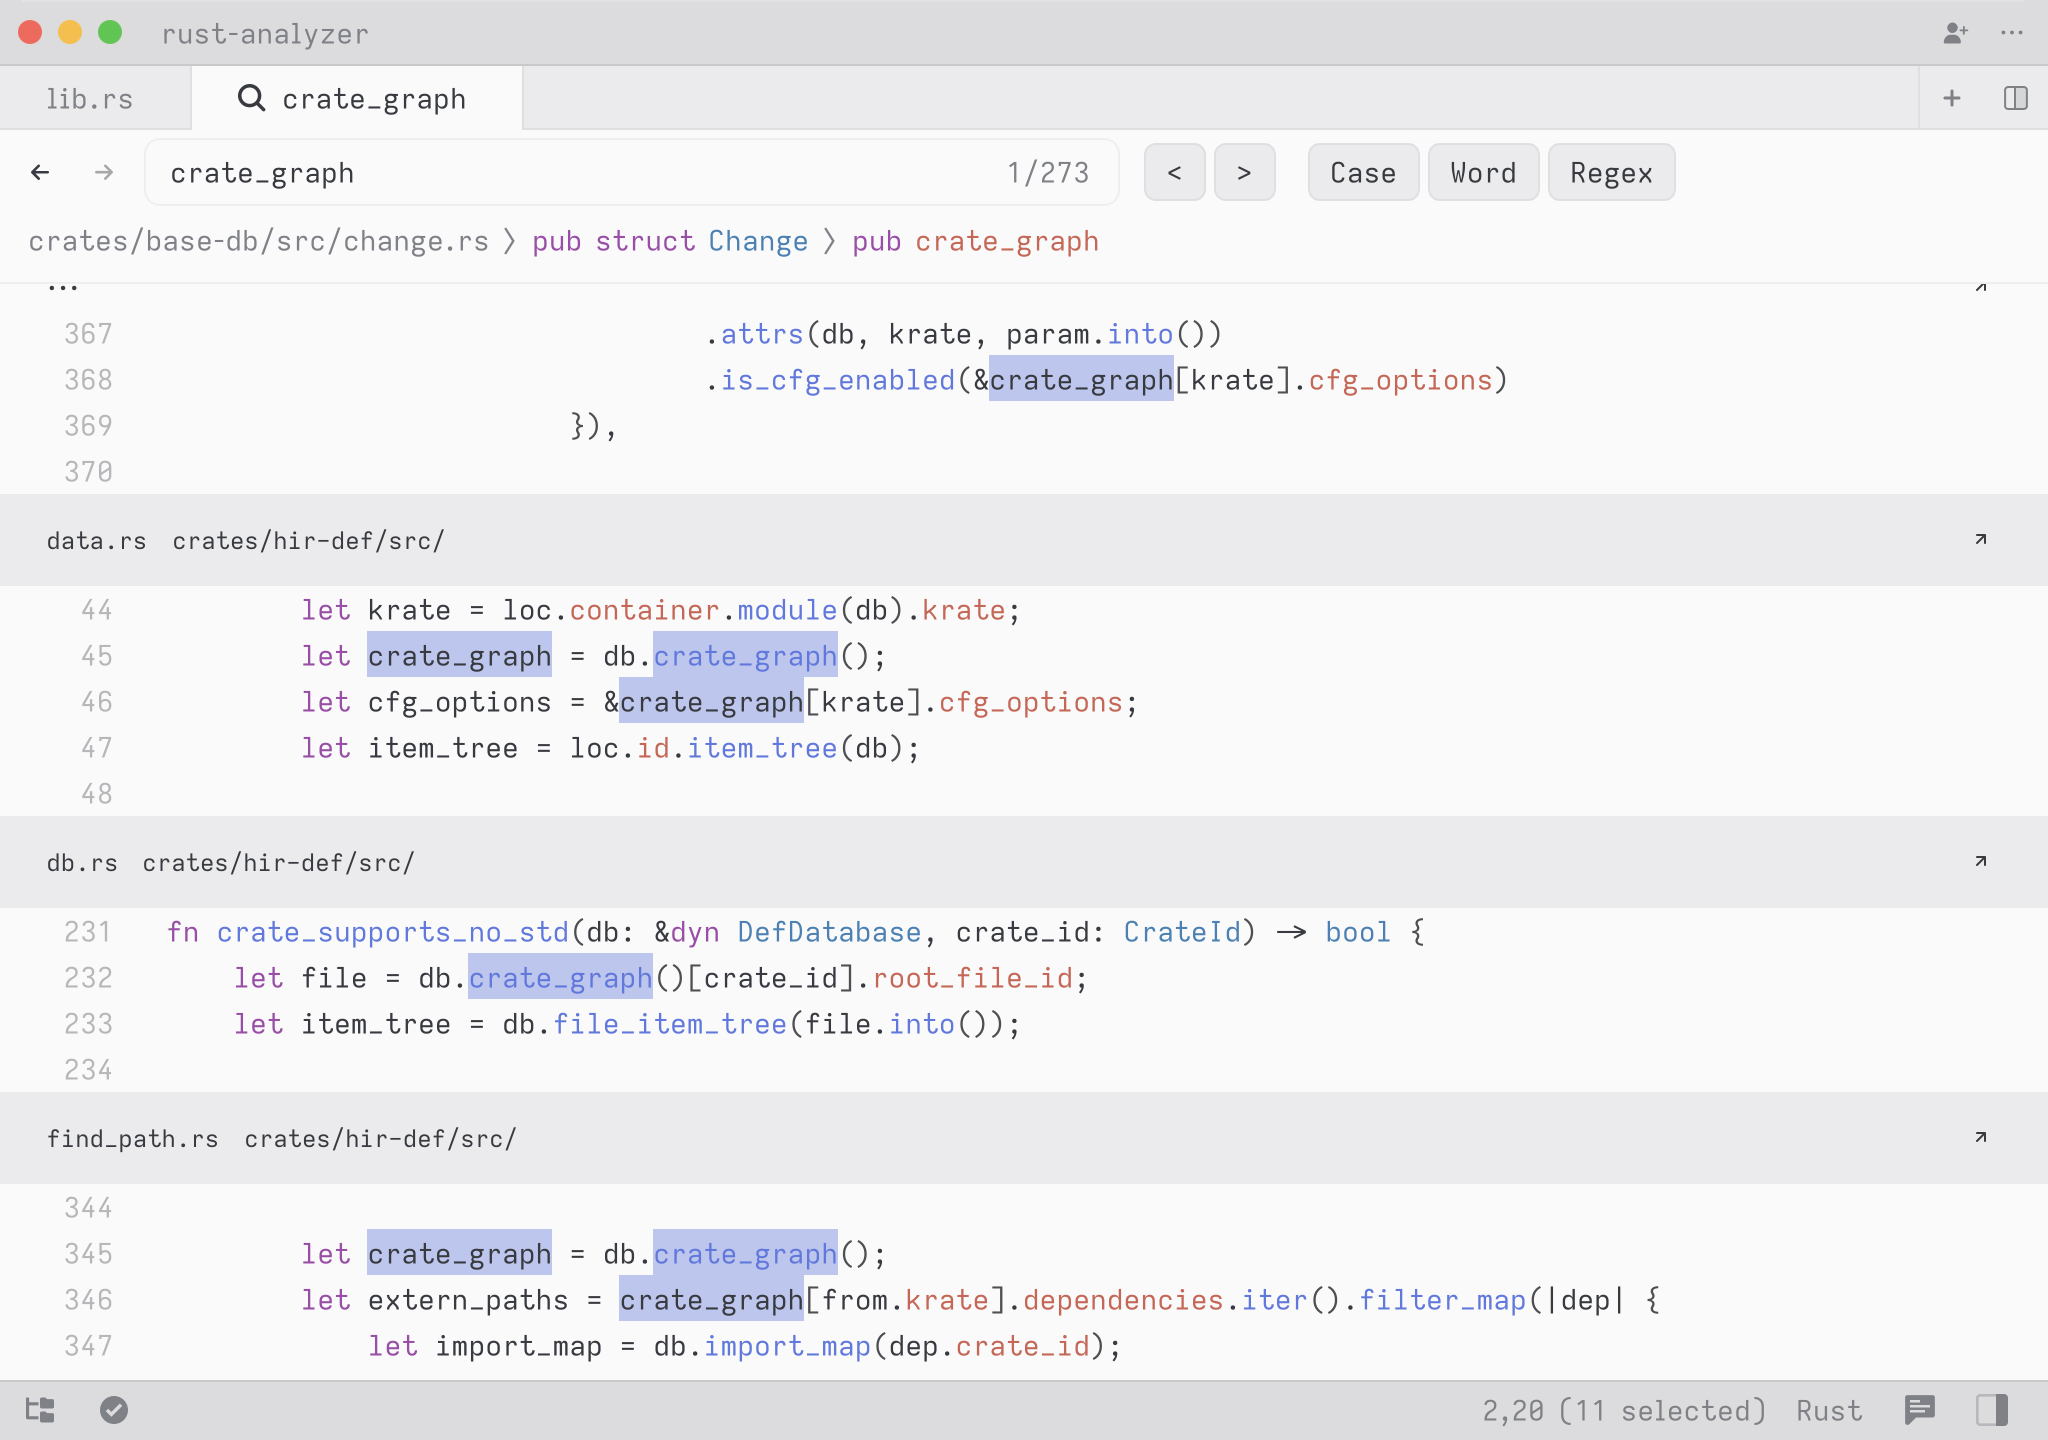
Zed’s project-wide search, a dedicated multi-buffer pane to show search results across the entire project.
Search results are presented in a multi-buffer, which is one of Zed’s unique features.
Rename Refactoring
To perform a rename refactoring, place your cursor on the symbol you’d
like to rename and press f2.
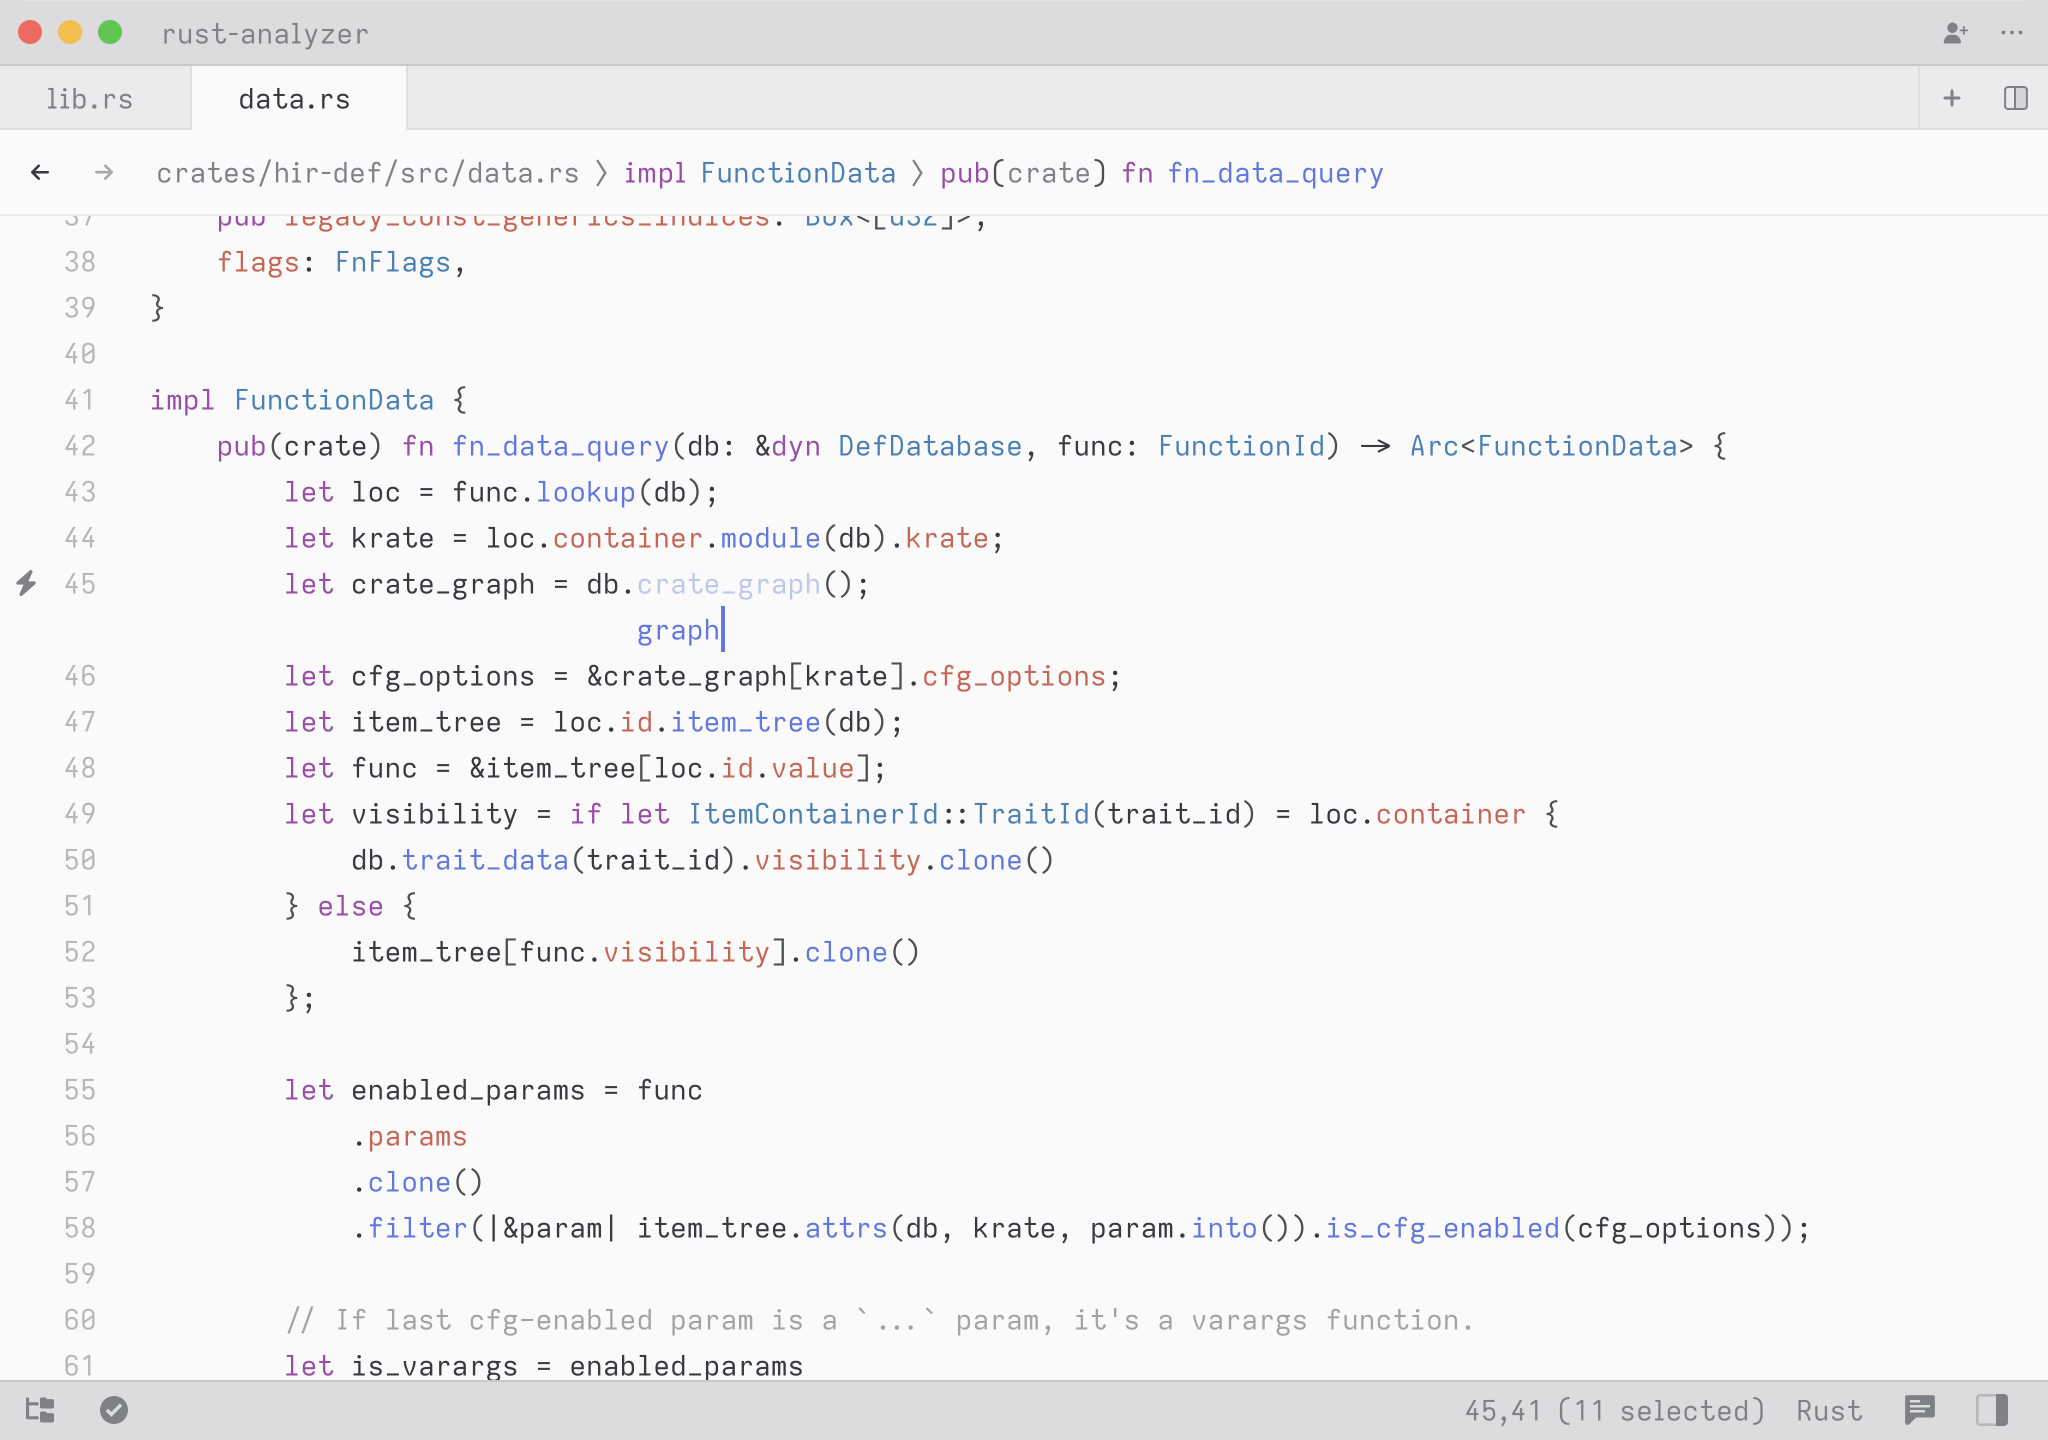
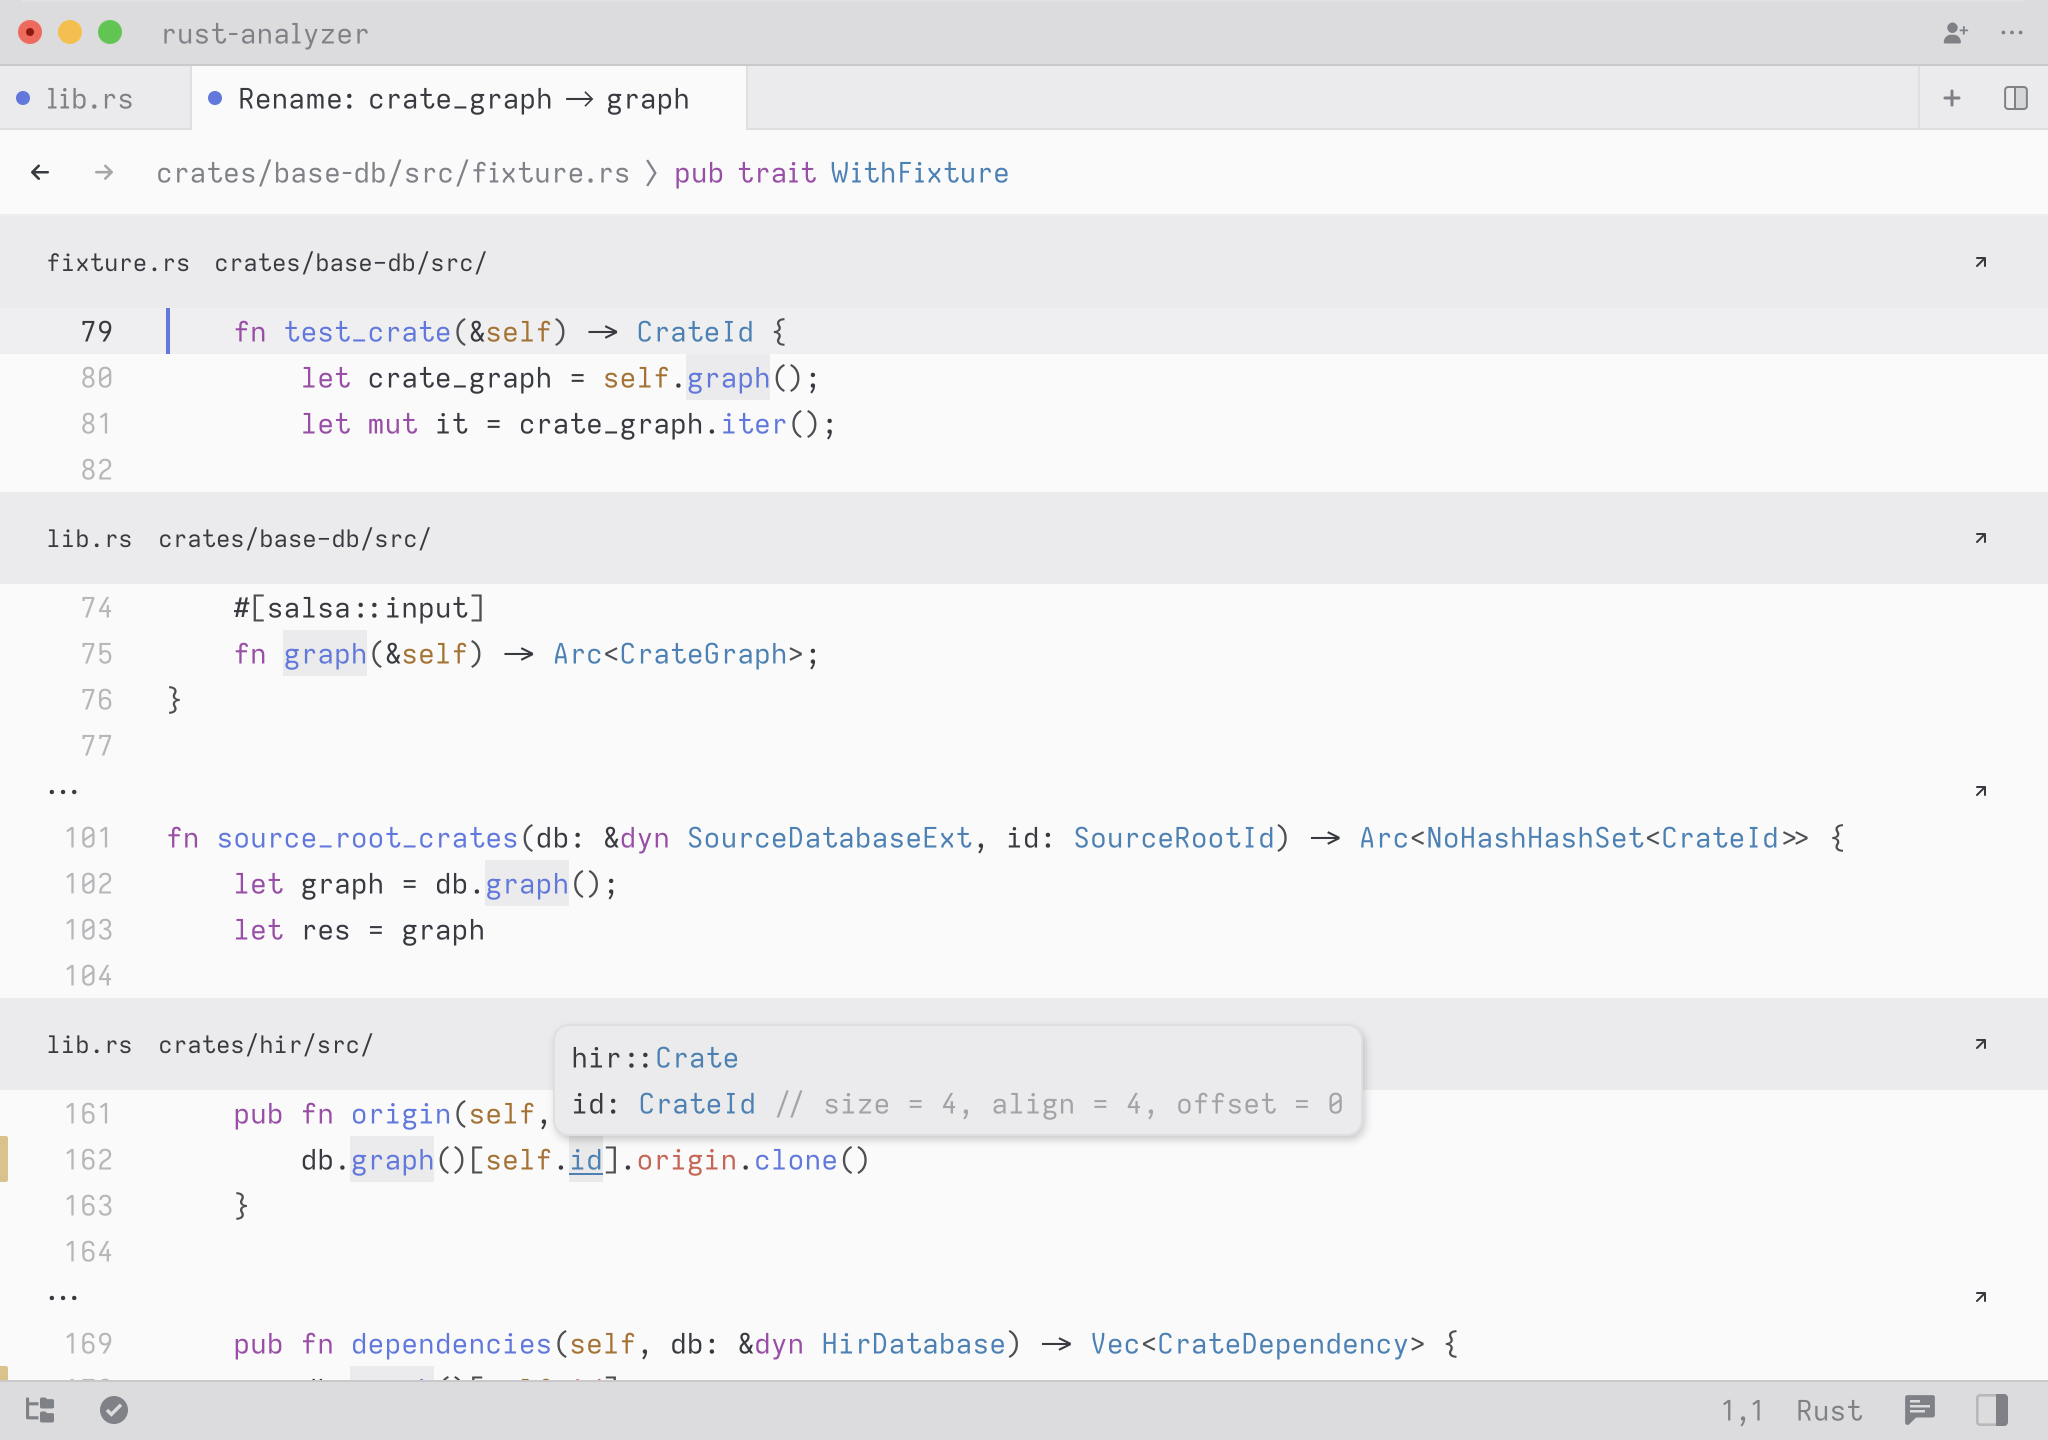
If the rename impacts multiple files, you’ll see the results in a multi-buffer.
Splitting Panes
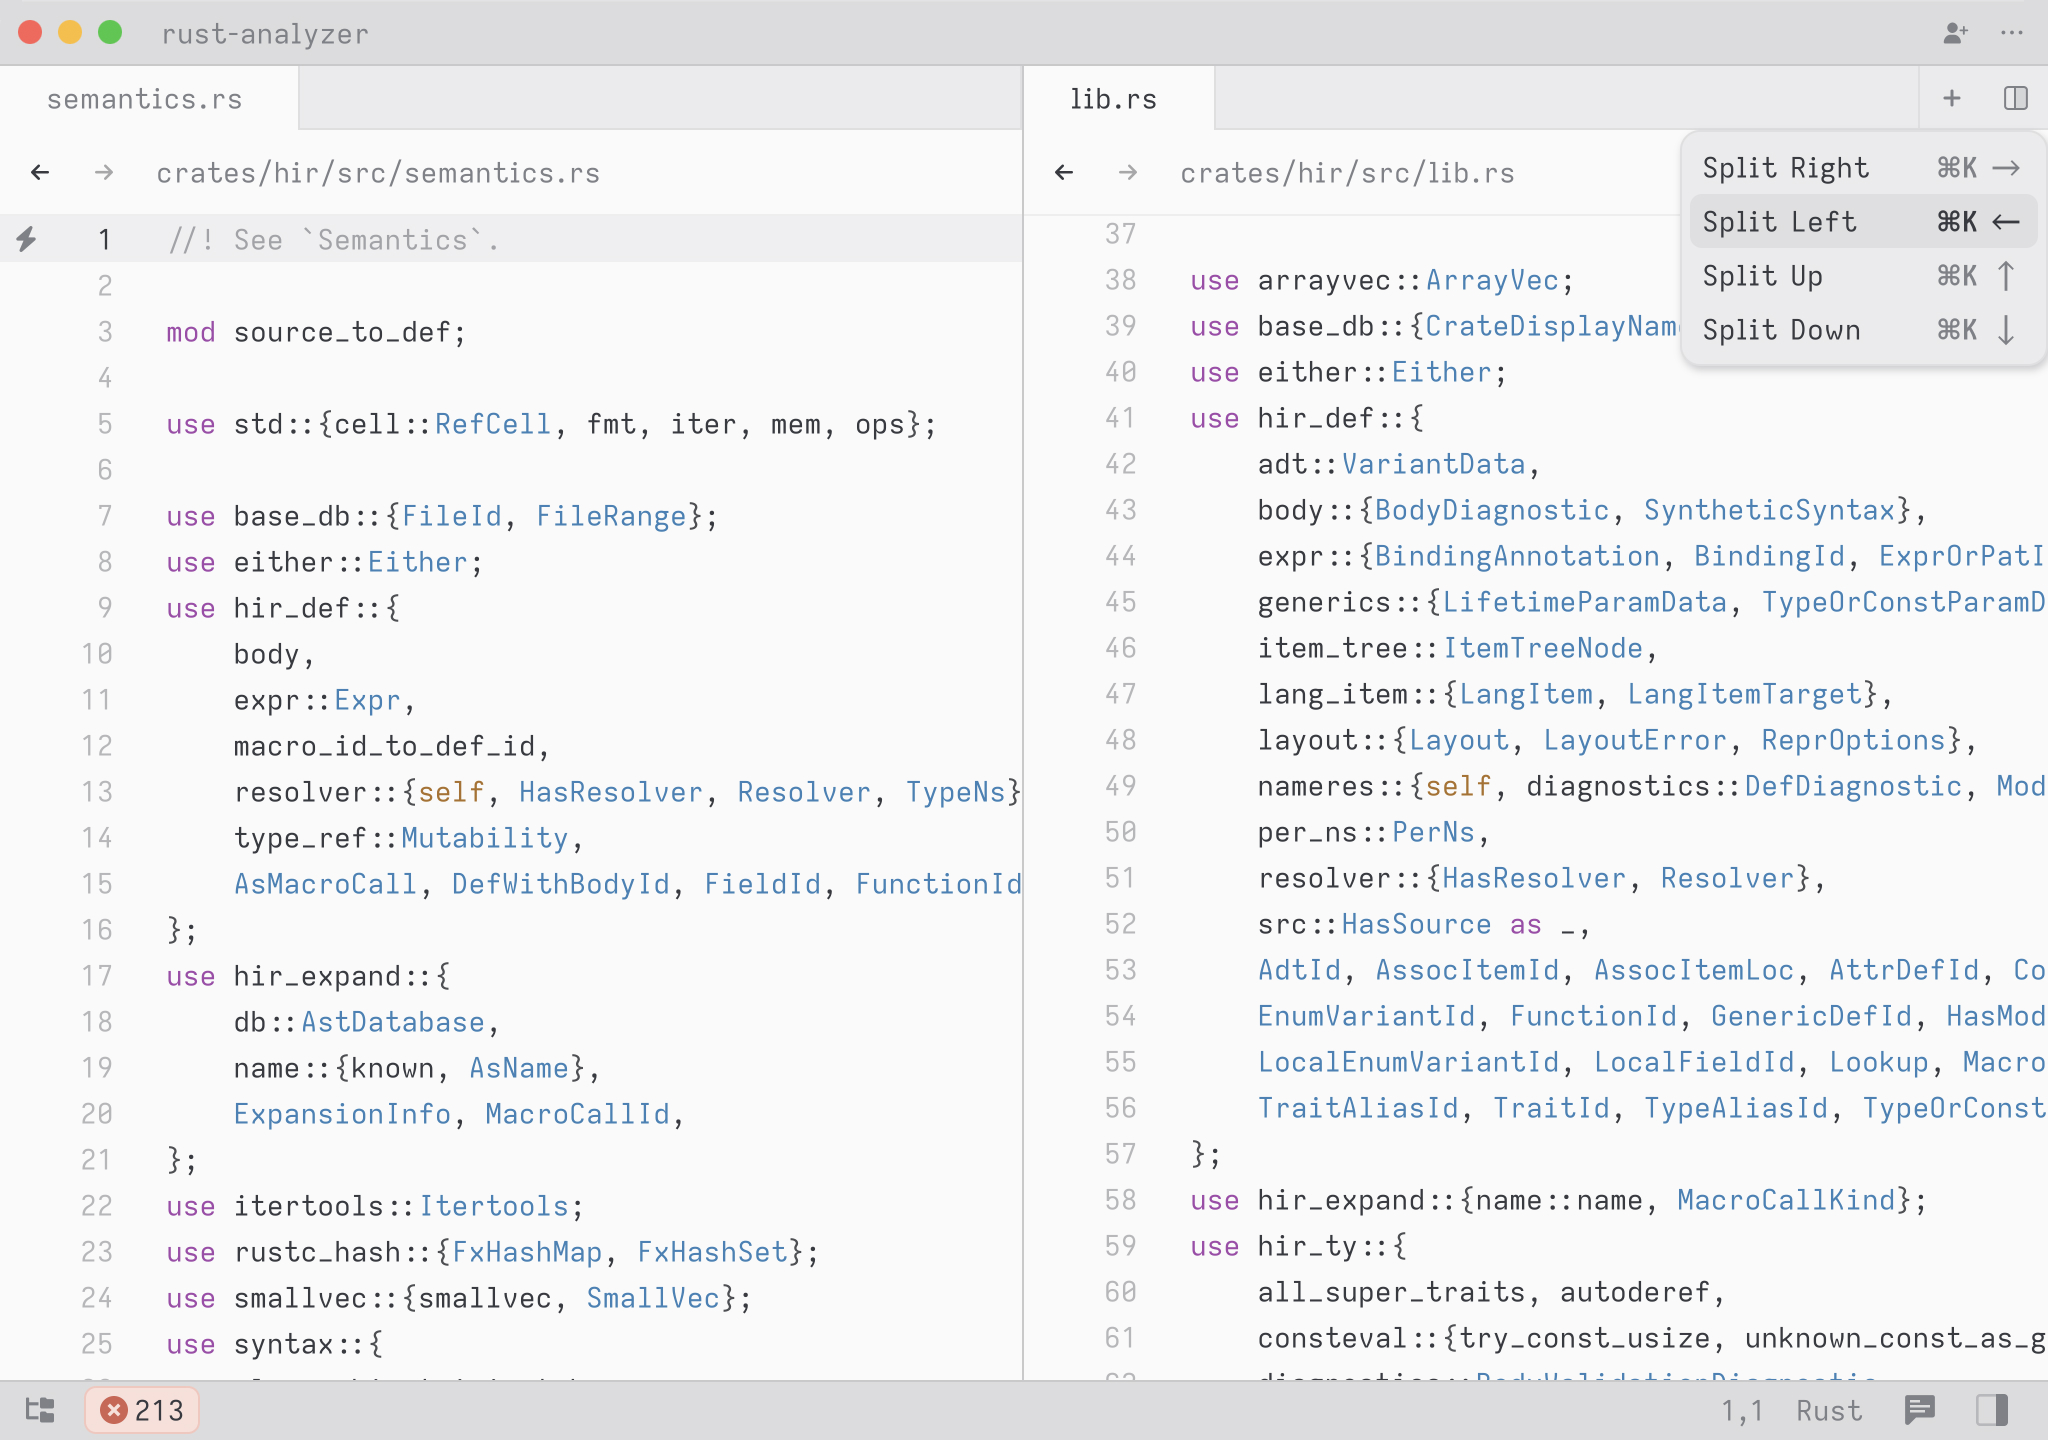
Two buffers split across two panes.
To split a pane, press cmd-k followed by an arrow the direction you
want to split. So to split the current tab to the right, it’s
cmd-k right. To cycle focus among different panes, press
cmd-k cmd-right to cycle forwards or cmd-k cmd-left to cycle
backwards.
You can adjust the size of the panes by dragging the divider to the left or right. Double-clicking on the divider will reset the split, distributing the space evenly between the panes.
Integrated Terminal
Zed comes with an integrated terminal emulator that uses Alacritty as its backend.
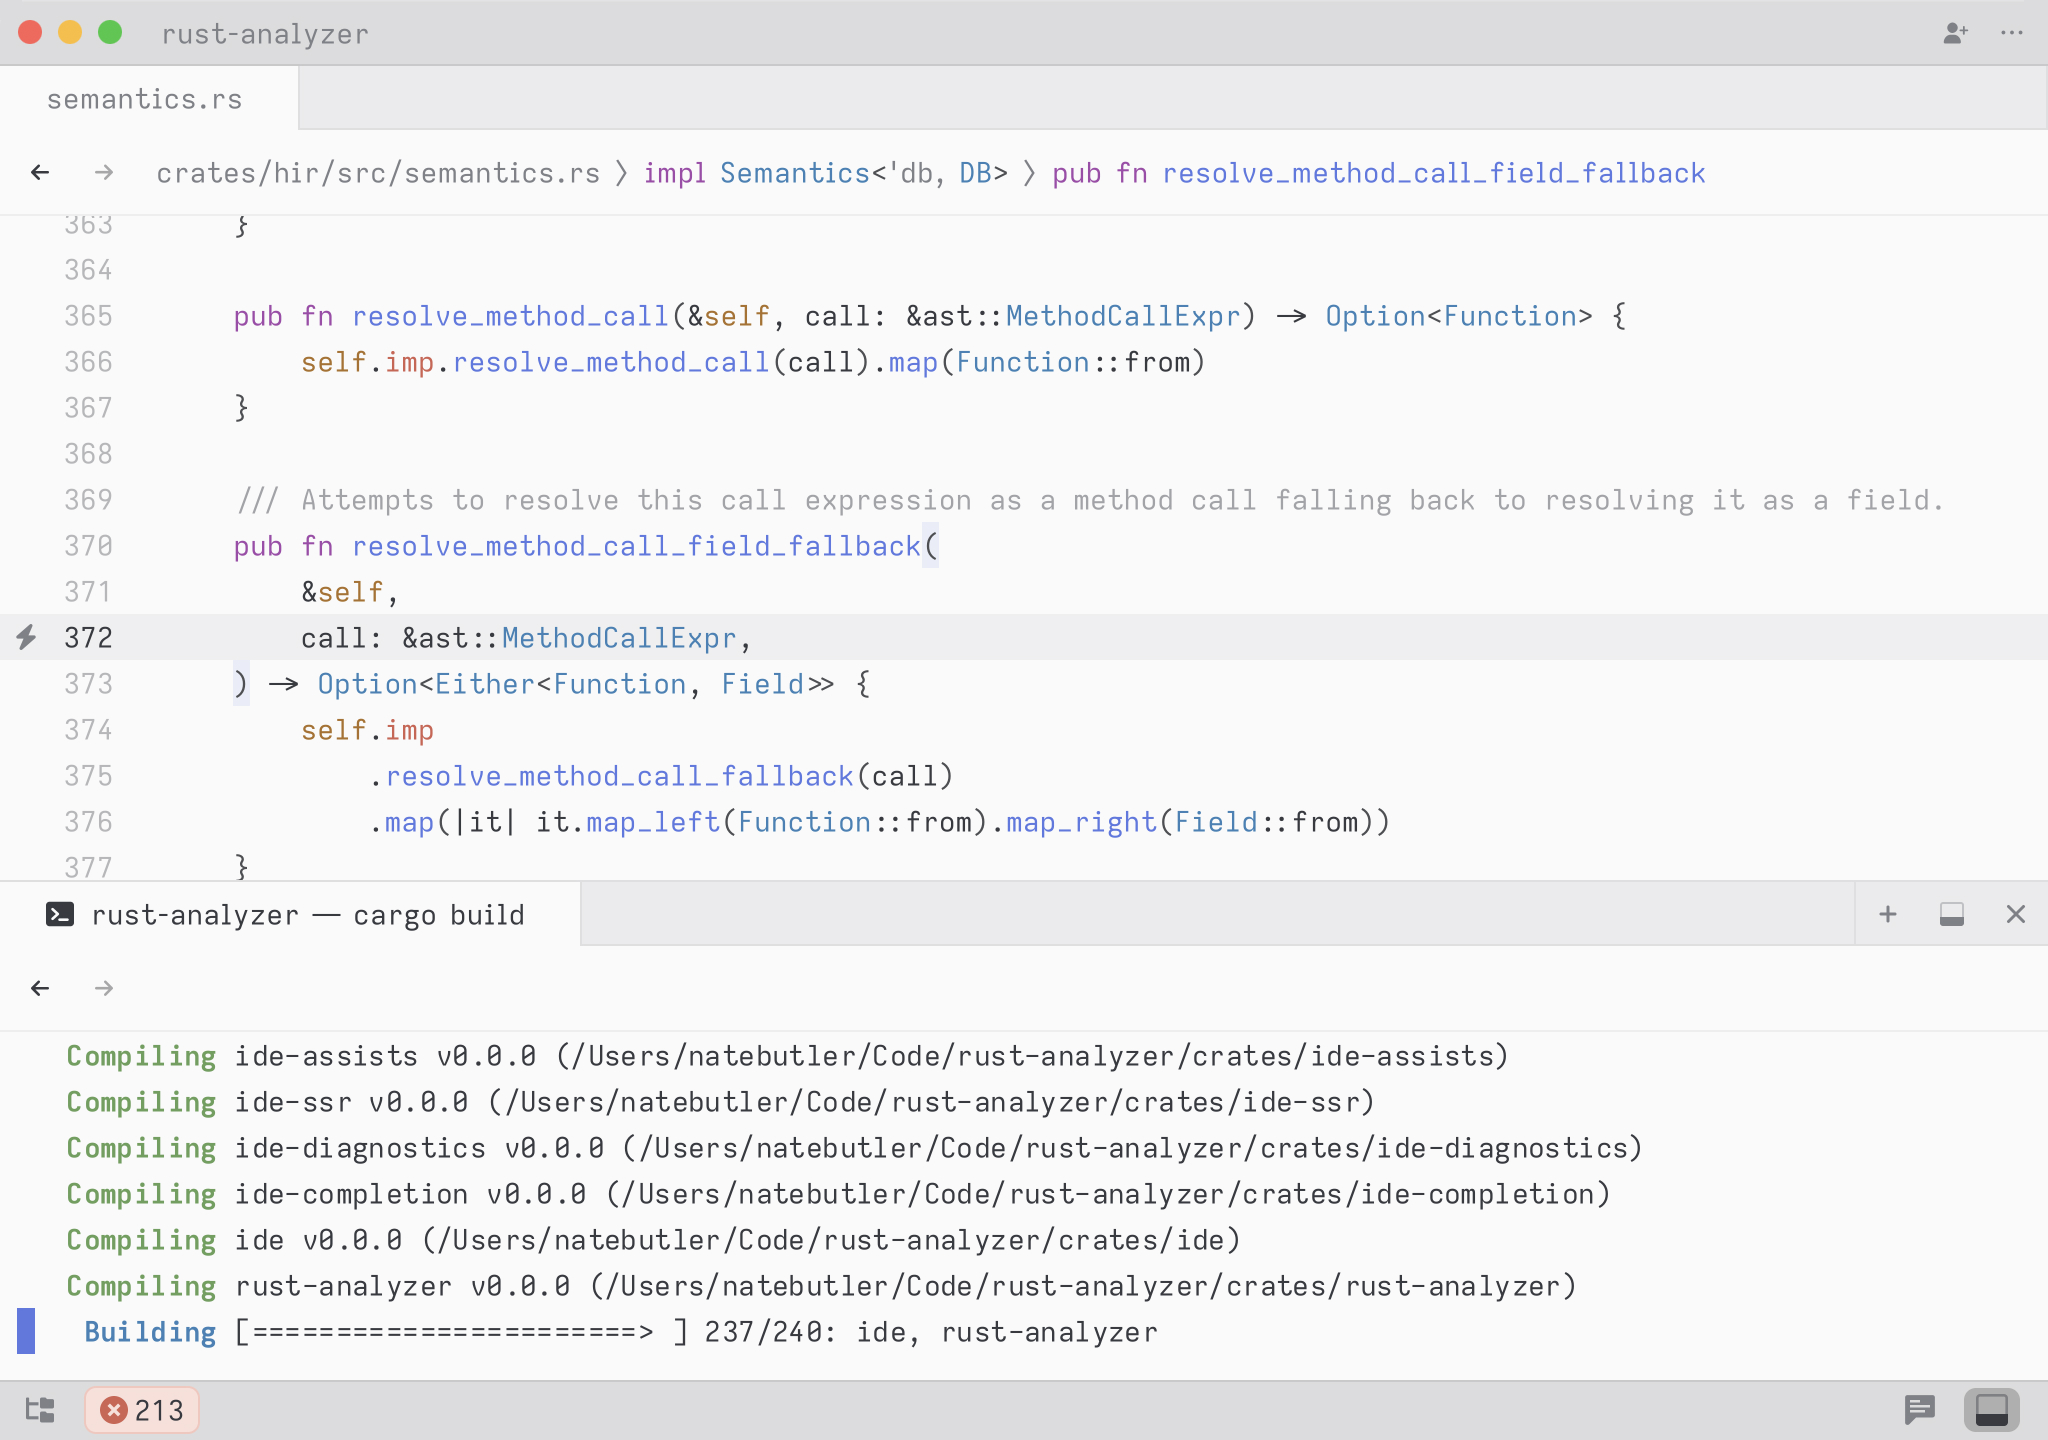
You can open the terminal with ctrl-` or by clicking the + icon on the right side of the tab bar.
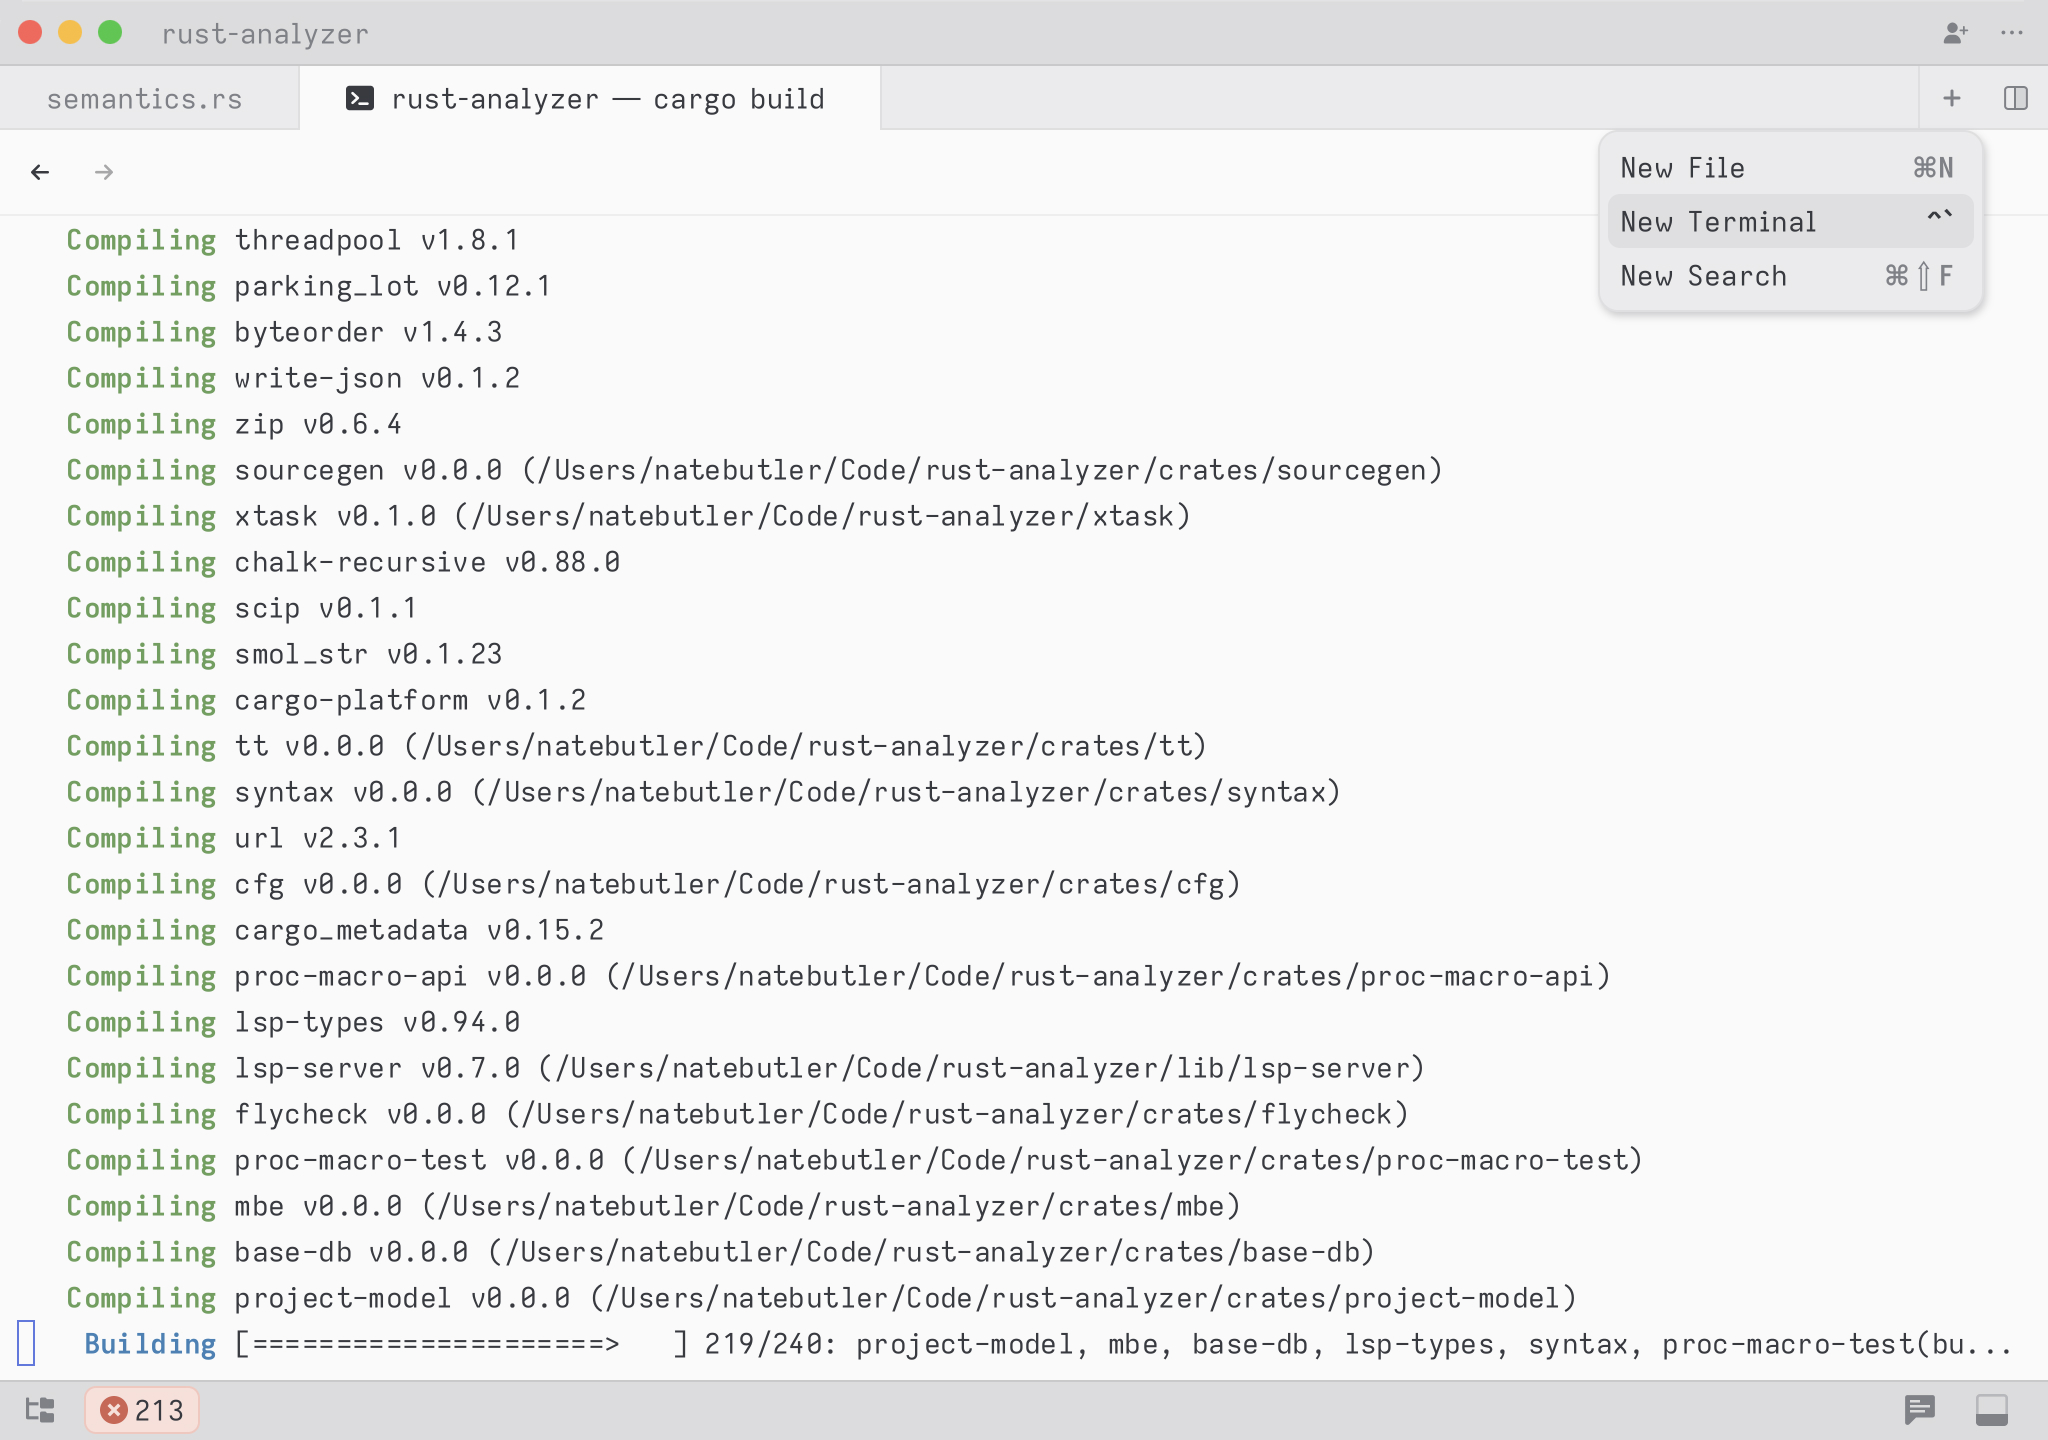
Terminals can also be created and used anywhere a buffer tab can.
Themes
Zed ships with a number of common editor themes. Themes will continue to be added to and improved.
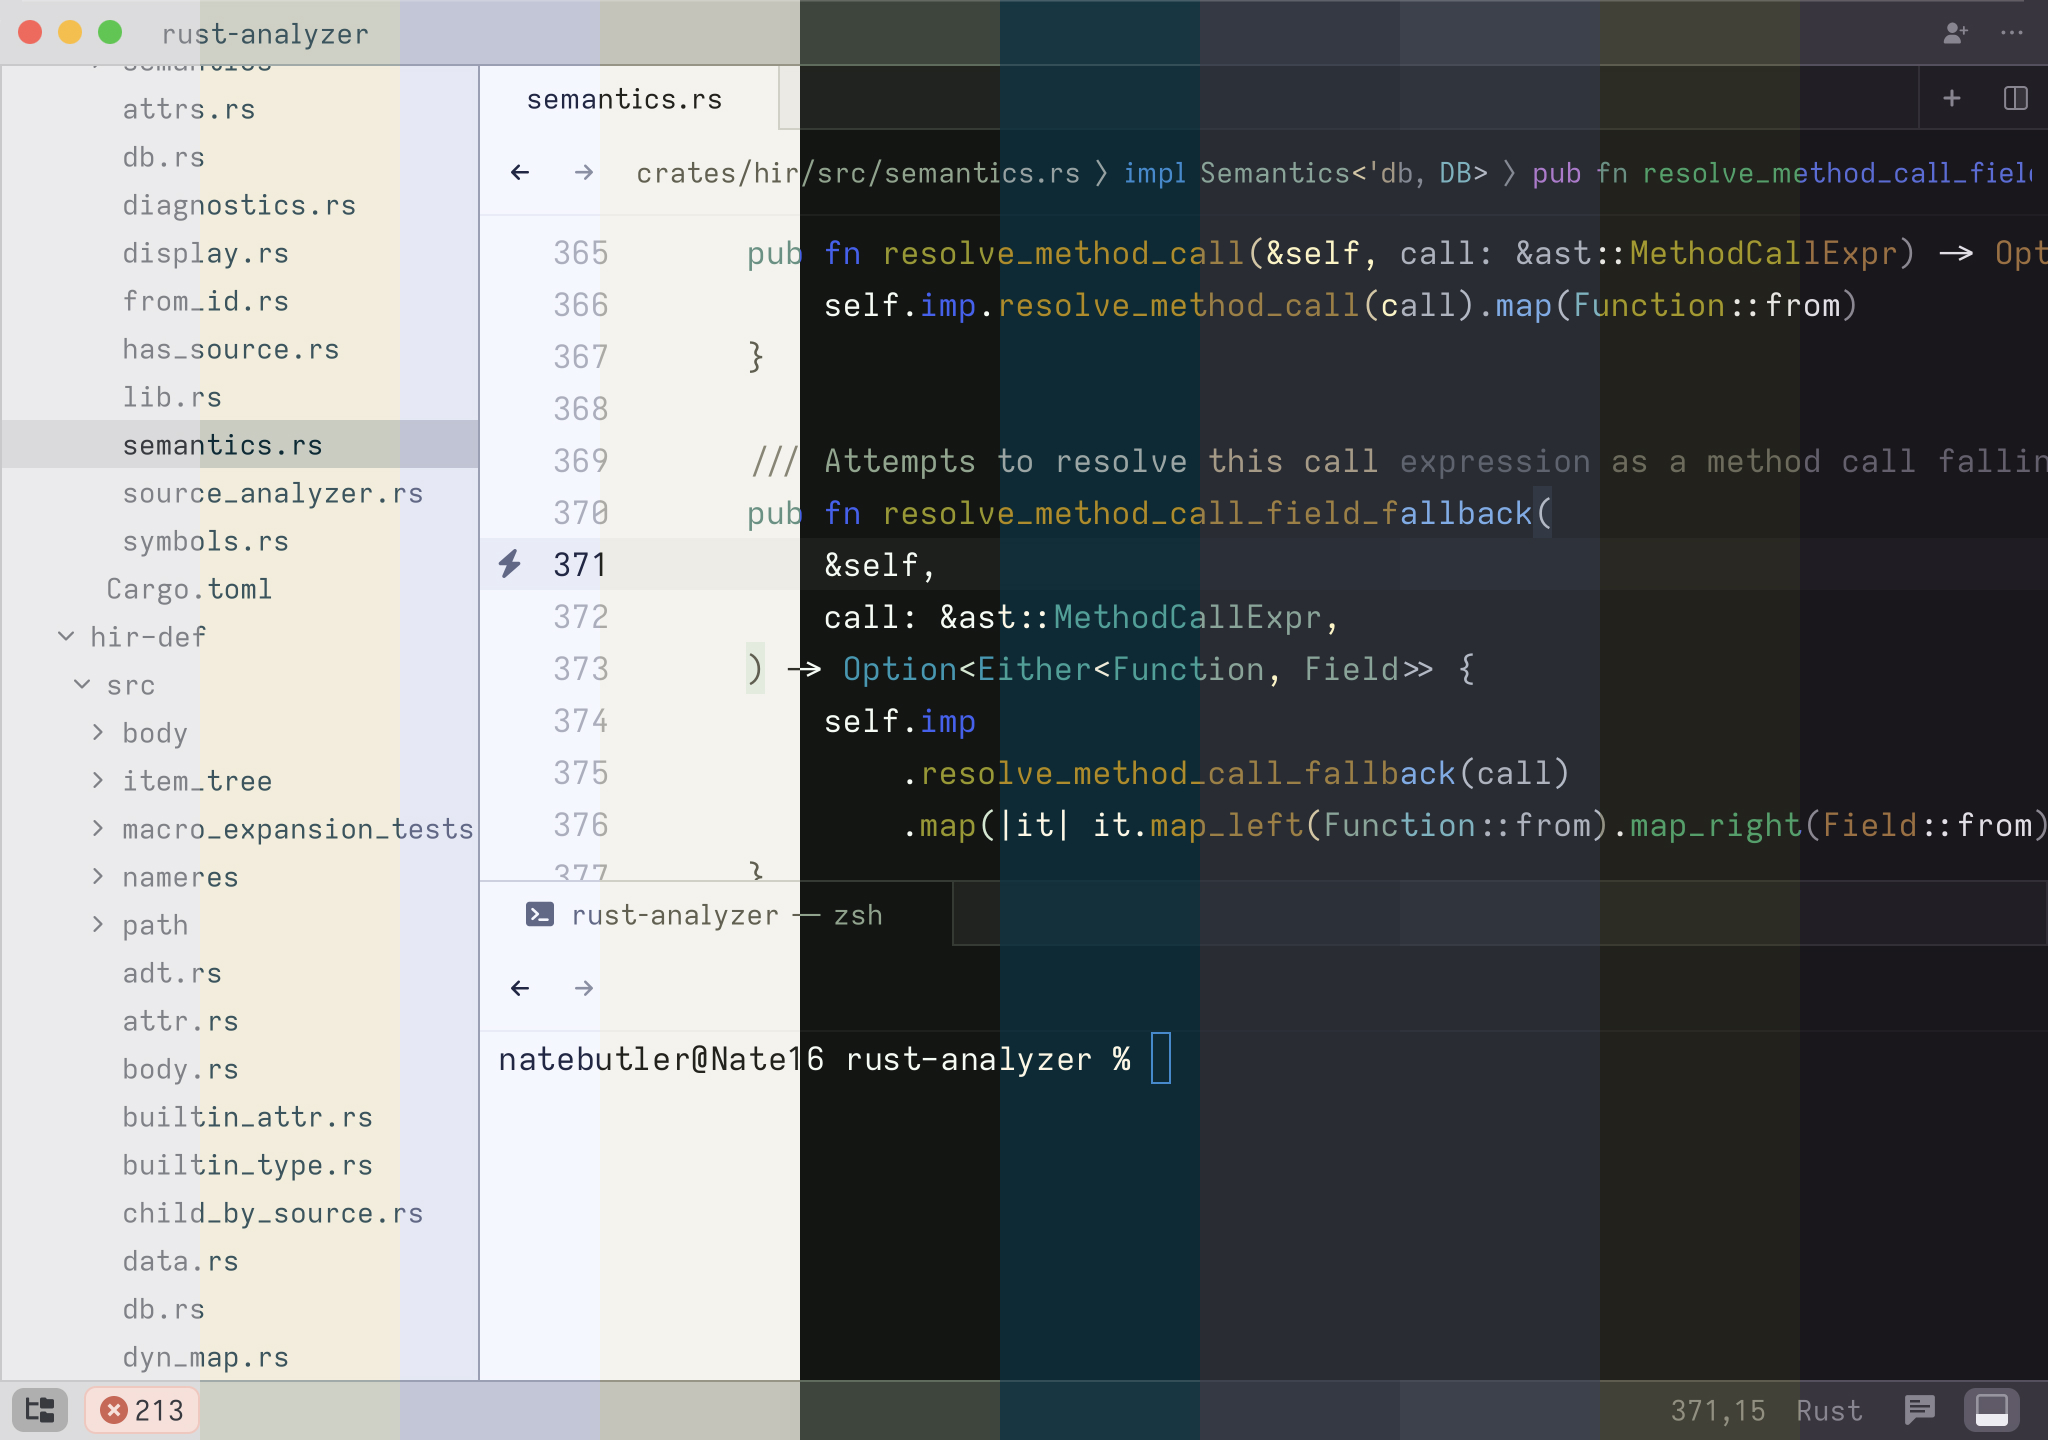
In the future users will be able to create, download and load external themes. See Themes – Docs for more info.
Choosing a theme
Toggle select a theme, press cmd-k cmd-t. We don’t currently support
user-defined themes, but we’ve tried to include some nice default
options.
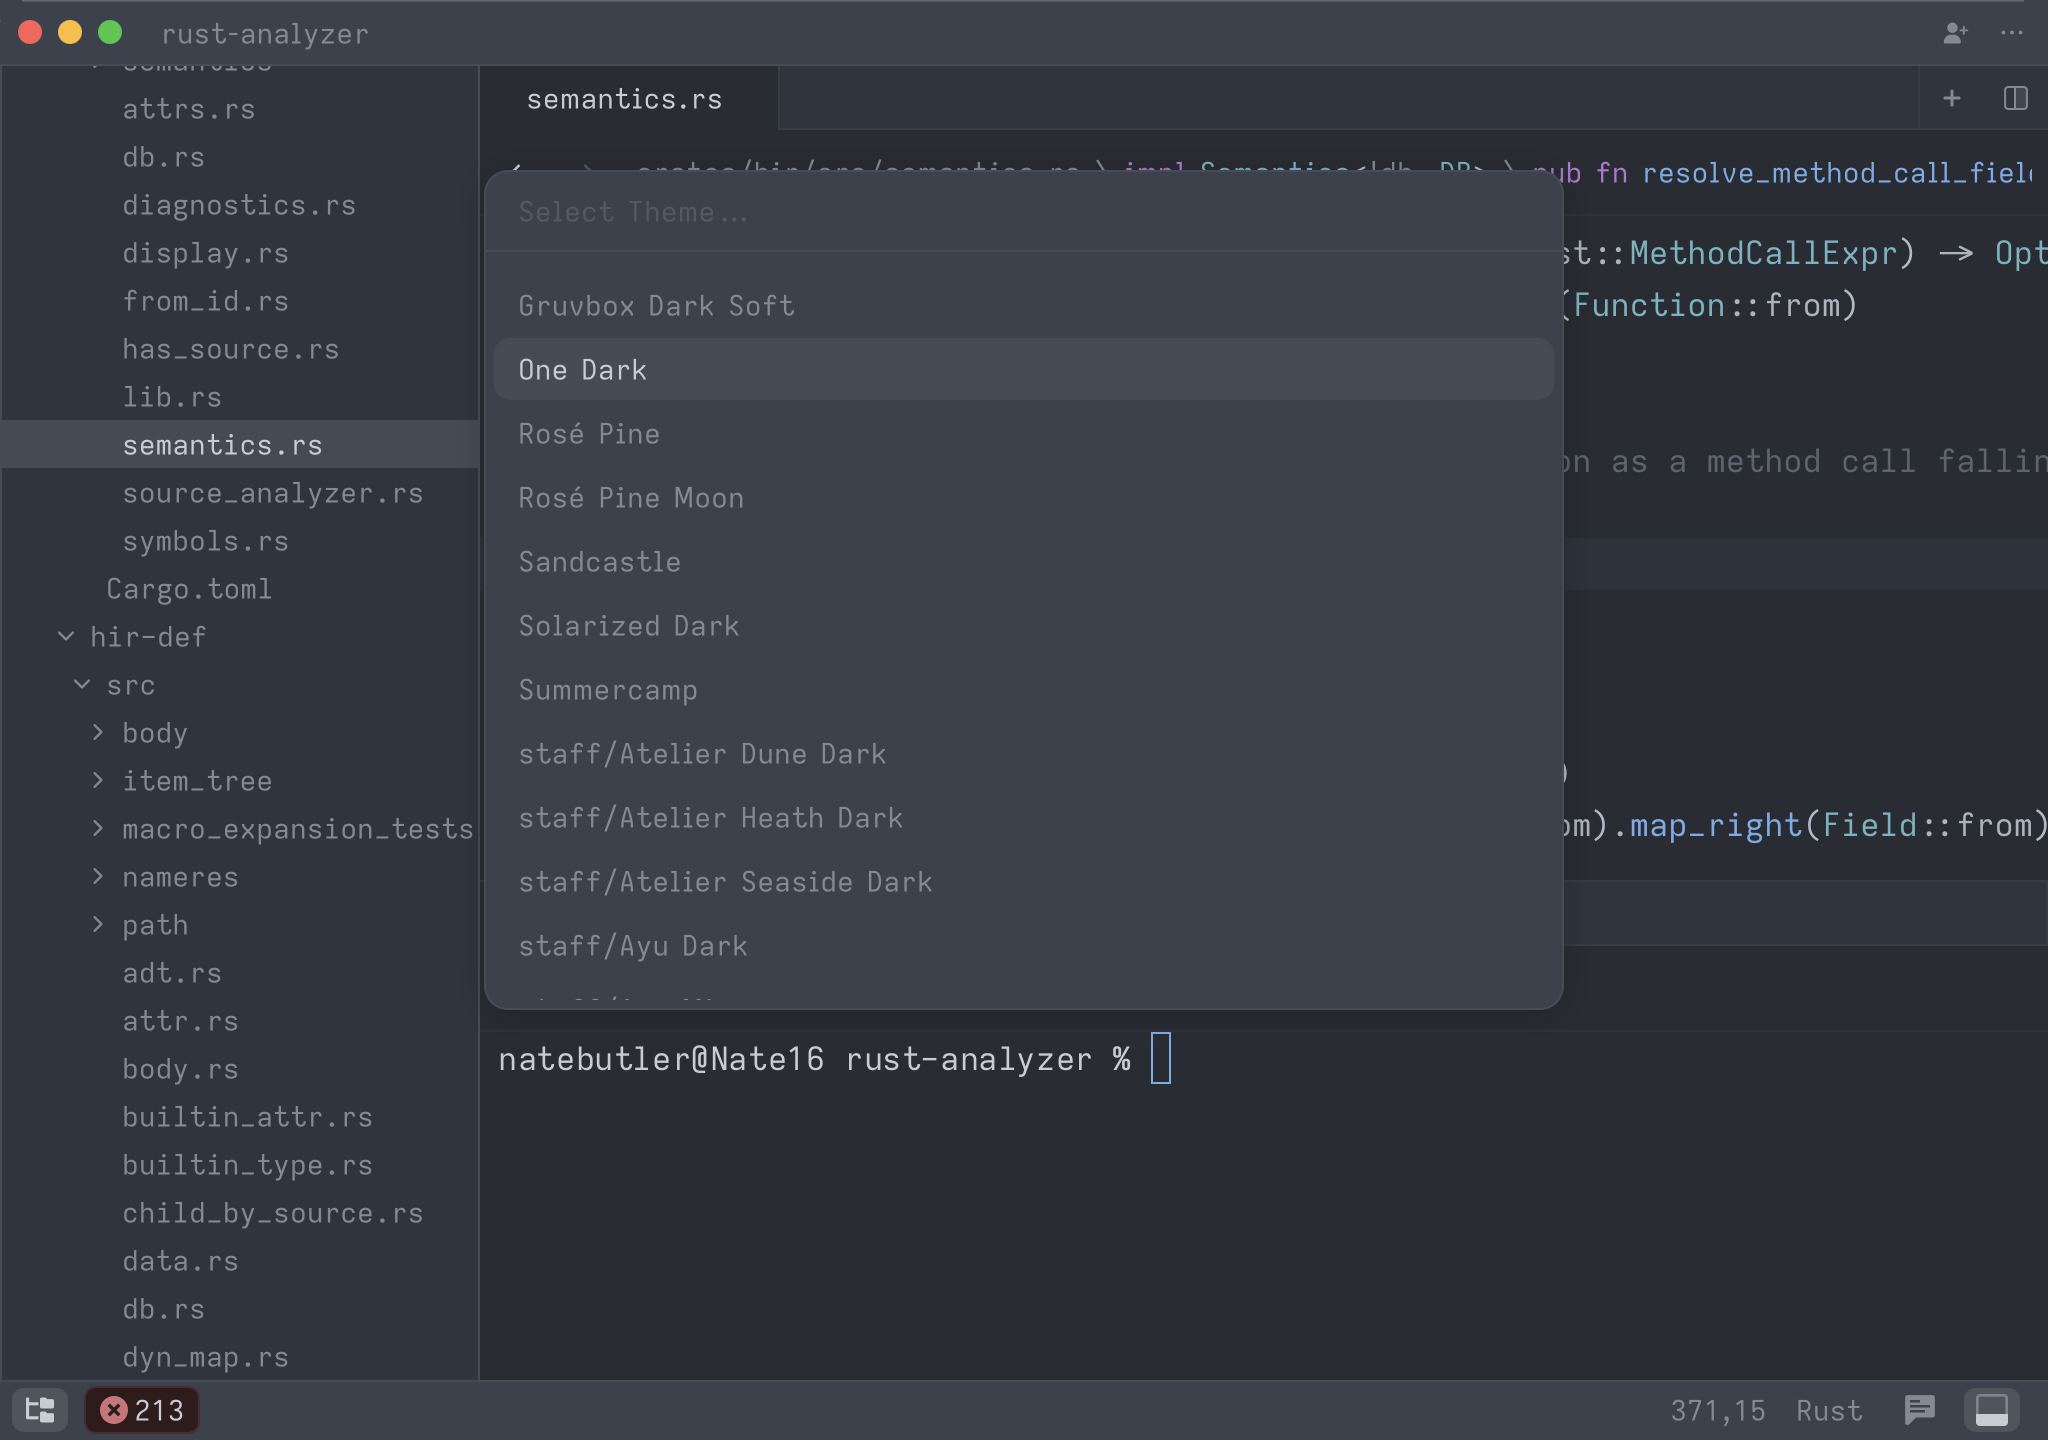
The theme picker palette. Using the change theme shortcut, (cmd-k, cmd-t) summons a palette allowing you to choose a theme from a list.
Vim
Vim mode is a work in progress
Fundamental parts of the Vim mode experience are still missing. We will continue developing it and will make an announcement when we consider it ready for full time use.
Enabling Vim mode
You can enable Vim mode by adding vim_mode: true to your
settings.json.
More about settings in Configuring Zed.
Please report issues you encounter while using Vim mode.
Vim mode quality
We expect our Vim key bindings to be standard. To ensure the quality of our Vim bindings, we currently test Zed’s Vim mode output against Neovim itself.
Additional references
Last updated Oct 08, 2026